User Guide
1. Signup, Login & Publish
How to SignUp on MyRx platform?
Step 1: Go to the MyRx Website Page

Step 2: Click on the Sign Up button.

Step 3: Fill in the Details .

Step 4: Click on the NEXT button to complete the sign-up process.

Step 5: Check for User Id and temporary Password received from MyRx admin on email / text message.
Step 6: Change password using temporary password.
How to Login to my MyRx profile?
Step 1: Go to MyRx Login Page

Step 2: Enter User Id and Password

Step 3: Click on LogIn! button

Step 4: Once logged in, you will be directed to the dashboard.

How to Publish the changes made to my website on MyRx?
Step 1: Go to MyRx Login Page
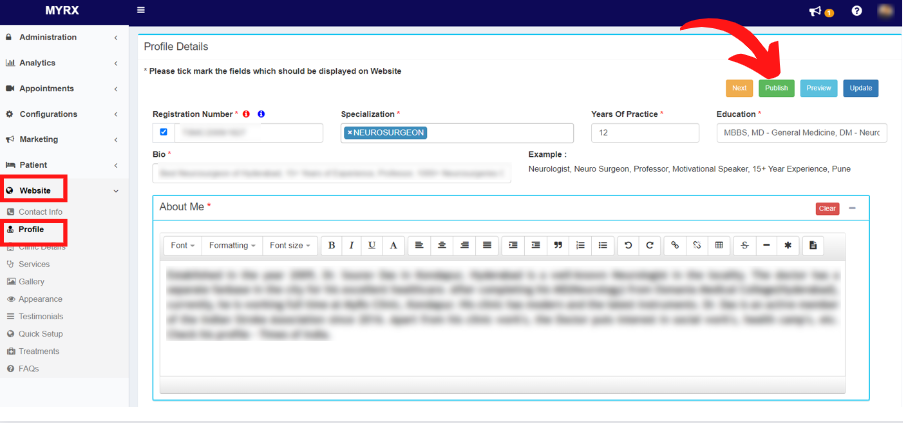
Step 2: Go to Website -> Profile
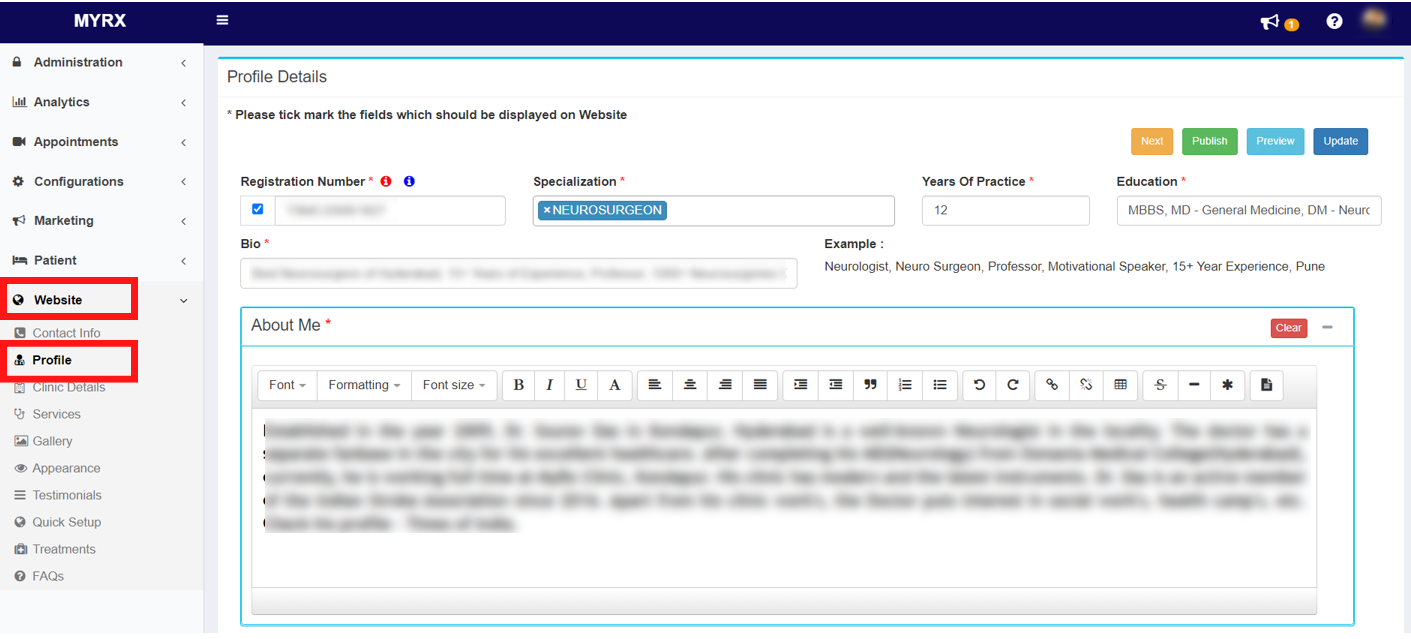
Step 3: Click on the PUBLISH button to update the changes on your website.
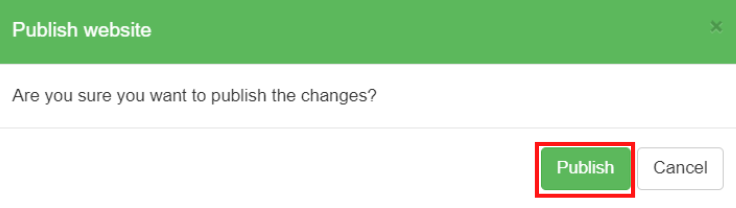
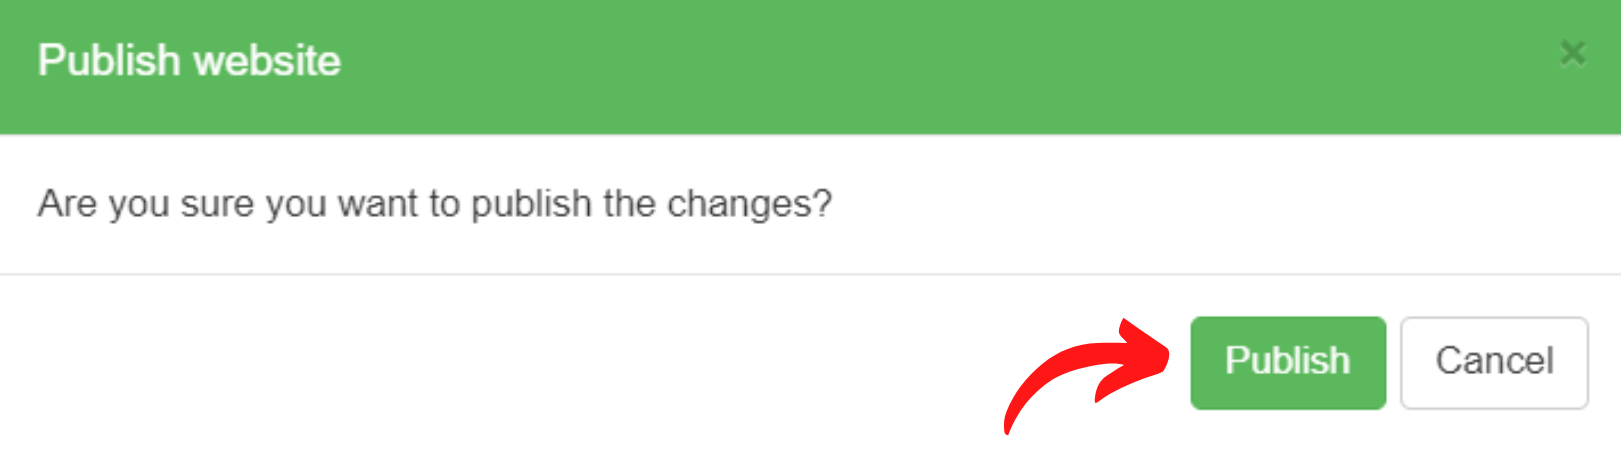
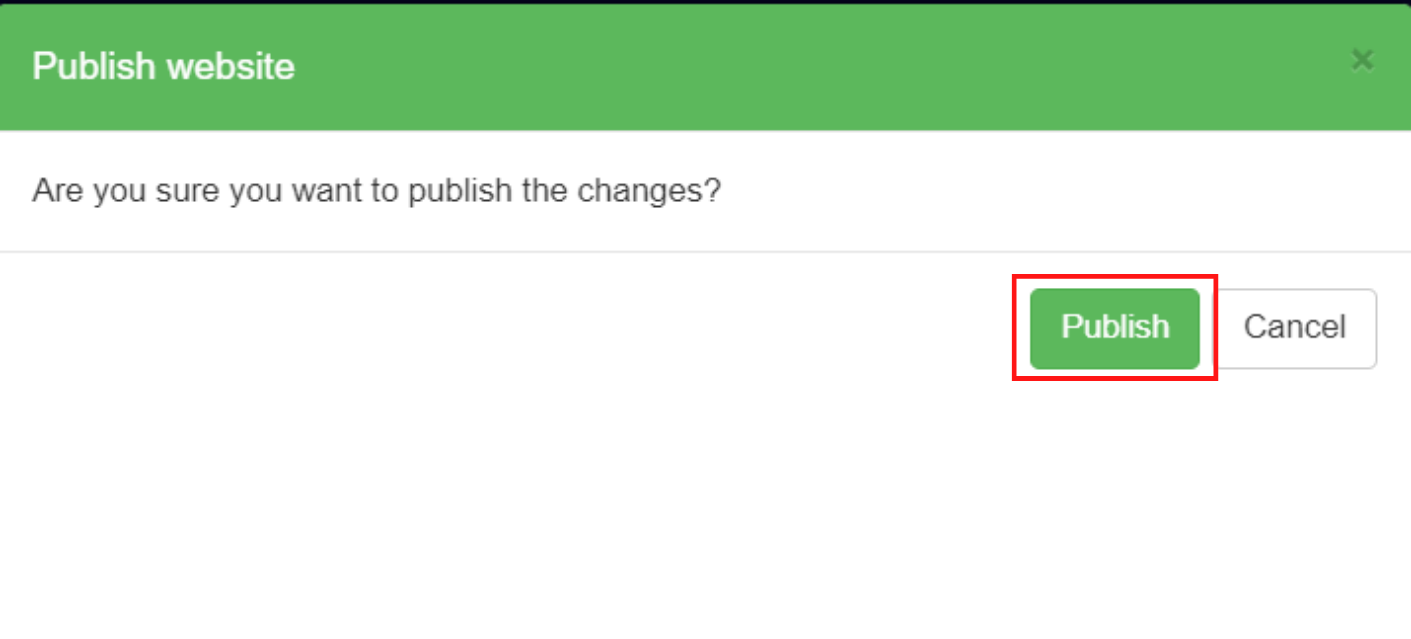
Step 4: Publish Website confirmation message will pop up. Click on Publish button
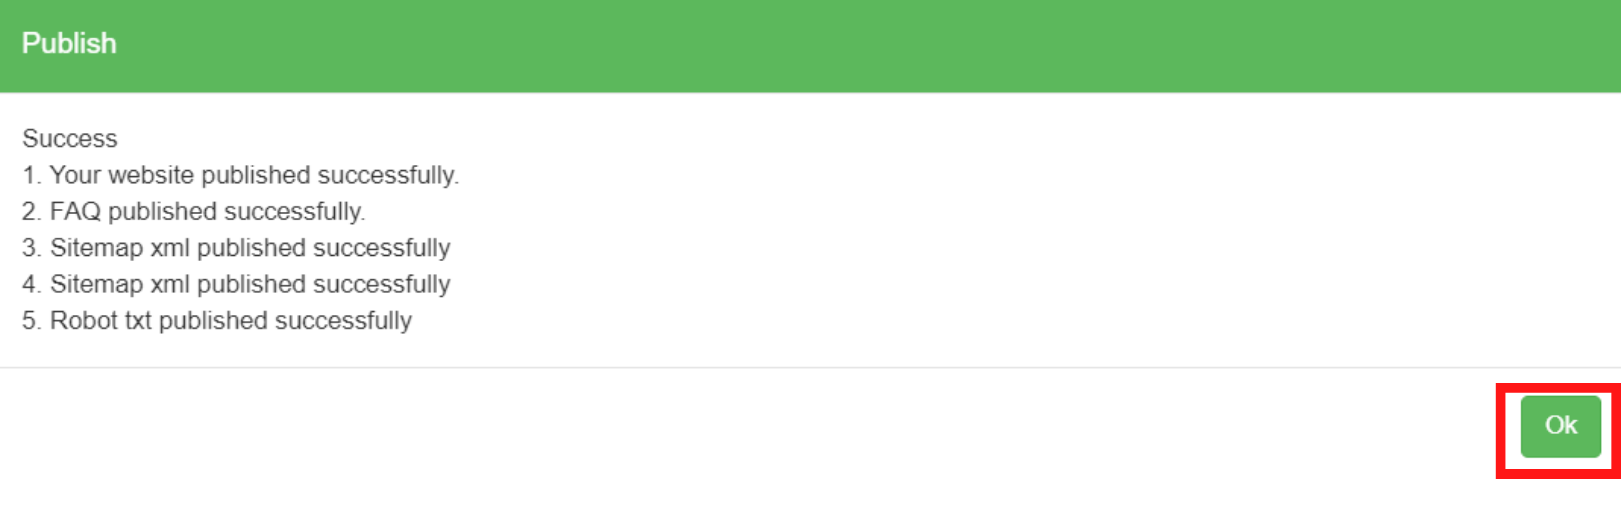
Step 5: Click on the Ok button on the publish confirmation pop-up.
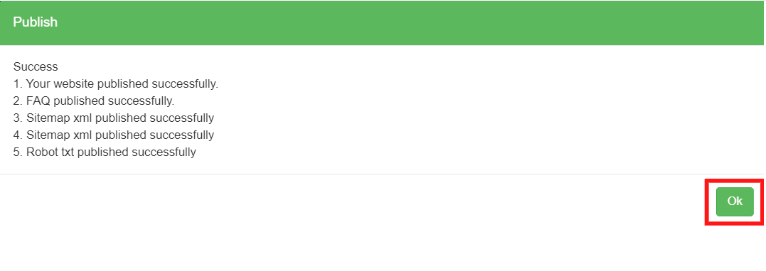
All the changes will be successfully published and the same will be reflected on your website.
2. Prescription
How to write a new prescription on the MyRx platform?
Step 1: Go to MyRx Login Page
Step 2: Enter User Id and Password
Step 3: Click on LogIn! button
Step 4: Once logged in, you will be directed to the dashboard.
Step 5: Now go to Patient section on that click on Write Prescrition .

Step 6: If you need to search for an existing patient, enter their Patient ID or Patient name in the Search For Existing Patient box under the Patient Tab. Alternatively, if you are creating a prescription for a new patient, please provide all the necessary basic details such as First Name, Gender, Mobile Number, etc.

Step 7: Continuing to the Vitals Tab, enter the Height and Weight to calculate the BMI automatically. If needed, provide additional details such as Blood Pressure, Temperature, Pulse, Respiratory Rate, SpO2, etc. You can also add the next visit date at your convenience.

Step 8: Next, under the Past History Tab, you can record any relevant past medical history of the patient.

Step 9: Within the Investigation Tab, enter the desired investigation in the Search bar and click on Add. This will grant access to additional options for that specific investigation, where you can input details such as Since, Severity, and a Note.

Step 10: Within the Symptoms Tab, enter the desired symptoms in the Search bar and click on Add. This will grant access to additional options for that specific Symptoms, where you can input details such as Since, Severity, and a Note.

Step 11: Under the Diagnosis Tab, enter the desired diagnosis in the Search bar and click on Add. If necessary, you can include a clinical note below the diagnosis.

Step 12: In the Tests Tab, enter the desired tests in the Search bar and click on Add. If necessary, you can include a clinical note below the tests.

Step 13: By clicking on the History button within the Investigation, Symptom, Diagnosis, Tests, or Advise Tab, you can view the previous records of Investigation, Symptom, Diagnosis, Tests, or Advise for that specific patient, respectively.

Step 14: Finally, in the Medicine Tab, you can choose the drugs you wish to prescribe by clicking on the Quick Medicine button. The Medicine Name, Dosage, Preference, and Duration boxes will be automatically filled for you, but you can update them as needed.


Note: If you are unable to find any medicine in your Quick Medicine section, you have the option to add them in the Configurations.
Step 15: Click on Save.

Step 16: After saving the prescription, a popup confirming Prescription Saved Successfully will appear. Simply click on OK to proceed.

How do you view prescriptions on the MyRx platform?
Step 1: Go to MyRx Login Page
Step 2: Enter User Id and Password
Step 3: Click on LogIn! button
Step 4: Once logged in, you will be directed to the dashboard.
Step 5: Go to Patient -> View Prescriptions

Step 6: Click on the View Prescription link next to the relevant patient on the right-hand side.

Once clicked, you will be directed to the prescription writer for that specific patient.

How to download a prescription from the MyRx platform?
Step 1: Go to MyRx Login Page
Step 2: Enter User Id and Password
Step 3: Click on LogIn! button
Step 4: Once logged in, you will be directed to the dashboard.
Step 5: Go to Patient -> View Prescriptions
Step 6: Click on the View Prescription link next to the relevant patient on the right-hand side.
Step 7: Once clicked, you will be directed to the prescription writer for that specific patient. Click on the Dropdown Menu next to print preview.

Step 8: Click on Download Prescription.

How to send a prescription to a patient via Email, SMS, or WhatsApp on the MyRx platform?
Step 1: Go to MyRx Login Page
Step 2: Enter User Id and Password
Step 3: Click on LogIn! button
Step 4: Once logged in, you will be directed to the dashboard.
Step 5: Go to Patient -> View Prescriptions
Step 6: Click on the View Prescription link next to the relevant patient on the right-hand side.
Step 7: Once clicked, you will be directed to the prescription writer for that specific patient. Click on the Dropdown Menu next to print preview.
Step 8: Click on Email / SMS Prescription.

3. Prescription Configuration
How to customize the Visual Configuration of the E-Prescription Writer on the MyRx platform?
Step 1: Go to MyRx Login Page
Step 2: Enter User Id and Password
Step 3: Click on LogIn! button
Step 4: Once logged in, you will be directed to the dashboard.
Step 5: Go to Configurations -> Prescription

Step 6: Click on the Template tab and expand it.

Step 7: Based on your preference, you have the option to choose either the Basic or Professional template for your e-prescription writer.

Step 8:Click on Update.

How do we configure the Header, Footer, and signature settings for the E-Prescription Writer on the MyRx platform?
Step 1: Go to MyRx Login Page
Step 2: Enter User Id and Password
Step 3: Click on LogIn! button
Step 4: Once logged in, you will be directed to the dashboard.
Step 5: Go to Configurations -> Prescription
Step 6: Click on the Header & Footer tab and expand it.

Step 7: To upload a header, click on the Add Header button.

Step 8:Likewise, upload a footer by clicking the Add Footer button.

Step 9:To upload your signature, click the Add Signature button.

Step 10:In place of Header, Footer, & Signature, you also have the option to upload a prescription template by clicking on the Add Template button.

Step 11:On the right side, you have the option to modify the template margin settings, and once you're done, remember to click on Save.

What are the steps to update the Basic E-Prescription Writer Configuration on the MyRx platform?
Step 1: Go to MyRx Login Page
Step 2: Enter User Id and Password
Step 3: Click on LogIn! button
Step 4: Once logged in, you will be directed to the dashboard.
Step 5: Go to Configurations -> Prescription
Step 6: Now click on the Visibility & Print button.

Step 7: Choose the checkboxes corresponding to your preferences, such as Vitals, Diagnosis, Symptoms, etc. The selected checkboxes will be included in the final prescription when printed.

Step 8:Additionally, you have the choice to select the signature position, whether it be on the left or right side.

Step 9:Click on Update.

How to set up the Vitals for the E-Prescription Writer on the MyRx platform?
Step 1: Go to MyRx Login Page
Step 2: Enter User Id and Password
Step 3: Click on LogIn! button
Step 4: Once logged in, you will be directed to the dashboard.
Step 5: Go to Configurations -> Prescription
Step 6: Click on the Vitals tab and expand it.

Step 7: Pick the boxes corresponding to your requirements; the chosen selections will appear in your prescription writer. If there are any elements in the Vitals section that you deem unnecessary, feel free to uncheck them.

Step 8:Click on Update.

Only the checkboxes you've selected in the Vitals section will be visible within the prescription writer.
How to customize the Quick Diagnoses Reference in the E-Prescription Writer on the MyRx platform?
Step 1: Go to MyRx Login Page
Step 2: Enter User Id and Password
Step 3: Click on LogIn! button
Step 4: Once logged in, you will be directed to the dashboard.
Step 5: Go to Configurations -> Prescription
Step 6: Click on the Diagnosis tab and expand it.

Step 7: Input a diagnosis based on your judgment into the Diagnosis Name textbox.

Step 8:Click on Add. You can delete any diagnosis later by clicking on the Delete icon.

The diagnosis you've added will appear in the suggested diagnosis box within your prescription writer.
How to personalize the Quick Symptom Reference in the E-Prescription Writer on the MyRx platform?
Step 1: Go to MyRx Login Page
Step 2: Enter User Id and Password
Step 3: Click on LogIn! button
Step 4: Once logged in, you will be directed to the dashboard.
Step 5: Go to Configurations -> Prescription
Step 6: Click on the Symptoms tab and expand it.

Step 7: Input a Symptoms based on your judgment into the Symptom Name textbox.

Step 8:Click on Add. You can delete any Symptom later by clicking on the Delete icon.

The symptoms you've added will appear in the suggested symptoms/complaints box within your prescription writer.
How to customize the Quick Investigation Reference in the E-Prescription Writer on the MyRx platform?
Step 1: Go to MyRx Login Page
Step 2: Enter User Id and Password
Step 3: Click on LogIn! button
Step 4: Once logged in, you will be directed to the dashboard.
Step 5: Go to Configurations -> Prescription
Step 6: Click on the Investigations tab and expand it.

Step 7: Input a Investigations based on your judgment into the Investigation Details textbox.

Step 8:Click on Add. You can delete any investigation later by clicking on the Delete icon.

The investigations you've added will appear in the suggested investigations box within your prescription writer.
How to set up the Quick Test/Procedure Reference in the E-Prescription Writer on the MyRx platform?
Step 1: Go to MyRx Login Page
Step 2: Enter User Id and Password
Step 3: Click on LogIn! button
Step 4: Once logged in, you will be directed to the dashboard.
Step 5: Go to Configurations -> Prescription
Step 6: Click on the Test & Procedure tab and expand it.

Step 7: Input a Test or Procedure based on your judgment into the Procedure/Test Name textbox.

Step 8:Click on Add. You can delete any test or procedure later by clicking on the Delete icon.

The advice you've added will appear in the suggested Advise/Remarks box within your prescription writer.
How to personalize the Quick Advise Reference in the E-Prescription Writer on the MyRx platform?
Step 1: Go to MyRx Login Page
Step 2: Enter User Id and Password
Step 3: Click on LogIn! button
Step 4: Once logged in, you will be directed to the dashboard.
Step 5: Go to Configurations -> Prescription
Step 6: Click on the Advise tab and expand it.

Step 7: Input an Advise based on your judgment into the Advise Details textbox.

Step 8:Click on Add. You can delete any advise later by clicking on the Delete icon.

The advice you've added will appear in the suggested Advise/Remarks box within your prescription writer.
How to customize the Quick Medicine Reference in the E-Prescription Writer on the MyRx platform?
Step 1: Go to MyRx Login Page
Step 2: Enter User Id and Password
Step 3: Click on LogIn! button
Step 4: Once logged in, you will be directed to the dashboard.
Step 5: Go to Configurations -> Prescription
Step 6: Click on the Medicine tab and expand it.

Step 7: Search for any medicine by typing the name in the Search Medicine search bar.

Step 8:The Name and Composition,/b> will be auto-filled for you, update the ,b>Dosage, Preference, Frequency, etc accordingly.

Step 9: Click on Add. You can delete or edit any medicine later by clicking on the Delete or Edit icon respectively. 
The medicines you've added will appear in the Quick Medicine box within your prescription writer.
4. Invoice
How do I create an invoice /receipt /bill for the specific patient in MyRx?
Step 1: Go to MyRx Login Page
Step 2: Enter User Id and Password
Step 3: Click on LogIn! button
Step 4: Once logged in, you will be directed to the dashboard.
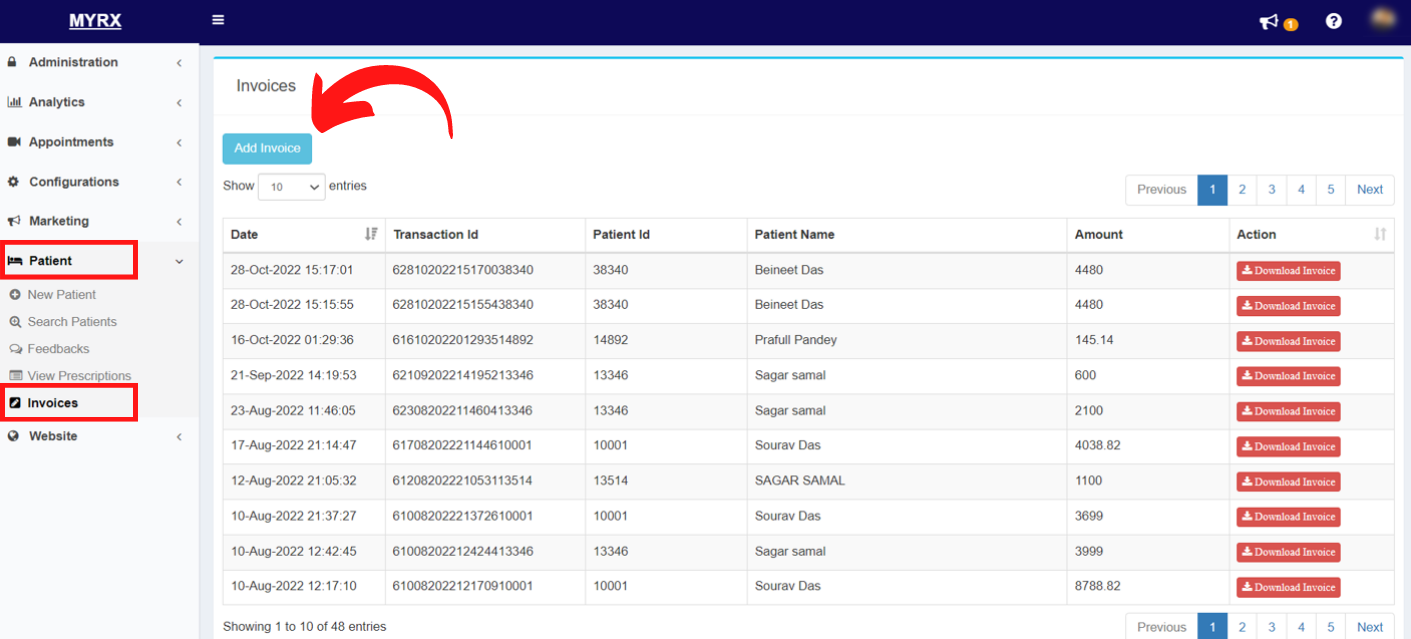
Step 5: Go to Patient -> Invoices.

Step 6: Click on the Add Invoice Button.

Step 7: Fill in the invoice details of the patient.

Step 8:Click on the Generate Invoice button.

Step 9:Click on the Download Invoice button.

How do I configure the header and footer of the invoices /receipts/bills in MyRx?
Step 1: Go to MyRx Login Page
Step 2: Enter User Id and Password
Step 3: Click on LogIn! button
Step 4: Once logged in, you will be directed to the dashboard.
Step 5: Go to Configuration -> Billing.

Step 6: Click on the Bill Header Footer Config.

Step 7: Upload Signature & Template.

How do I configure the particulars of the invoices for quick set-up in MyRx?
Step 1: Go to MyRx Login Page
Step 2: Enter User Id and Password
Step 3: Click on LogIn! button
Step 4: Once logged in, you will be directed to the dashboard.
Step 5: Go to Configuration -> Billing.
Step 6: Click on the Configure Quick Particulars Reference button.

Step 7: Fill in the Particulars details.

Step 8: Click on the Add button.

5. Report & Analytics
How do I get a monthly New Patient Registration Report?
Step 1: Go to MyRx Login Page
Step 2: Enter User Id and Password
Step 3: Click on LogIn! button
Step 4: Once logged in, you will be directed to the dashboard.
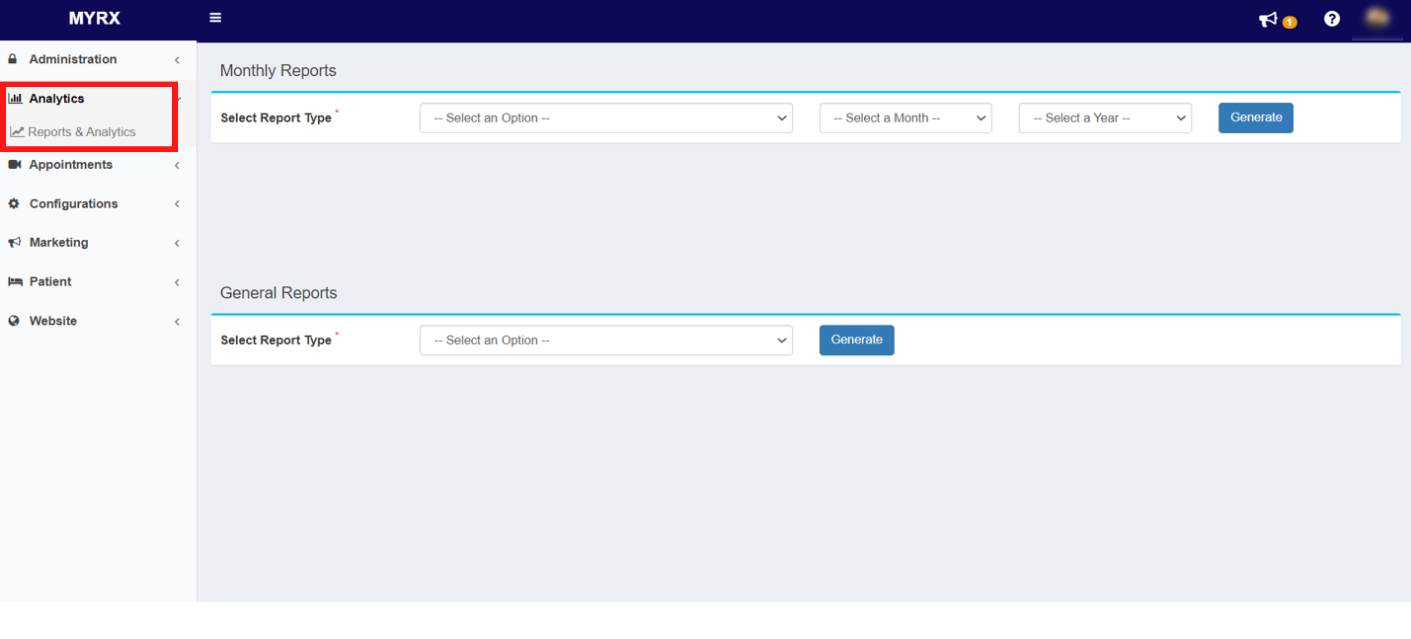
Step 5: Go to Analytics ->Reports & Analytics.

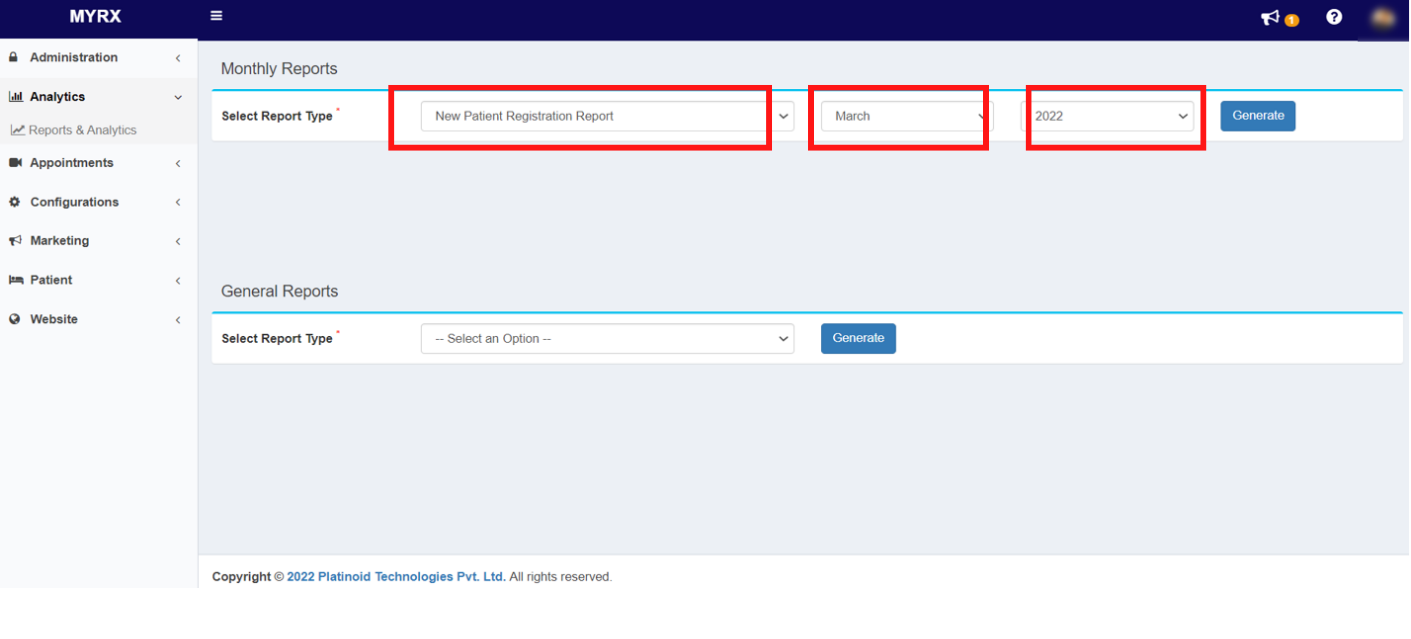
Step 6: Click on the Select report type -> Select an option.

Step 7: Click on the New Patient Registration Report option.

Step 8:Now select a Month & a Year in which you want to generate the report.

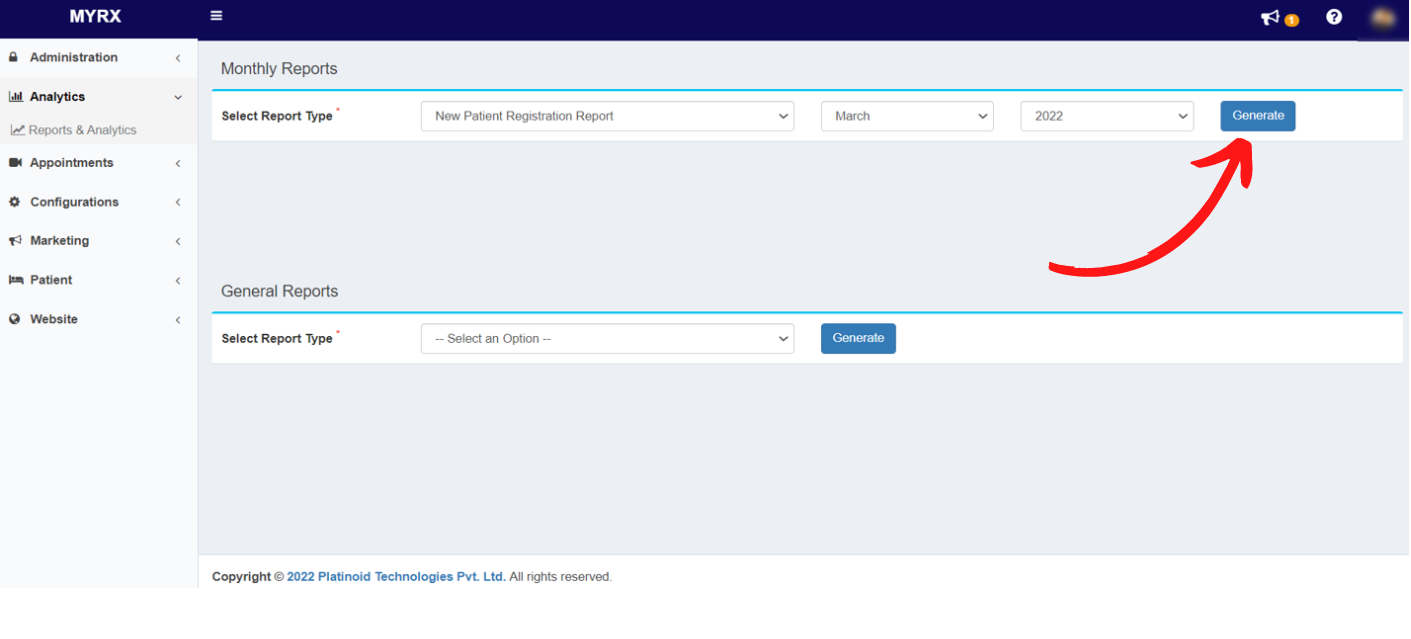
Step 9:After filling in the required details click on the Generate button. 
Your Monthly New Patient Registration Report has been generated successfully.
How do I get a monthly follow-up patient report?
Step 1: Go to MyRx Login Page
Step 2: Enter User Id and Password
Step 3: Click on LogIn! button
Step 4: Once logged in, you will be directed to the dashboard.
Step 5: Go to Analytics ->Reports & Analytics.
Step 6: Click on the Select report type -> Select an option.
Step 7: Click on the Follow-Up Patient Report.

Step 8:Now select a Month & a Year in which you want to generate the report.

Step 9:After filling in the required details click on the Generate button. 
Your Monthly Follow-up Patient Report has been generated successfully.
How do I get a monthly prescription report?
Step 1: Go to MyRx Login Page
Step 2: Enter User Id and Password
Step 3: Click on LogIn! button
Step 4: Once logged in, you will be directed to the dashboard.
Step 5: Go to Analytics ->Reports & Analytics.
Step 6: Click on the Select report type -> Select an option.
Step 7: Click on the Prescription Report button.

Step 8:Now select a Month & a Year in which you want to generate the report.

Step 9:After filling in the required details click on the Generate button. 
Your Monthly Prescription Report has been generated successfully.
How do I get the General report of the patient?
Step 1: Go to MyRx Login Page
Step 2: Enter User Id and Password
Step 3: Click on LogIn! button
Step 4: Once logged in, you will be directed to the dashboard.
Step 5: Go to Analytics ->Reports & Analytics.
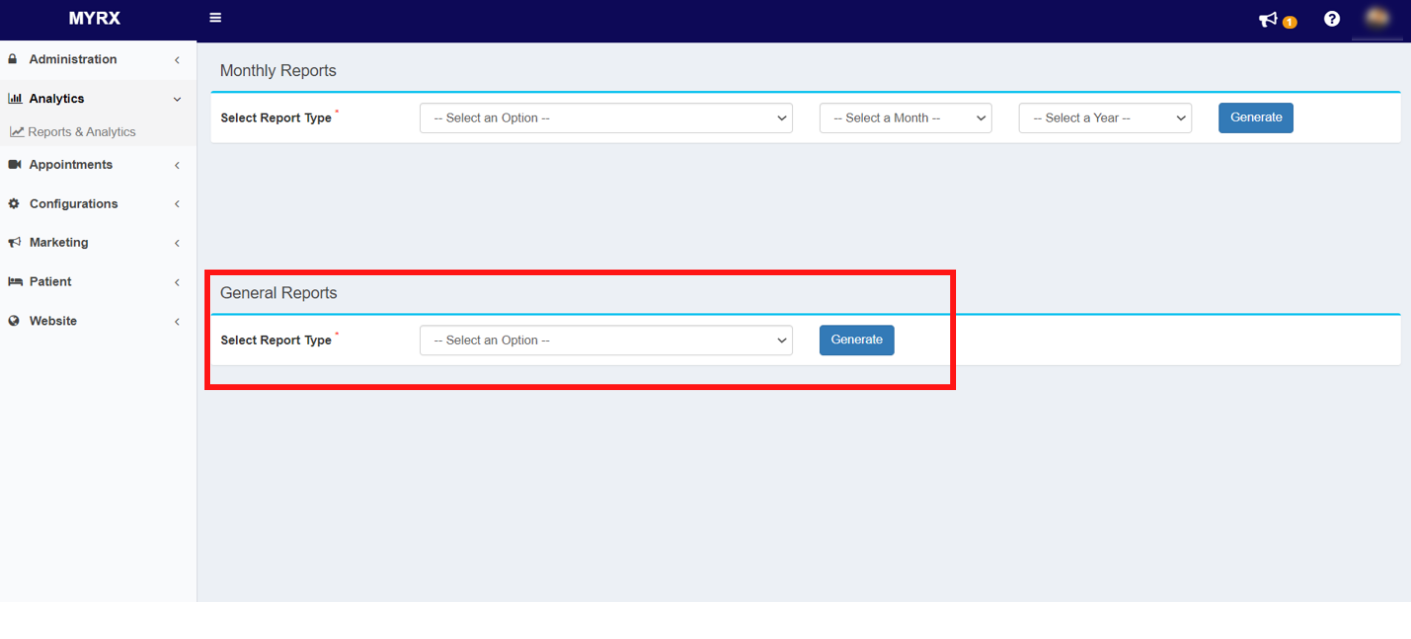
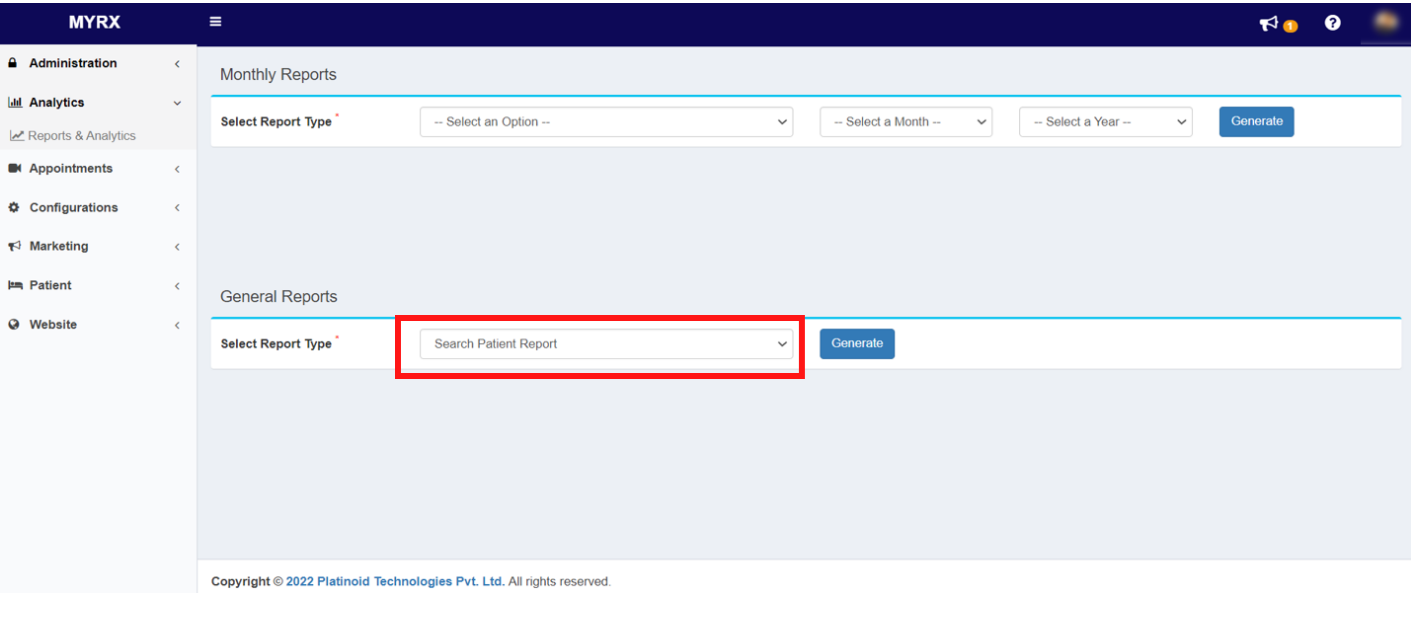
Step 6: Go to General report & click on the Select report type & select the option Search Patient Report.
Step 7: After entering the required details click on the Generate button.
Your General Report of Search Patient has been Generated.
6. Patient
How to add a new patient to my database in MyRx?
Step 1: Go to MyRx Login Page
Step 2: Enter User Id and Password
Step 3: Click on LogIn! button
Step 4: Once logged in, you will be directed to the dashboard.
Step 5: Go to Patient -> New Patient
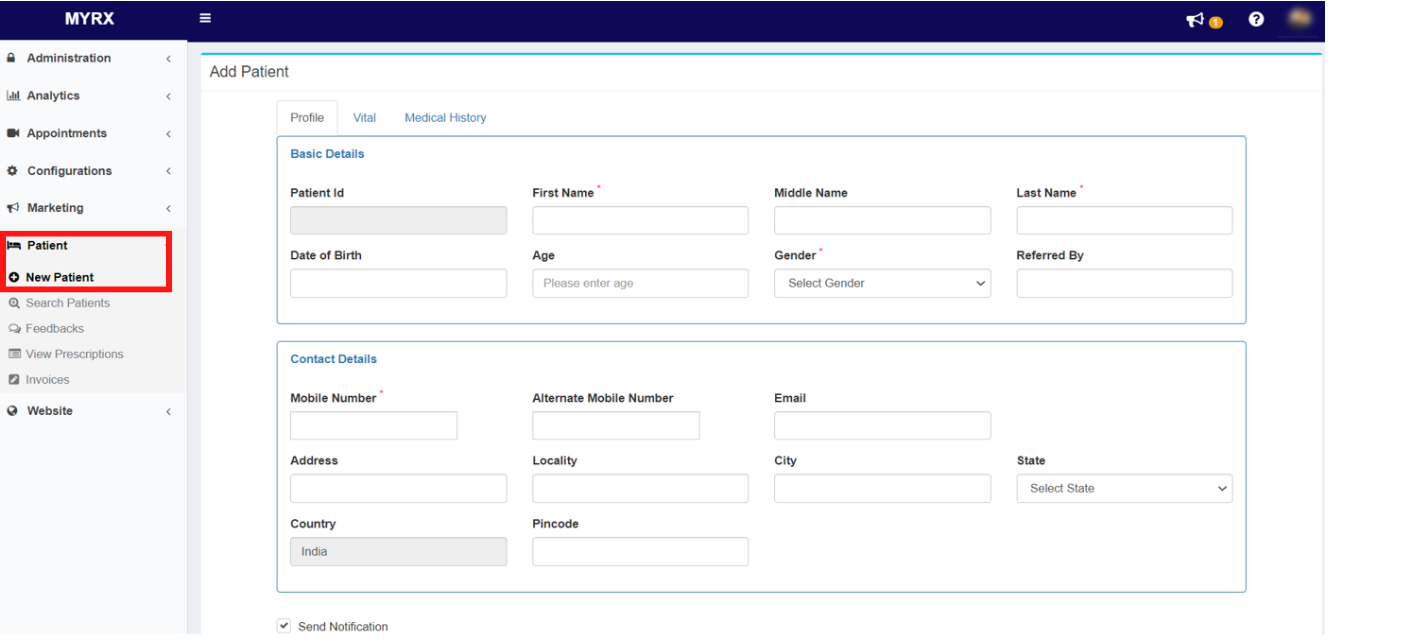
Step 6: Fill in the “Basic Details” & “Contact Details” in the Profile Section.
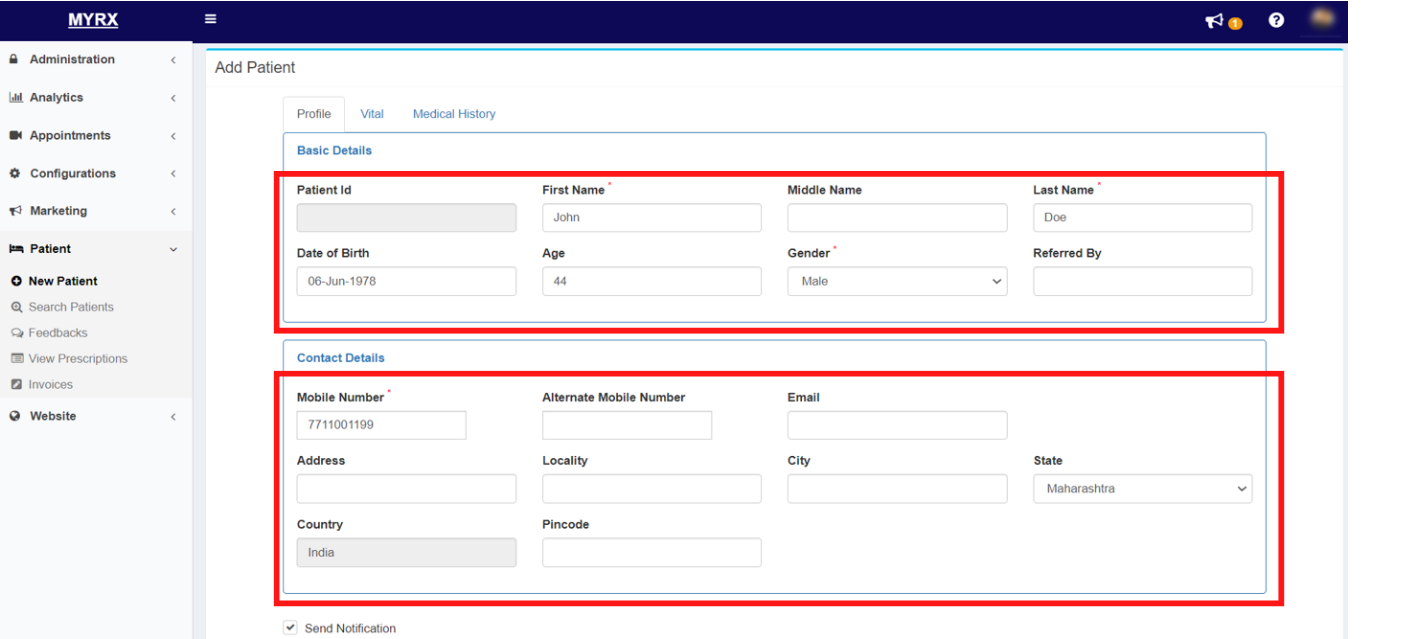
Step 7: Fill in the “Vital Details” in the Vital section.
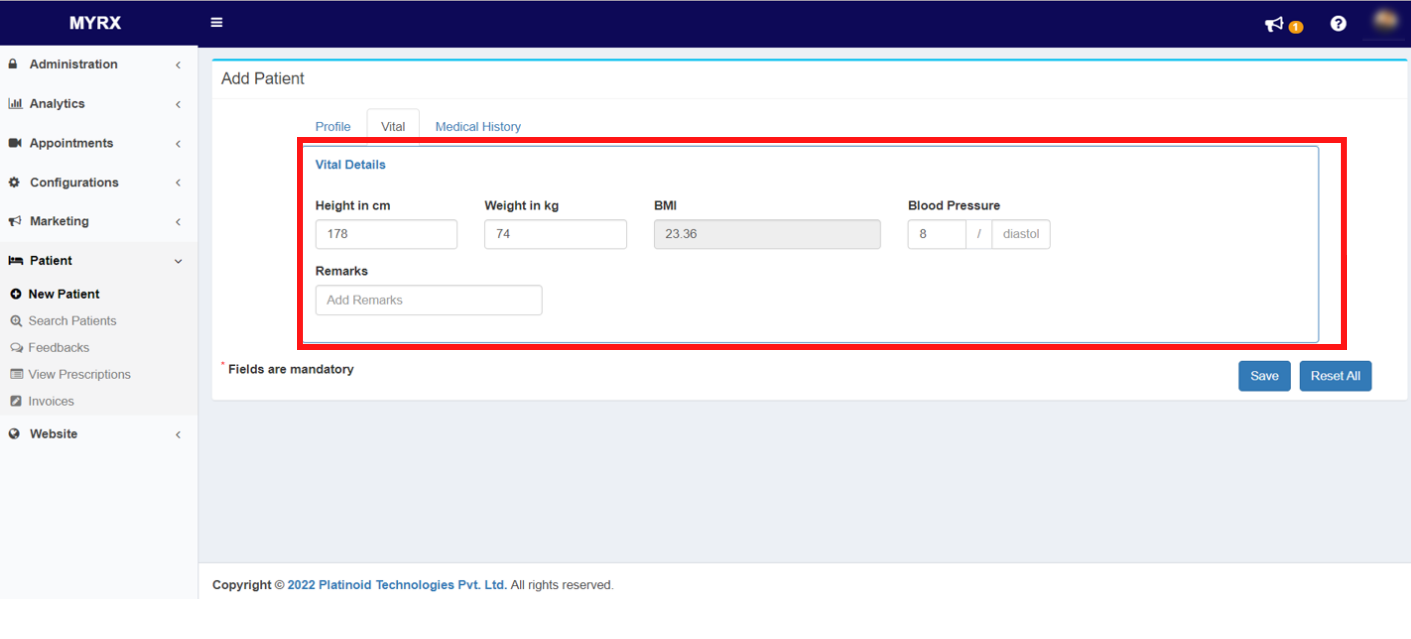
Step 8: Fill in the Medical History details & upload the required documents.
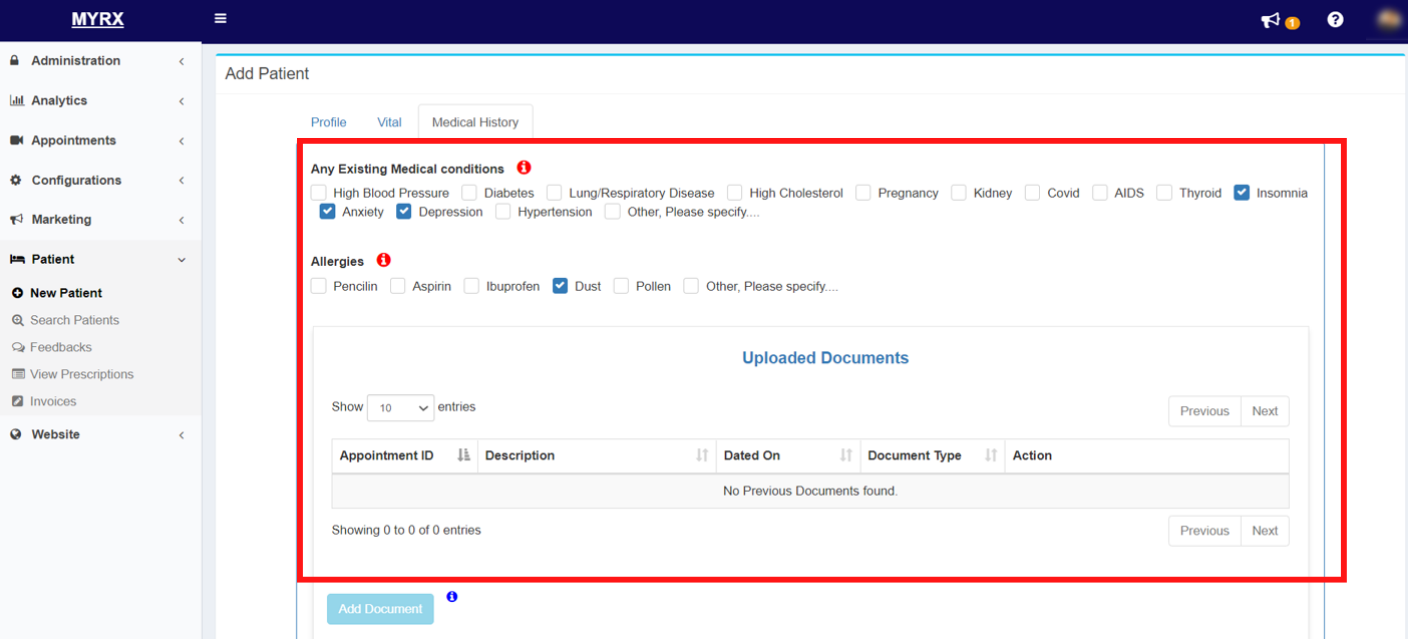
Step 9: Click on the Save button.
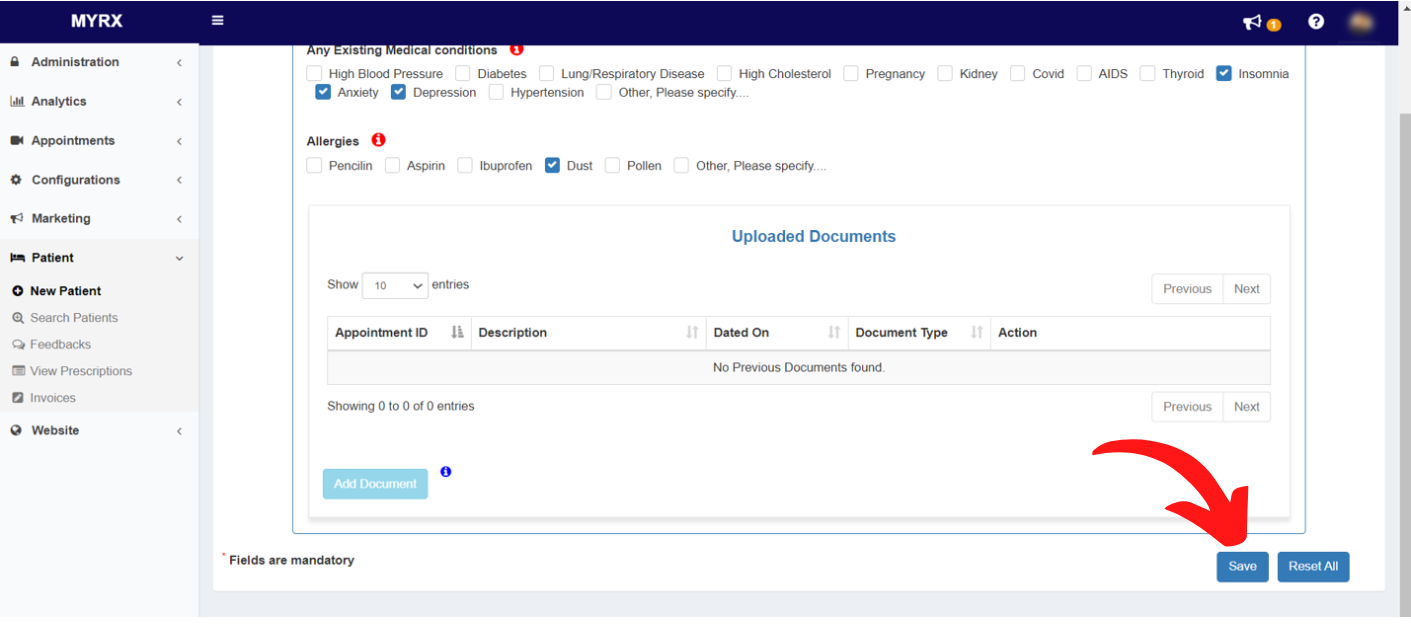
A new patient will be successfully added to your database.
How to search for a patient from the database in MyRx?
Step 1: Go to MyRx Login Page
Step 2: Enter User Id and Password
Step 3: Click on LogIn! button
Step 4: Once logged in, you will be directed to the dashboard.
Step 5: Go to Patient -> Search Patients
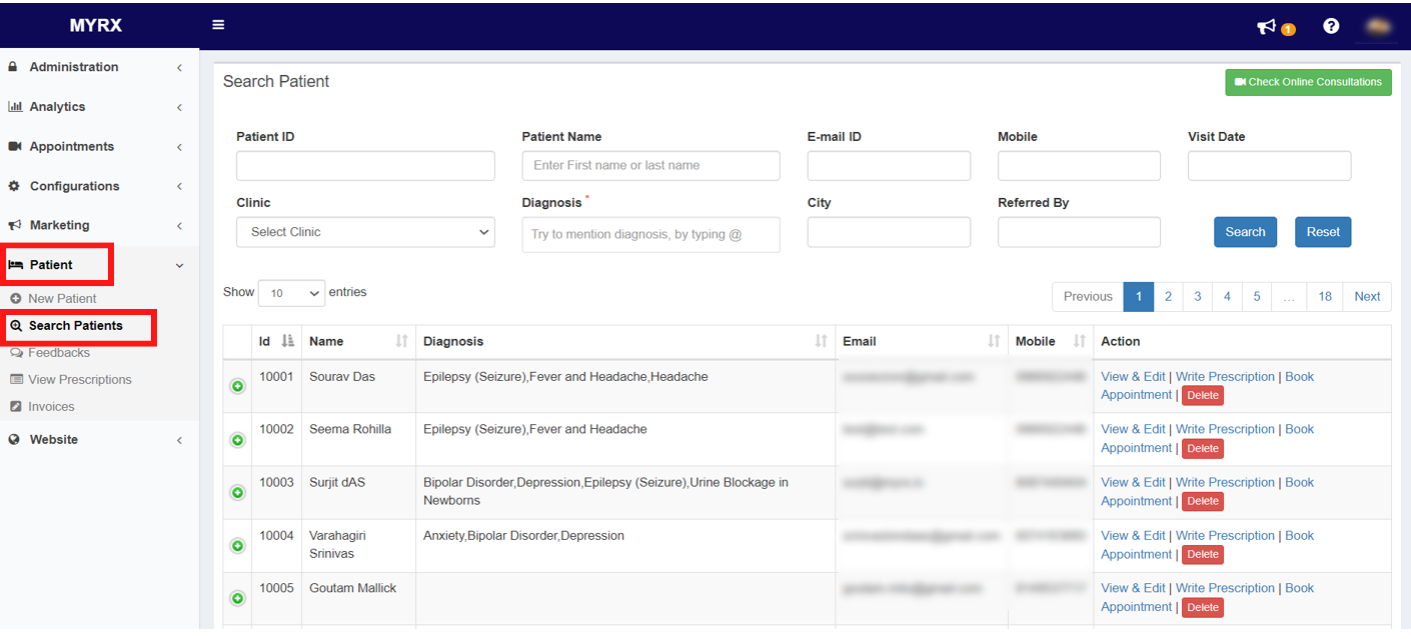
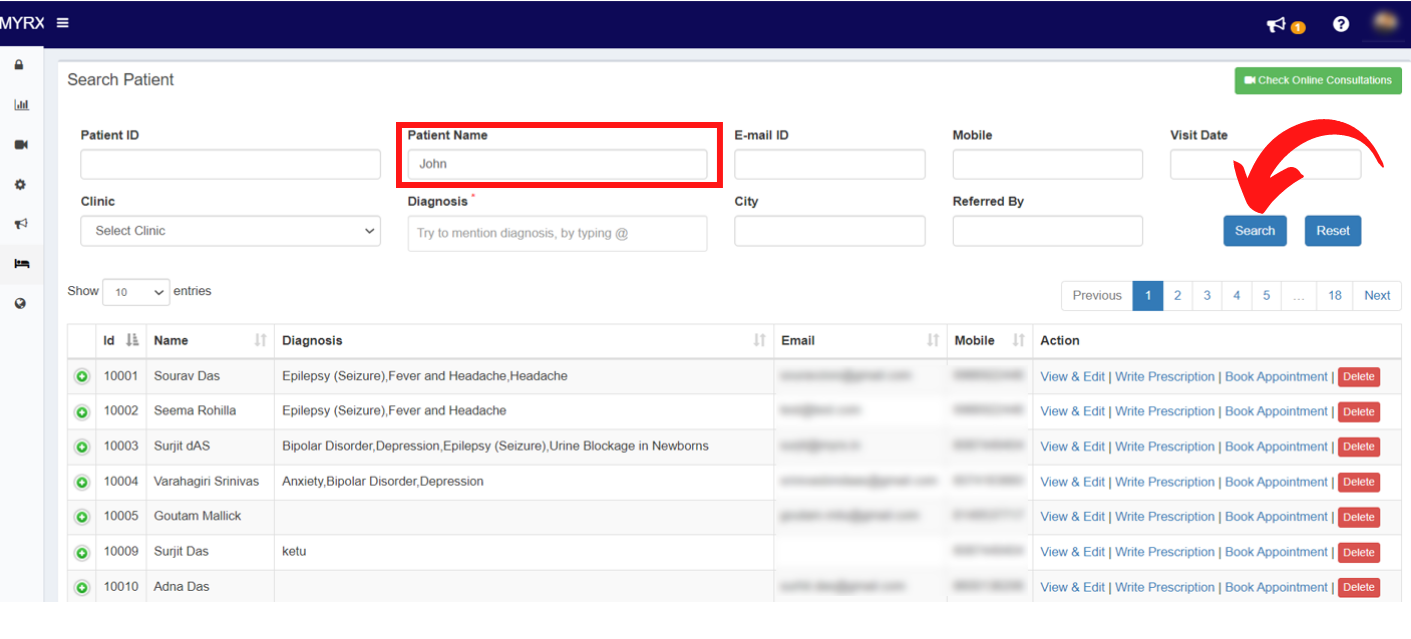
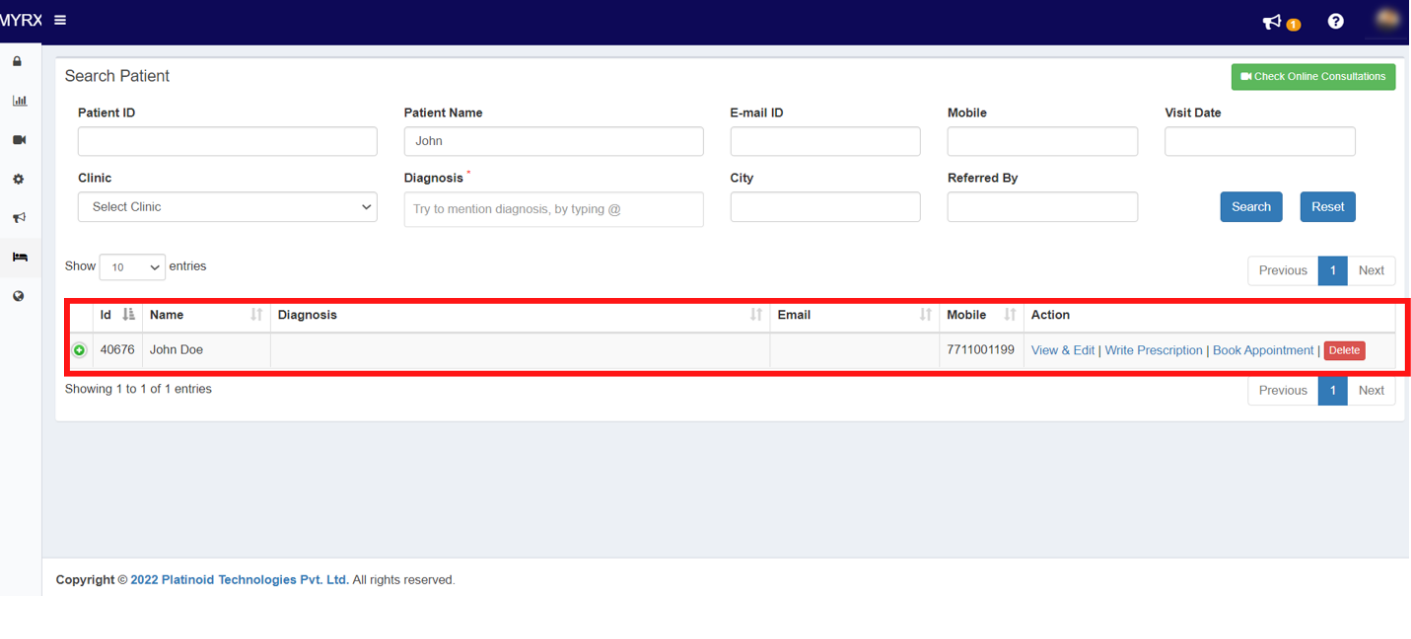
Step 6: Enter the Name of the patient in the Patient Name box.
Step 7: Click on the Search button.
How to edit a patient's details in MyRx?
Step 1: Go to MyRx Login Page
Step 2: Enter User Id and Password
Step 3: Click on LogIn! button
Step 4: Once logged in, you will be directed to the dashboard.
Step 5: Go to Patient -> Search Patients
Step 6: Search for any patient by entering the patient's name in the “Patient name” search box.
Step 7: Click on the “View & Edit” option in the Action section on the right.
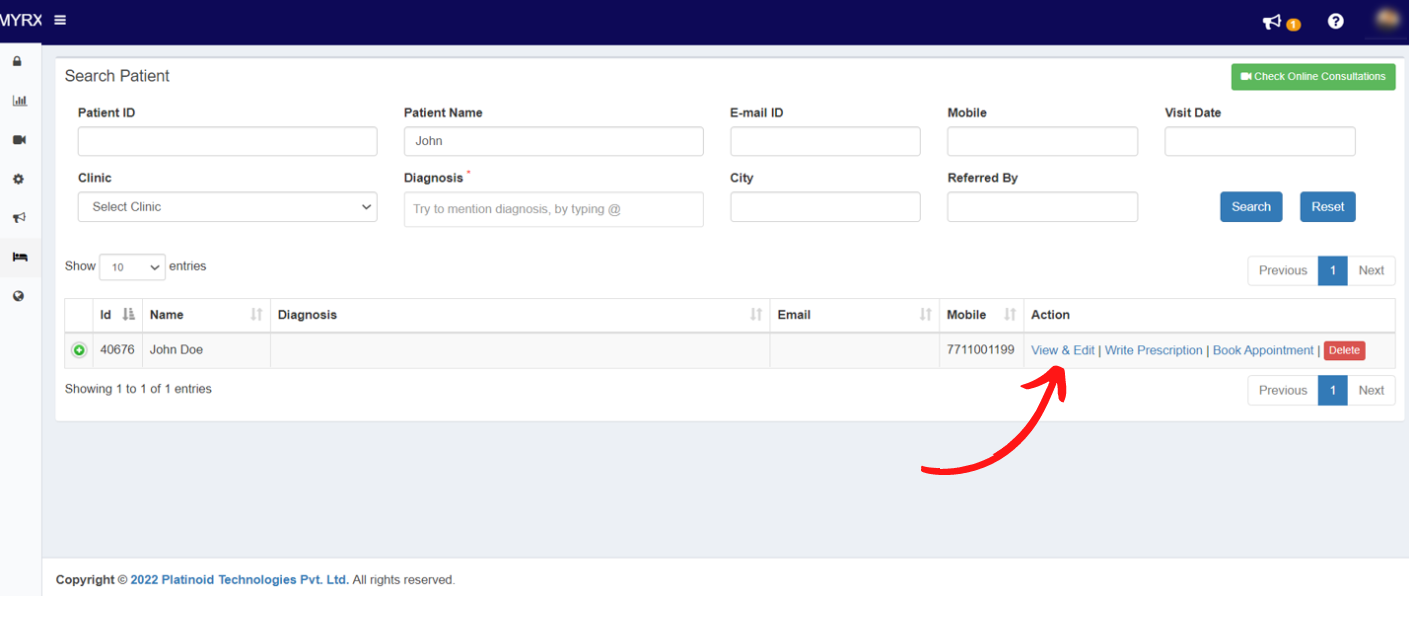
Step 8: Edit the details which are required and click on Save.
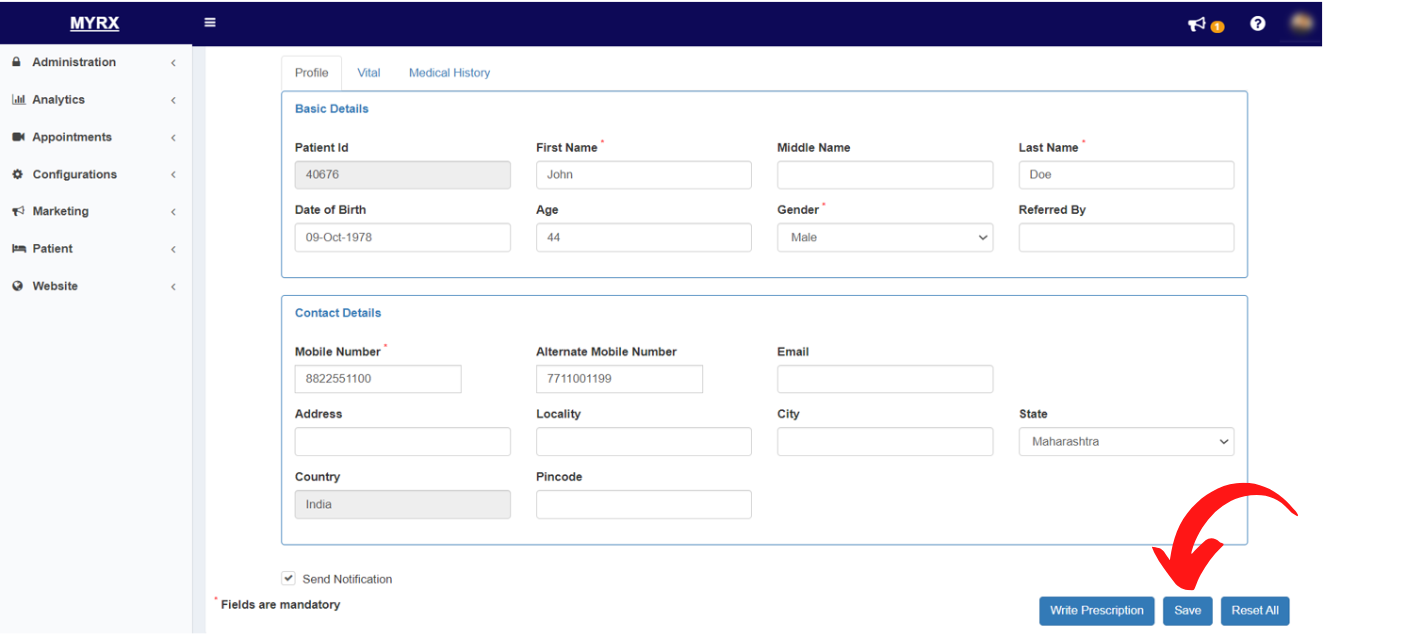
The patient's edited details will be updated.
How to view patient feedback in MyRx?
Step 1: Go to MyRx Login Page
Step 2: Enter User Id and Password
Step 3: Click on LogIn! button
Step 4: Once logged in, you will be directed to the dashboard.
Step 5: Go to Patient -> Feedback
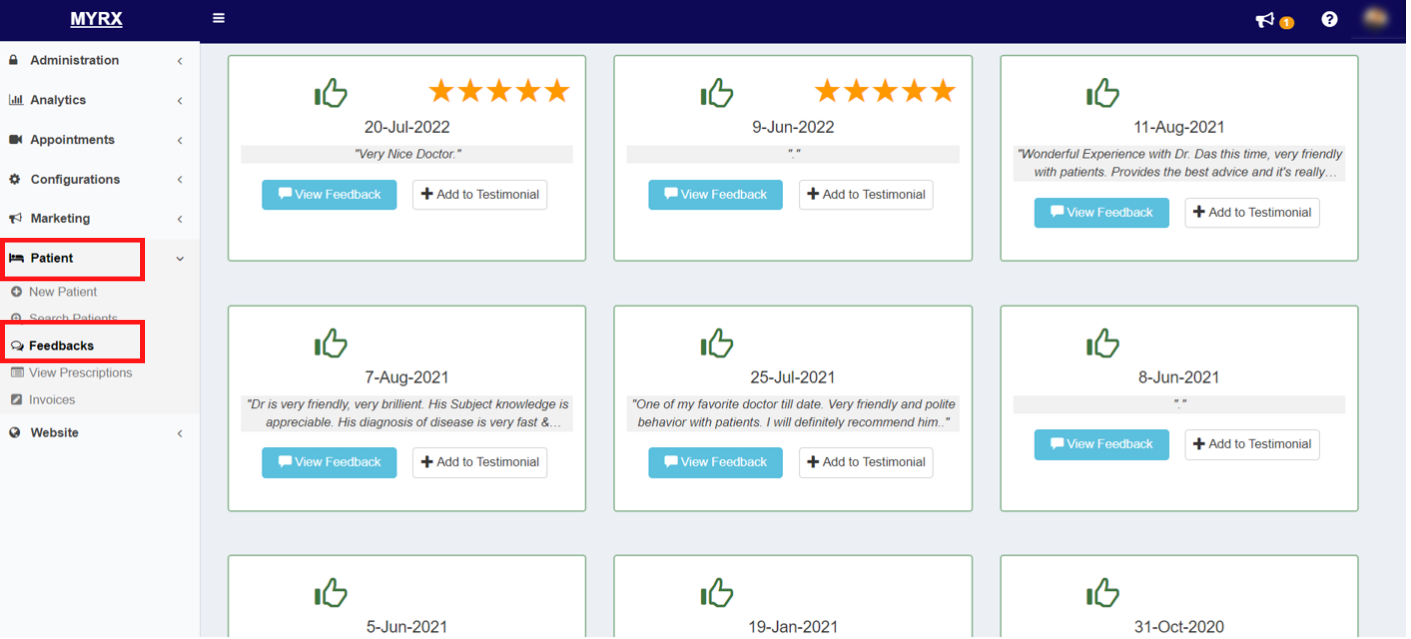
Step 6: Click on “View Feedback” from any of the following feedback.
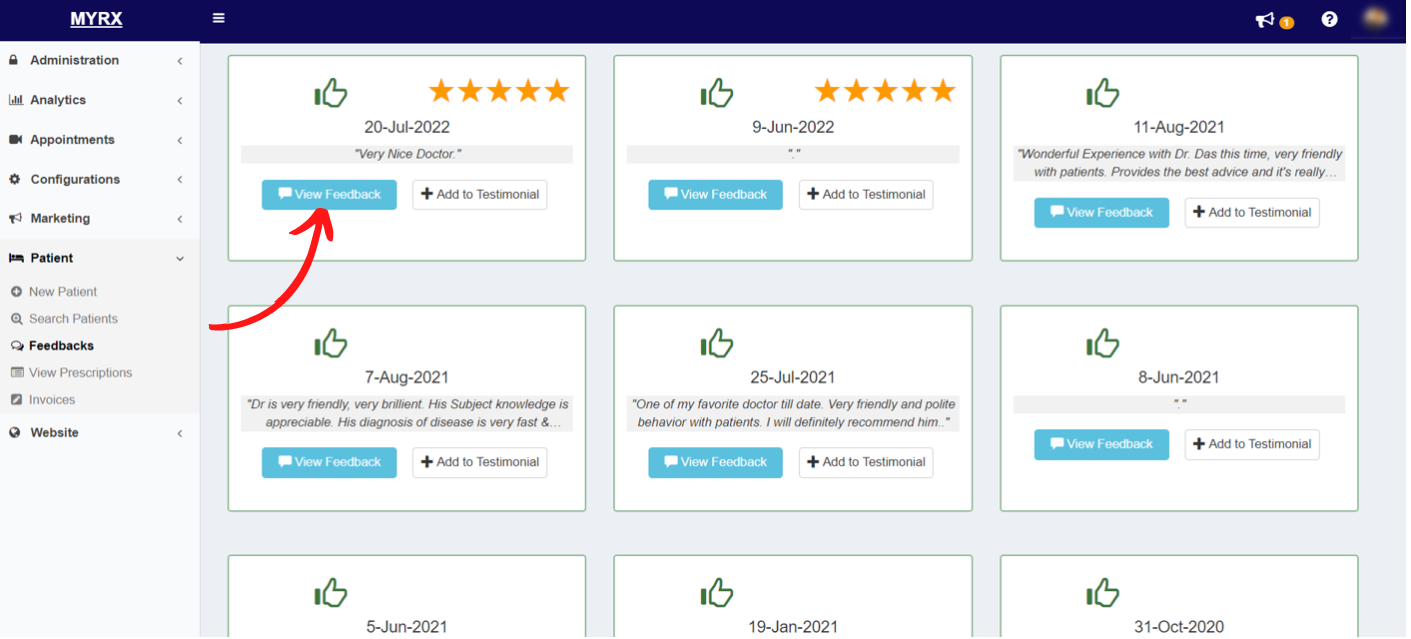
You can view the feedback details & add them to your Testimonial if needed.
How to view patient prescriptions in MyRx?
Step 1: Go to MyRx Login Page
Step 2: Enter User Id and Password
Step 3: Click on LogIn! button
Step 4: Once logged in, you will be directed to the dashboard.
Step 5: Go to Patient -> View Prescriptions
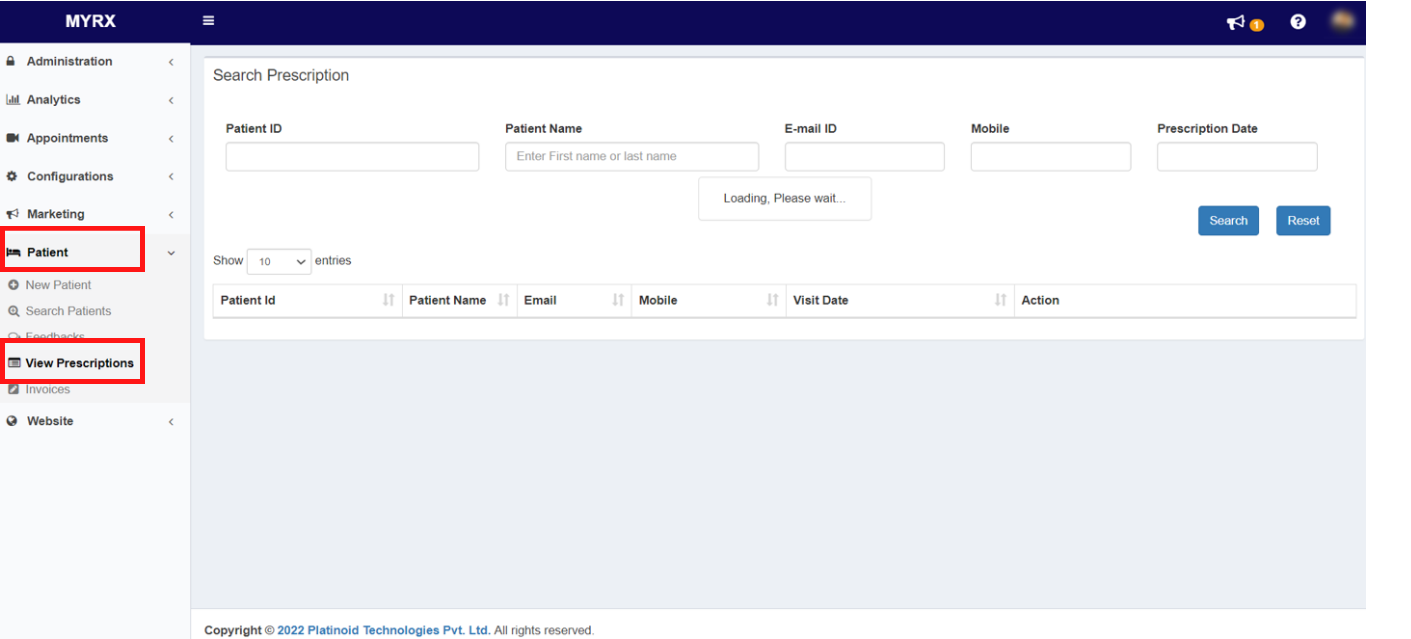
Step 6: Enter the patient’s name in the “Patient Name” textbox.
Step 7: Click on the Search button.
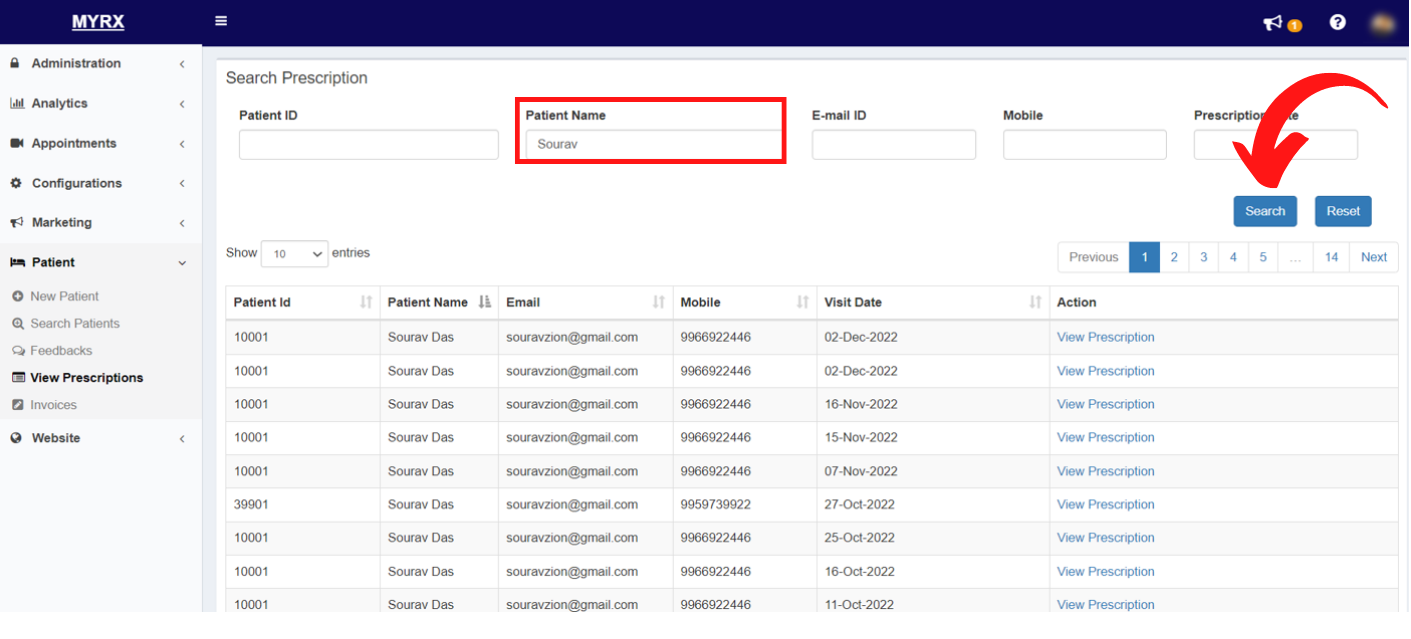
Step 8: Click on View Presciption on the right side.
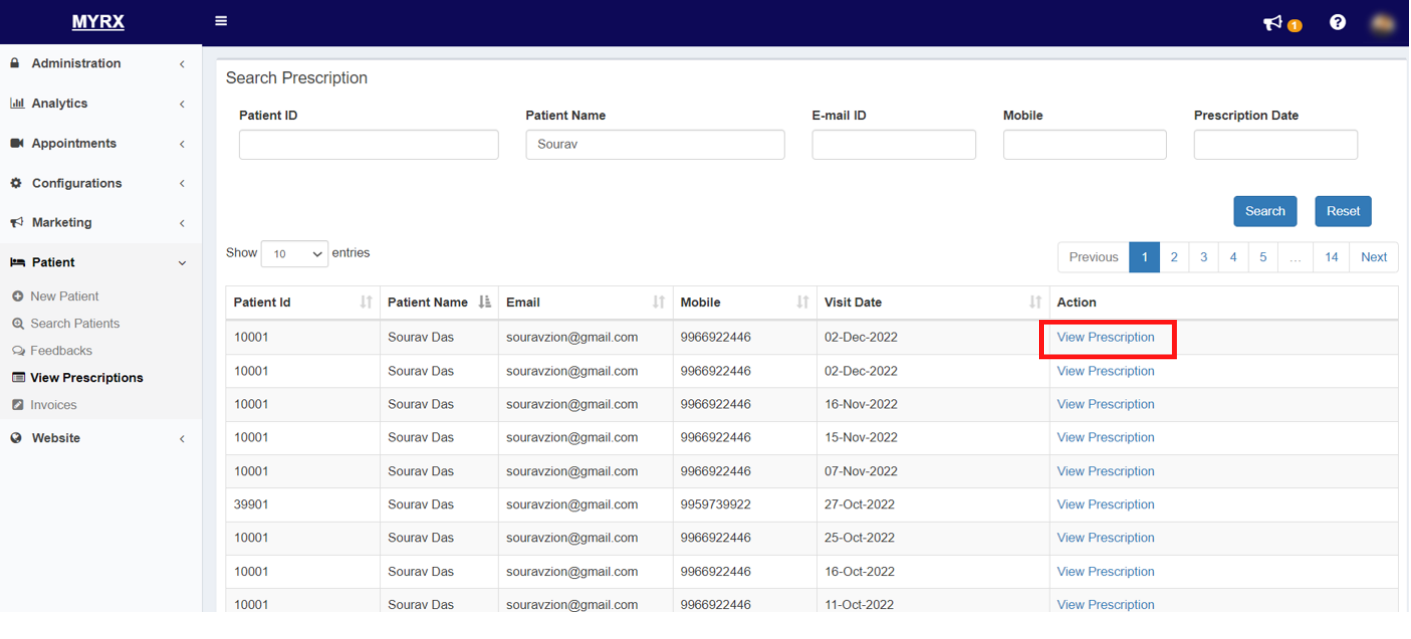
You will be able to view the patient’s prescription and download it if needed.
How to add patient invoices in MyRx?
Step 1: Go to MyRx Login Page
Step 2: Enter User Id and Password
Step 3: Click on LogIn! button
Step 4: Once logged in, you will be directed to the dashboard.
Step 5: Go to Patient -> Invoices
Step 6: Click on the “Add Invoice” button.
Step 7: Enter the Patient’s Name or Patient ID.
Step 8: Enter Payment Mode.

Step 9: In the Particulars section, Enter Particulars, Details(if required), Rate, Quantity, and Tax details
Step 10: The total amount would be calculated automatically, Click on Generate Invoice.
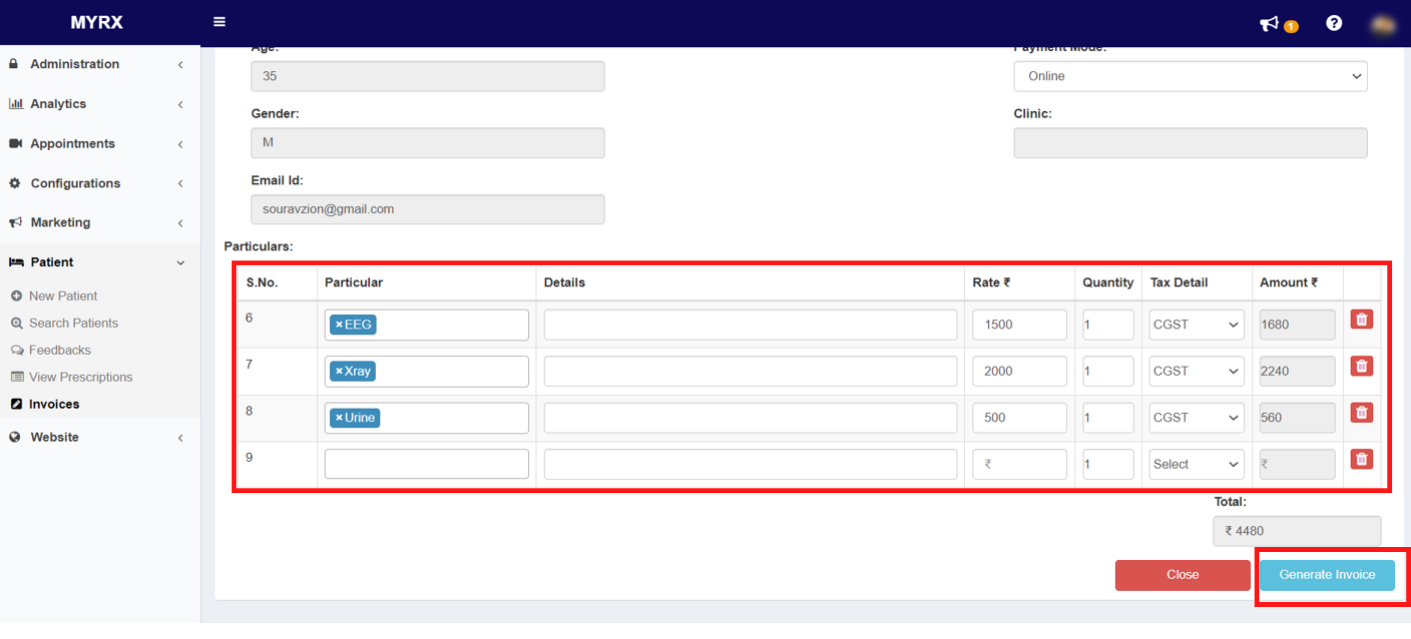
The invoice will be generated, you will get a popup to download the same. 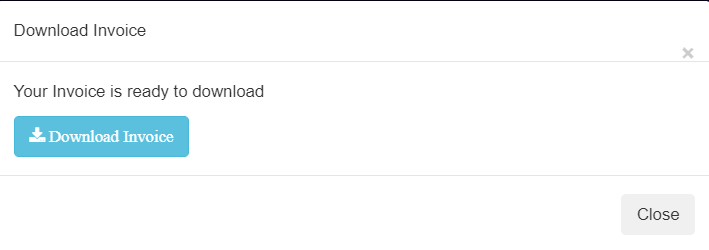
7. Appointment
How to book an Online appointment for a patient in MyRx?
Step 1: Go to MyRx Login Page
Step 2: Enter User Id and Password
Step 3: Click on LogIn! button
Step 4: Once logged in, you will be directed to the dashboard.
Step 5: Go to Appointments -> View & Manage
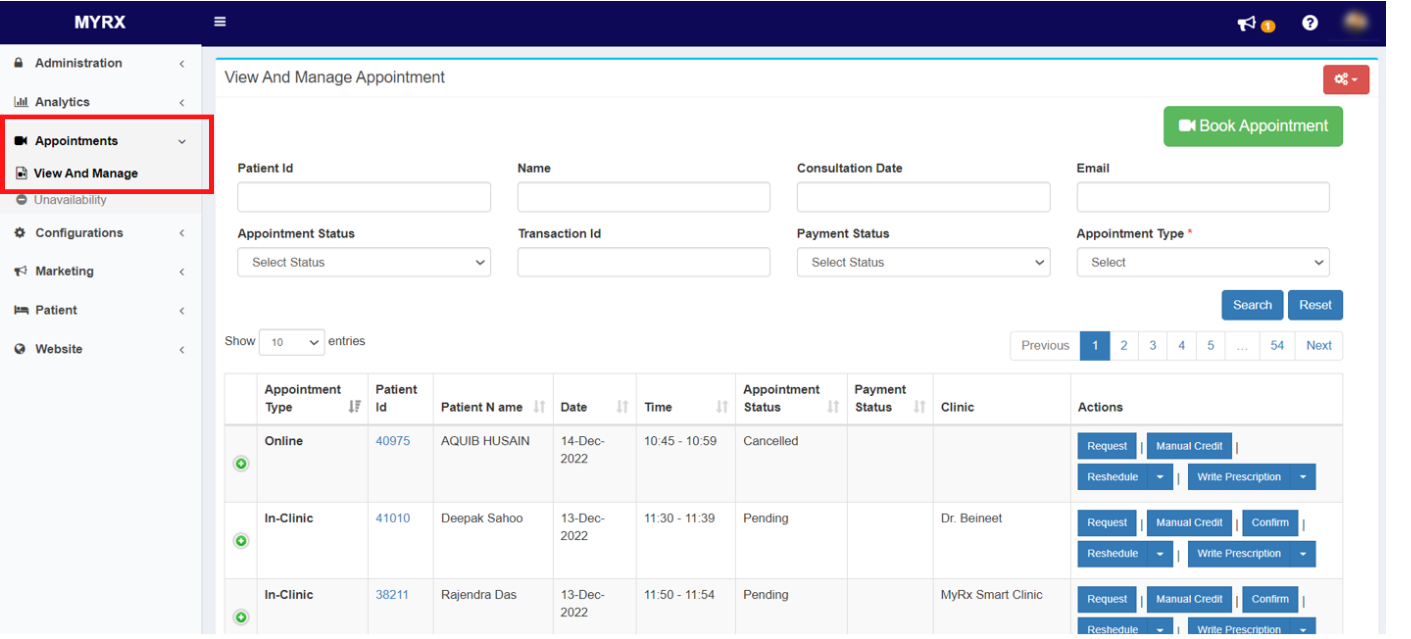
Step 6: Click on Book Appointment Button to open the Appointment booking form.

Step 7: Click on the Online Consulting button.
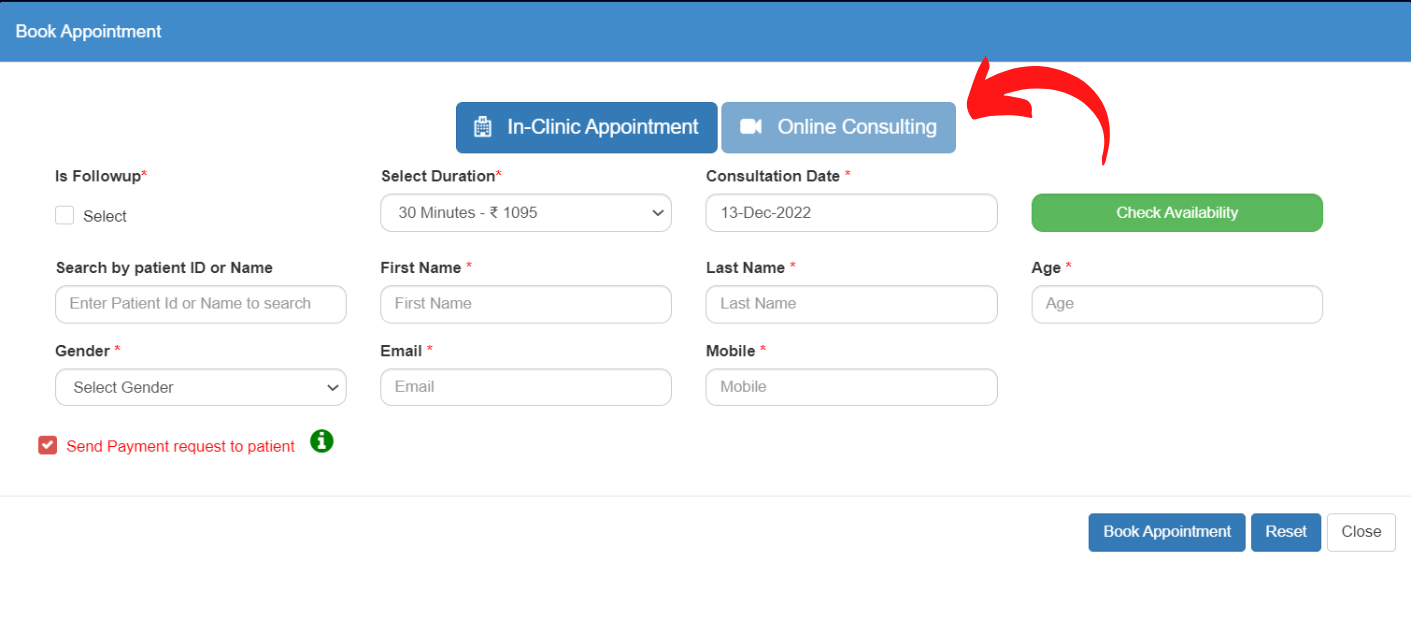
Step 8: If it's a follow-up, check the “Is Followup” checkbox.
Step 9: Select the Duration for the online consulting as required.
Step 10: Choose a date from the calendar under Consultation Date.
Step 11: Click the Check Availability button to choose a time slot for the required date in the “Select Slot” option.
Step 12: Enter the First Name, Last Name, Age, Gender, Email & Mobile number of the patient.
Step 13: Check the “Send Payment request to the patient” box if you wish to share a payment request with the patient by mail.
Step 14: Click on the “Book Appointment” button.
Step 15: Click Ok on the success message of the appointment.
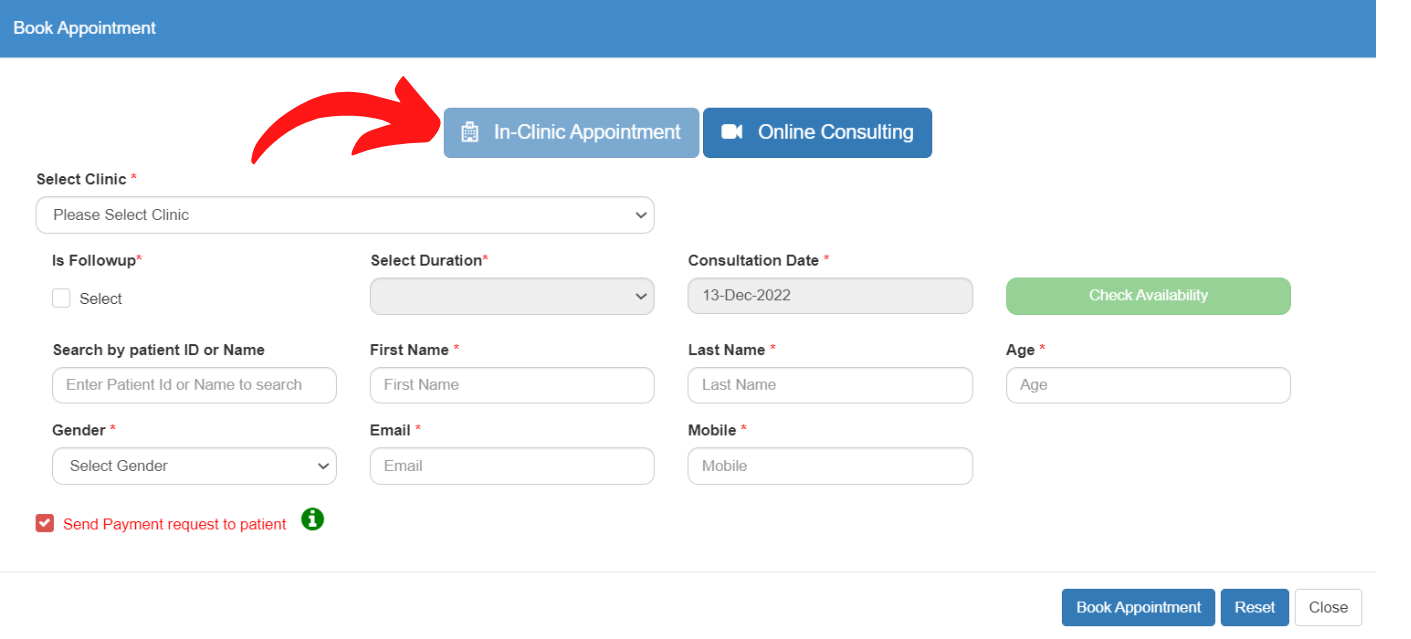
How to book an In-Clinic appointment for a patient in MyRx?
Step 1: Go to MyRx Login Page
Step 2: Enter User Id and Password
Step 3: Click on LogIn! button
Step 4: Once logged in, you will be directed to the dashboard.
Step 5: Go to Appointments -> View & Manage
Step 6: Click on Book Appointment Button to open the Appointment booking form.
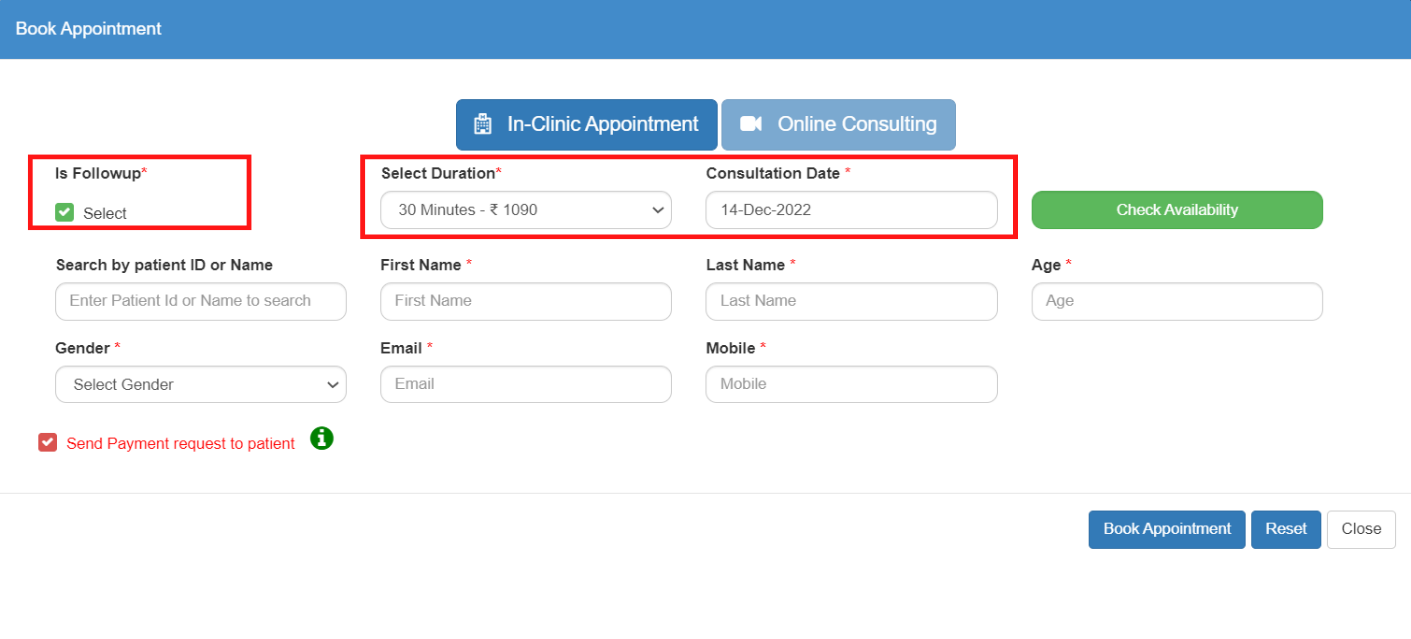
Step 7: Click on the In-Clinic Appointment button.
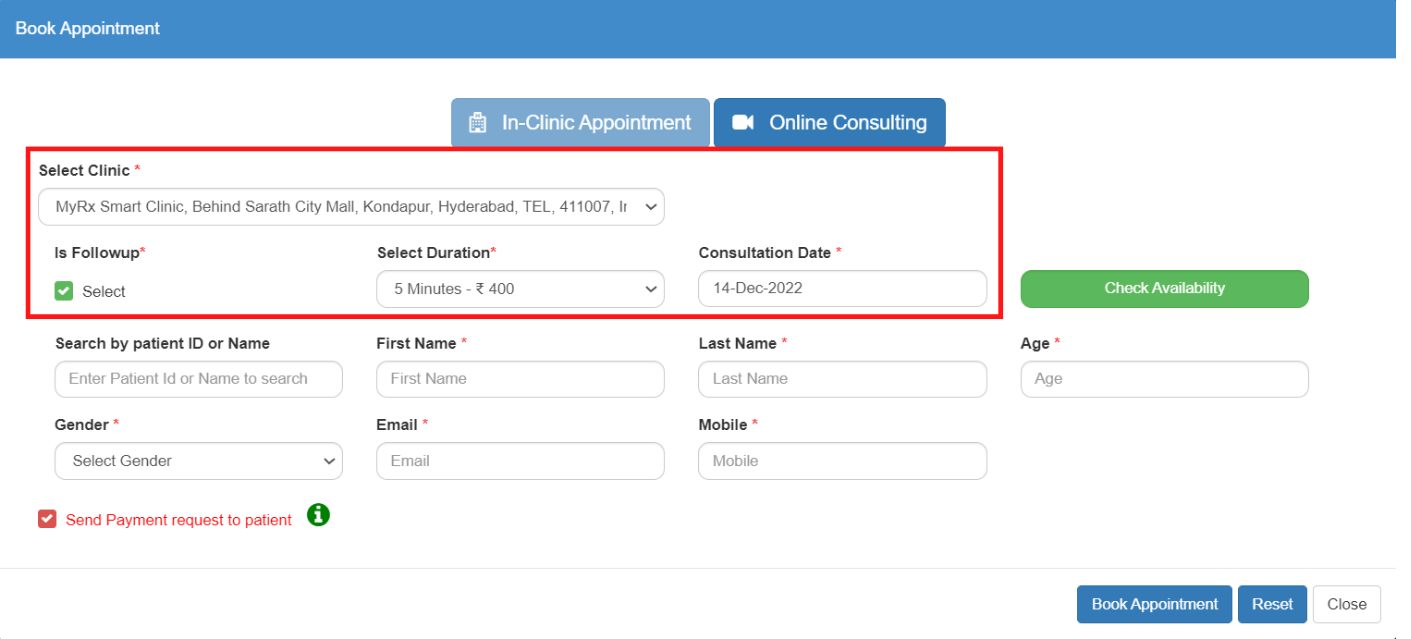
Step 8: Select the Clinic from the dropdown menu.
Step 9: If it's a follow-up, check the “Is Followup” checkbox.
Step 10: Select the Duration for the In-clinic appointment.
Step 11: Choose a date from the calendar under Consultation Date.
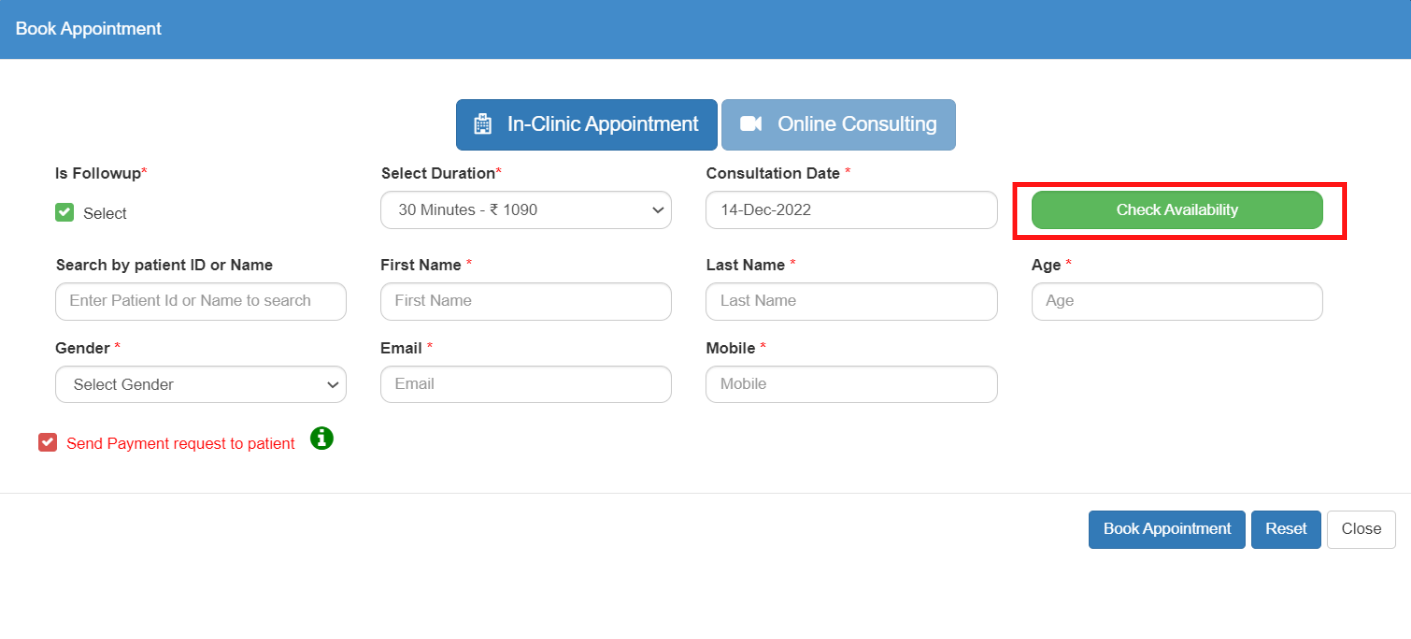
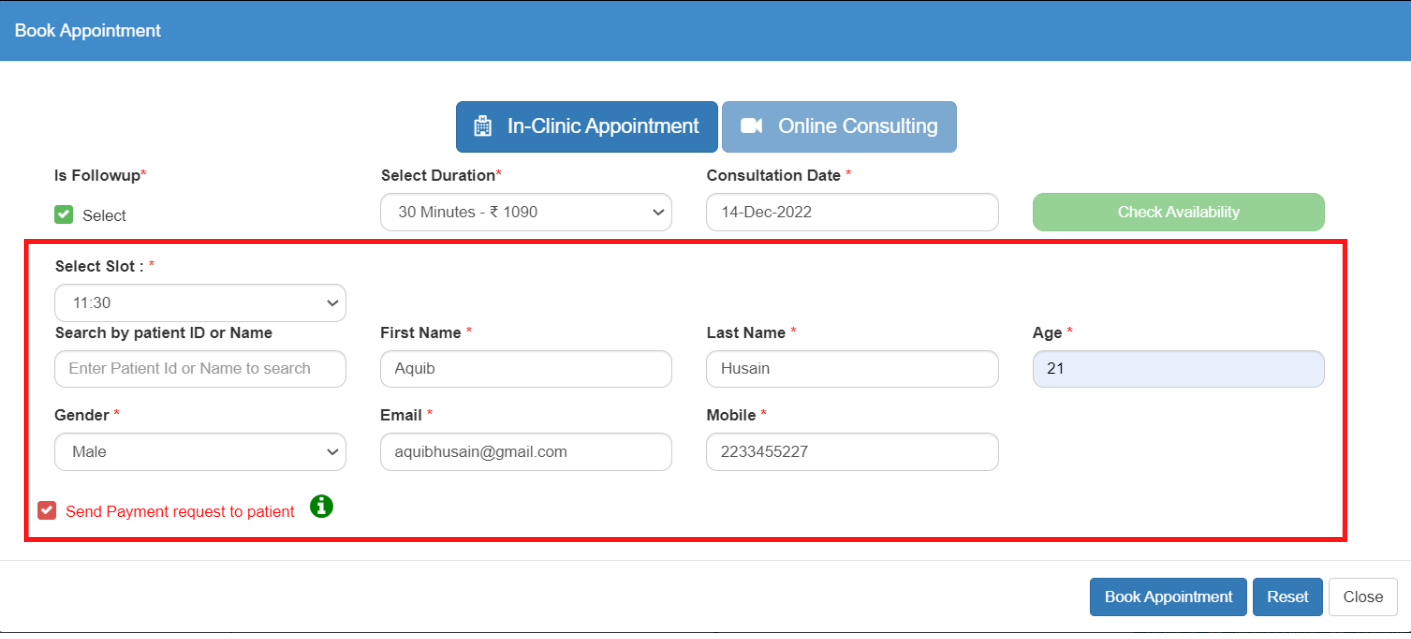
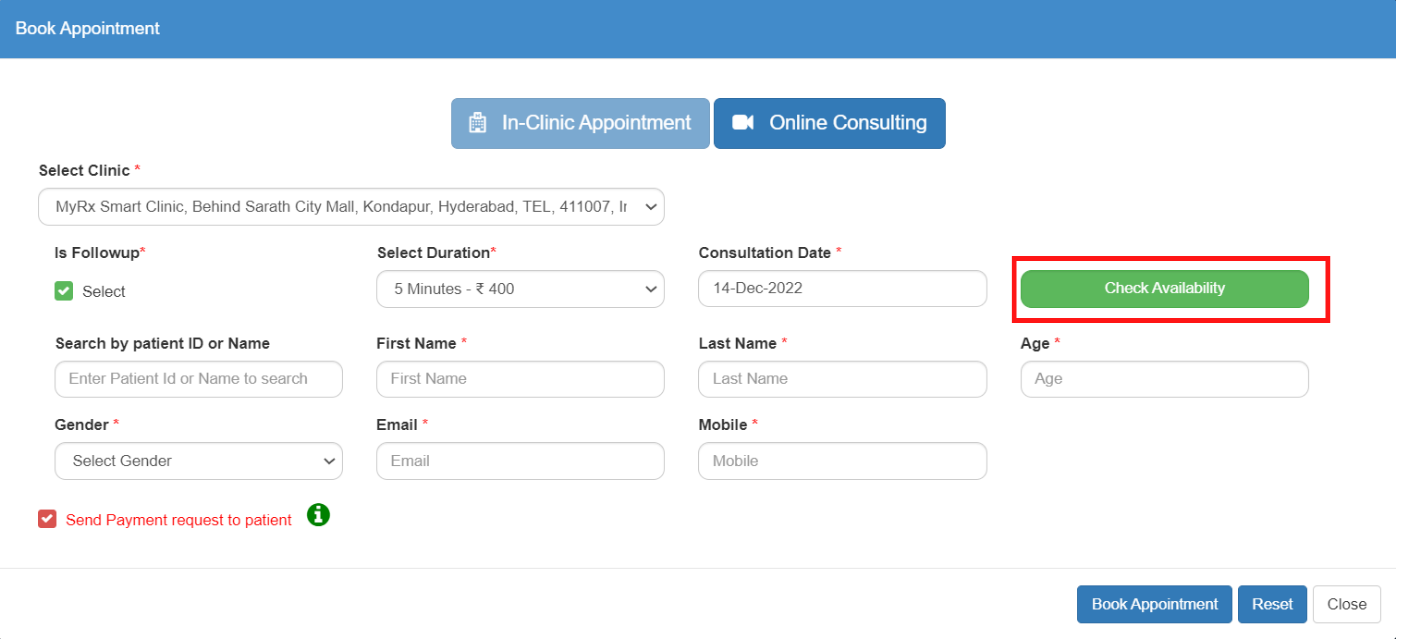
Step 12: Click the Check Availability button to choose a time slot for the required date in the “Select Slot” option.
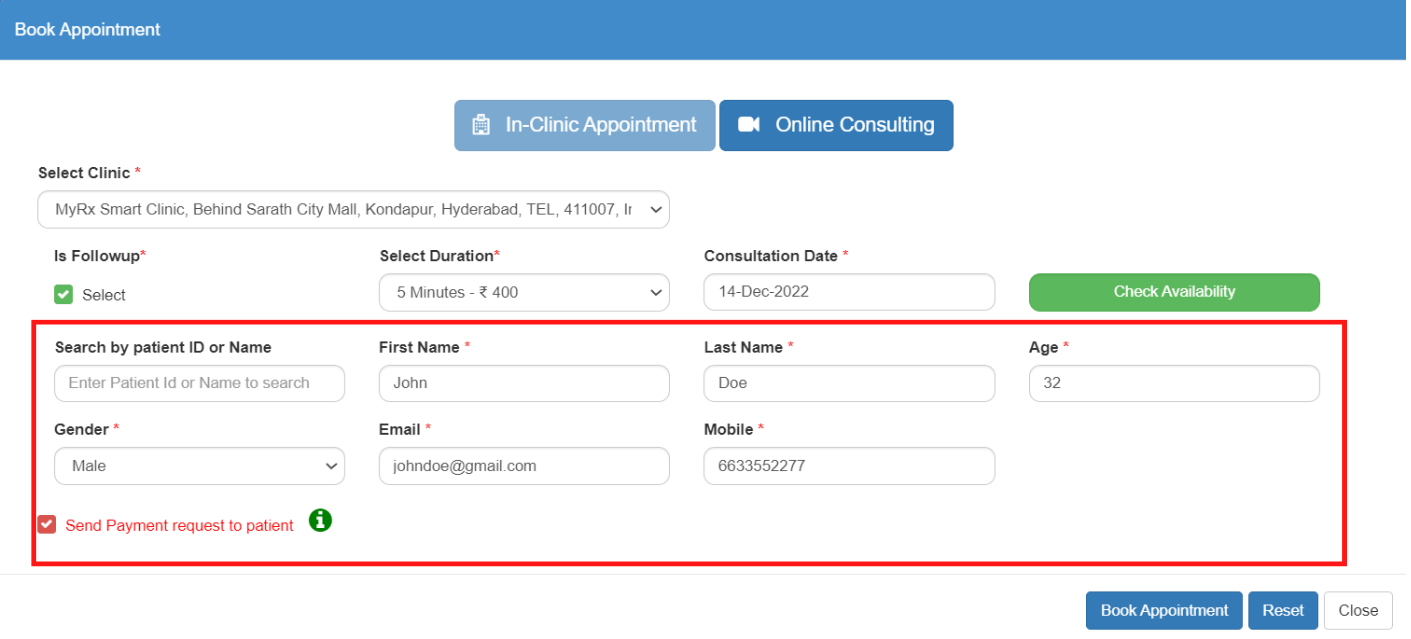
Step 13: Enter the First Name, Last Name, Age, Gender, Email & Mobile number of the patient.
Step 14: Check the “Send Payment request to the patient” box if you wish to share a payment request with the patient by mail.
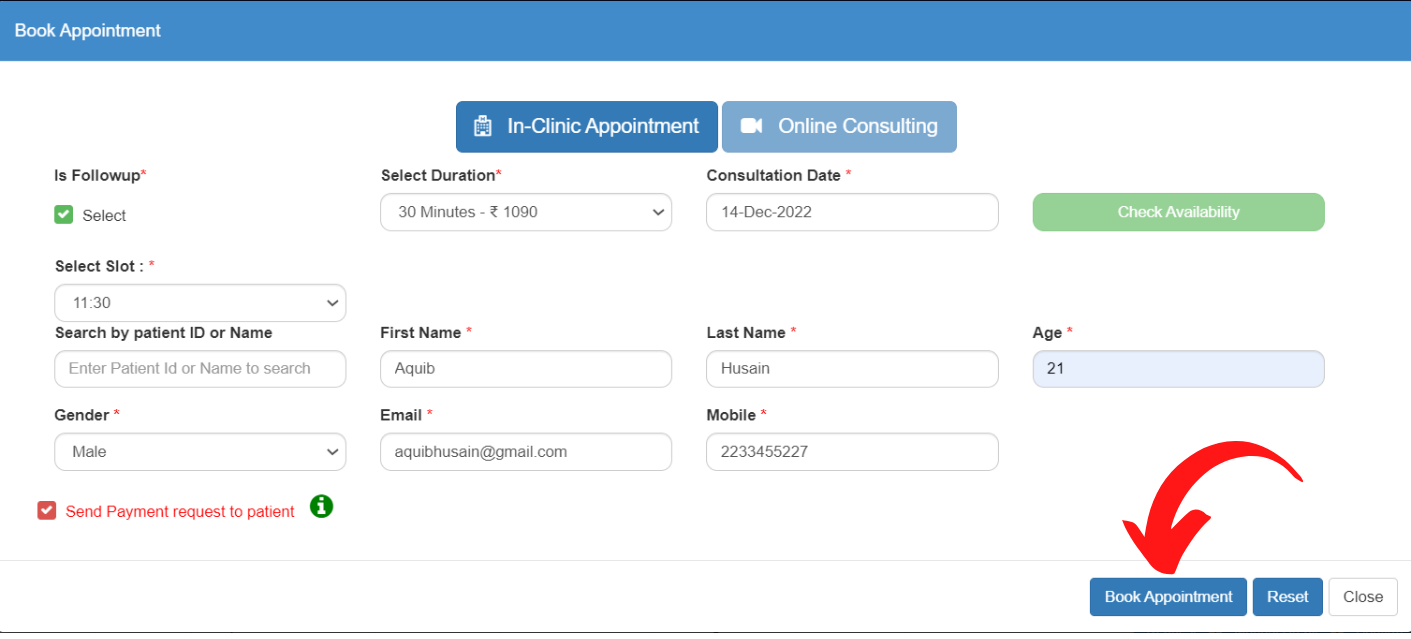
Step 15: Click on the “Book Appointment” button.
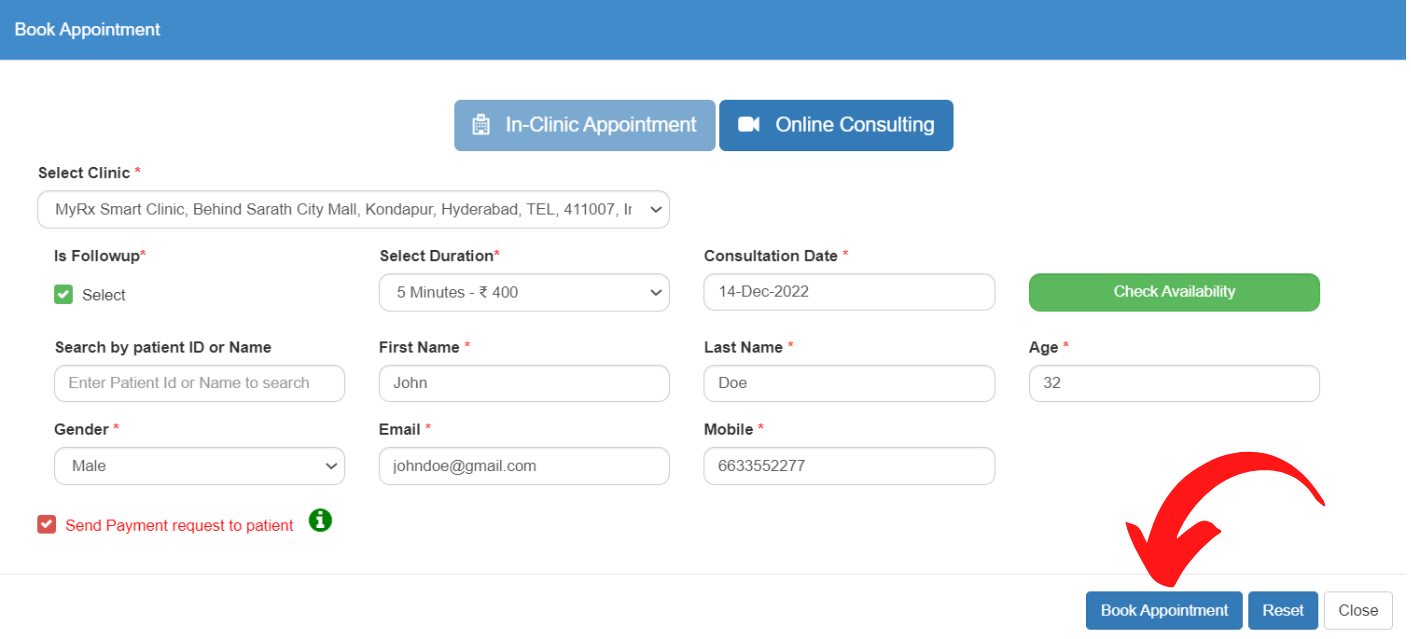
Step 16: Click Ok on the success message of the appointment.
How to reschedule an Online/ In Clinic appointment in MyRx?
Step 1: Go to MyRx Login Page
Step 2: Enter User Id and Password
Step 3: Click on LogIn! button
Step 4: Once logged in, you will be directed to the dashboard.
Step 5: Go to Appointments -> View & Manage
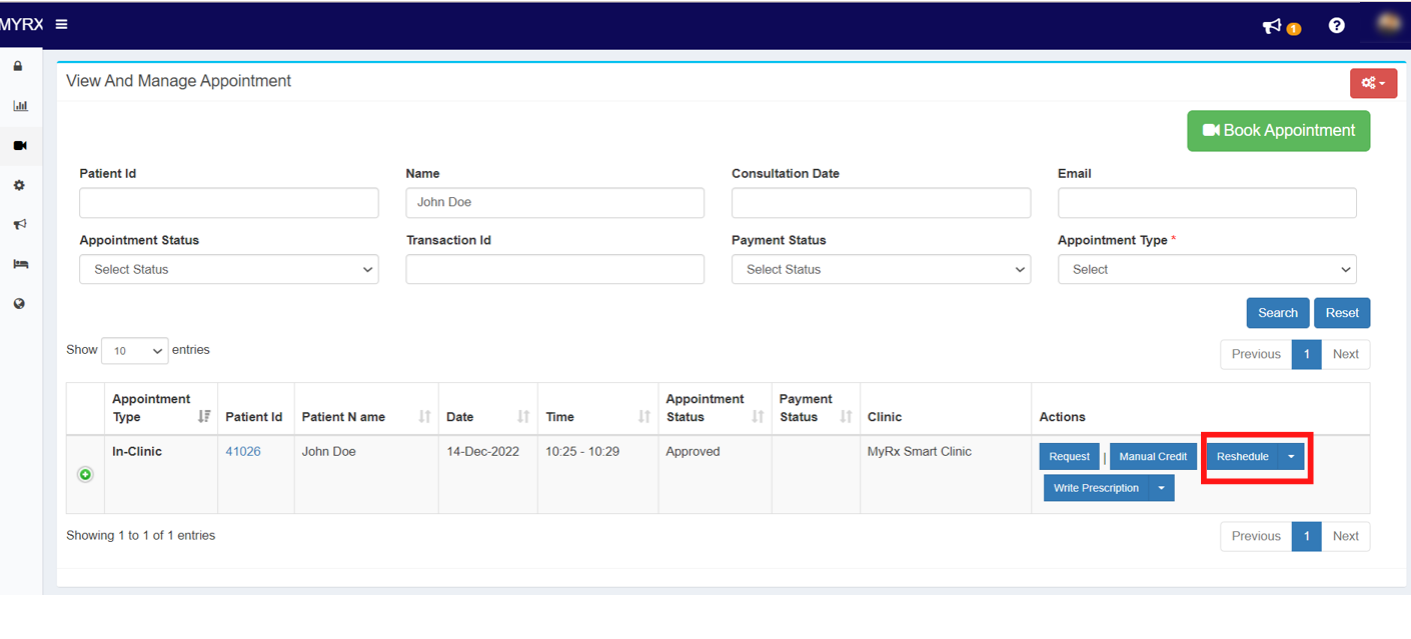
Step 6: Enter the patient’s name in the search box and click on Search.
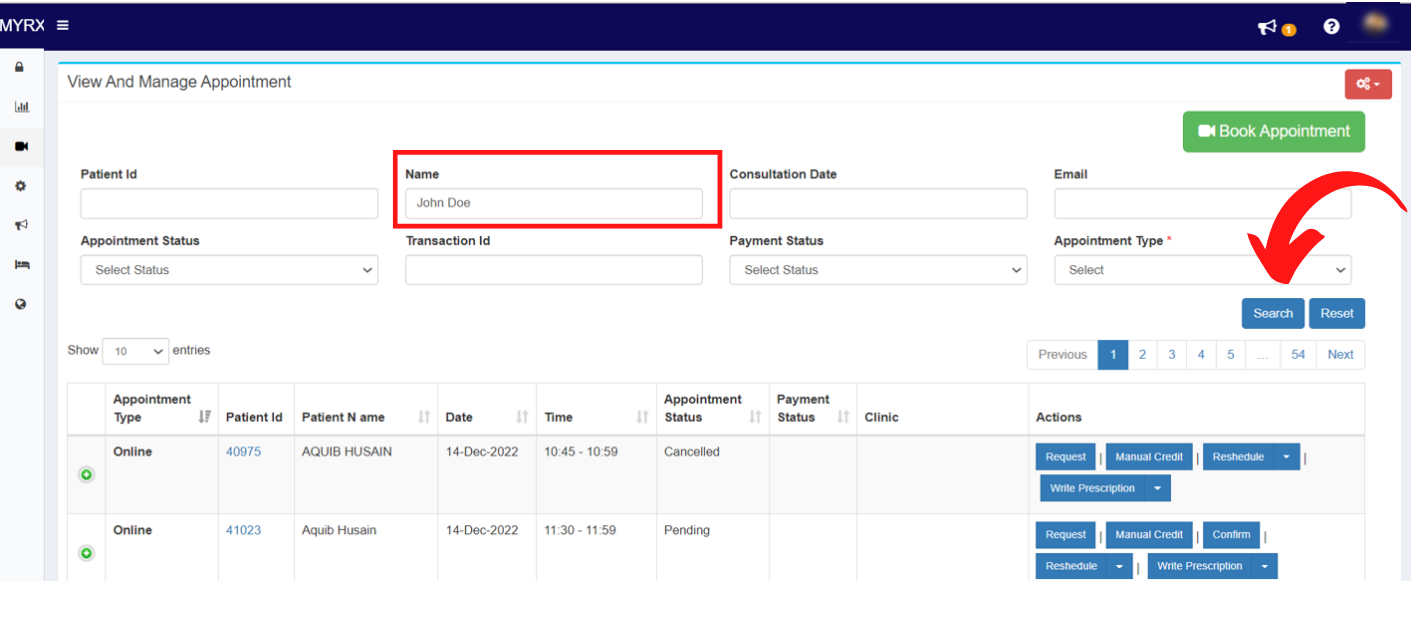
Step 7: Click on the Reschedule button on the right.
Step 8: Modify the Date and Time for the appointment.

Step 9: Click on Update Appointment.
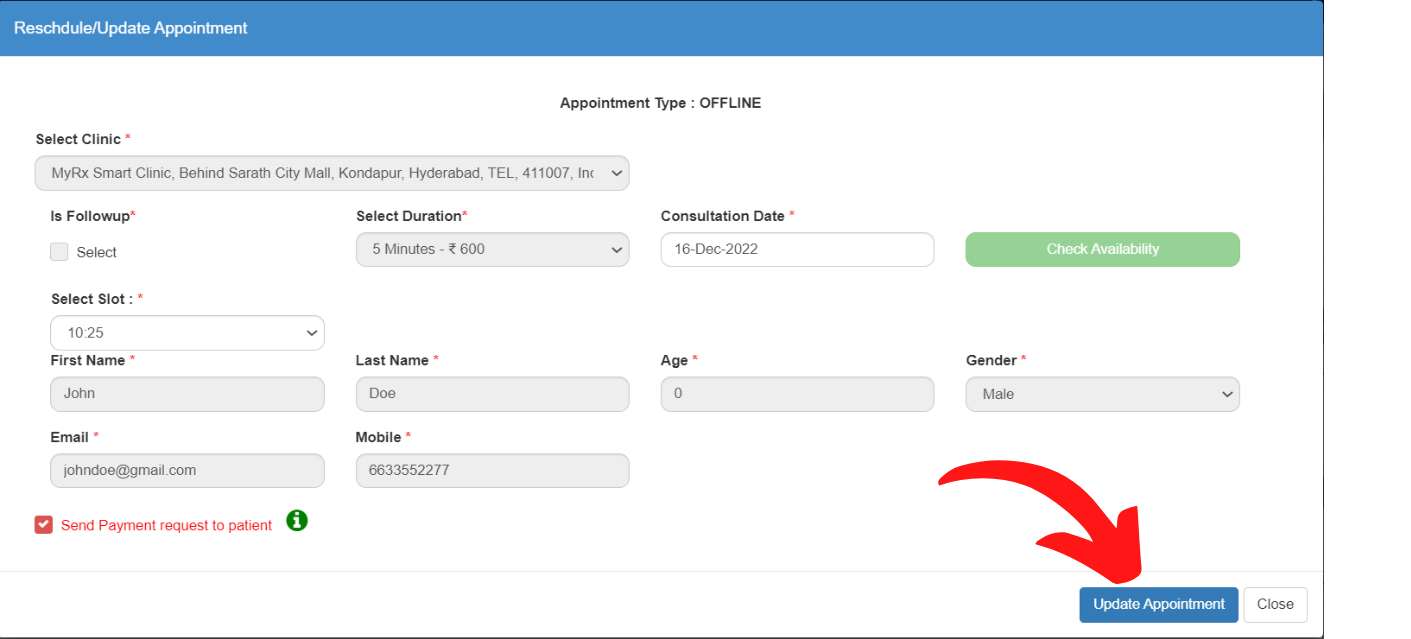
The requested Online/ In Clinic appointment will be rescheduled.

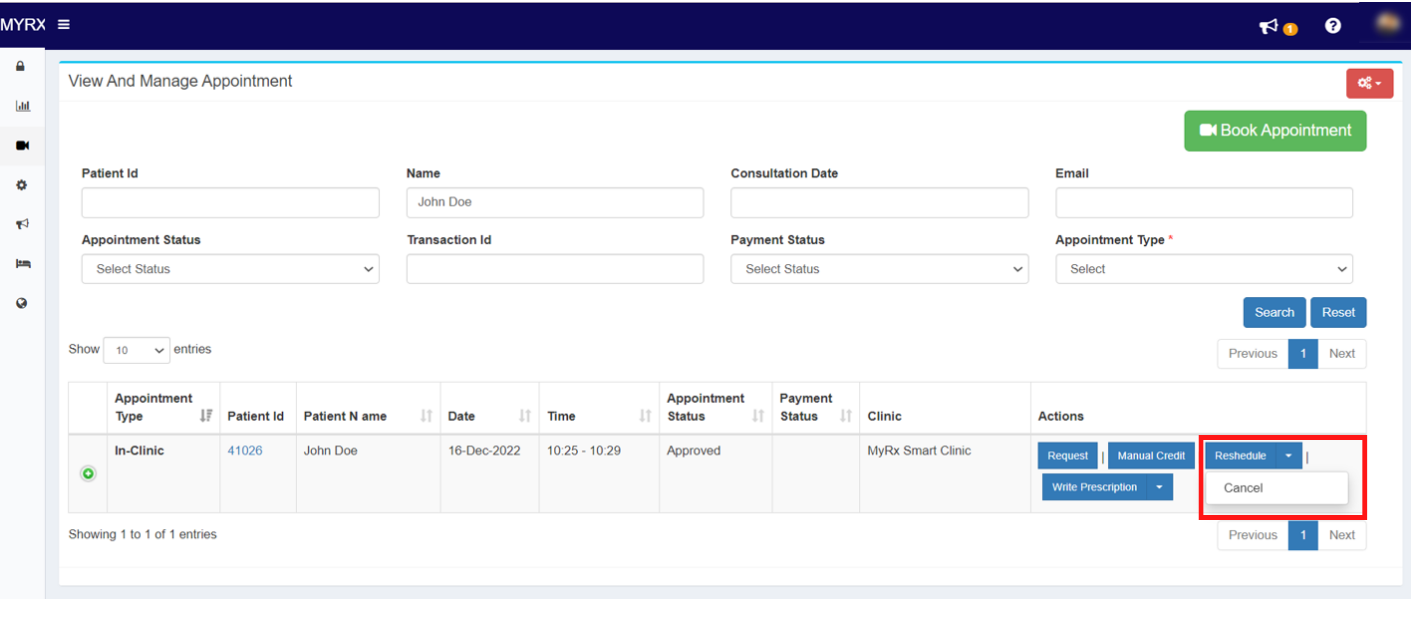
How to cancel a booked Online/ In Clinic appointment in MyRx?
Step 1: Go to MyRx Login Page
Step 2: Enter User Id and Password
Step 3: Click on LogIn! button
Step 4: Once logged in, you will be directed to the dashboard.
Step 5: Go to Appointments -> View & Manage
Step 6: Enter the patient’s name in the search box and click on Search.
Step 7: Click on the Dropdown button beside the Reschedule option and click on “Cancel”.
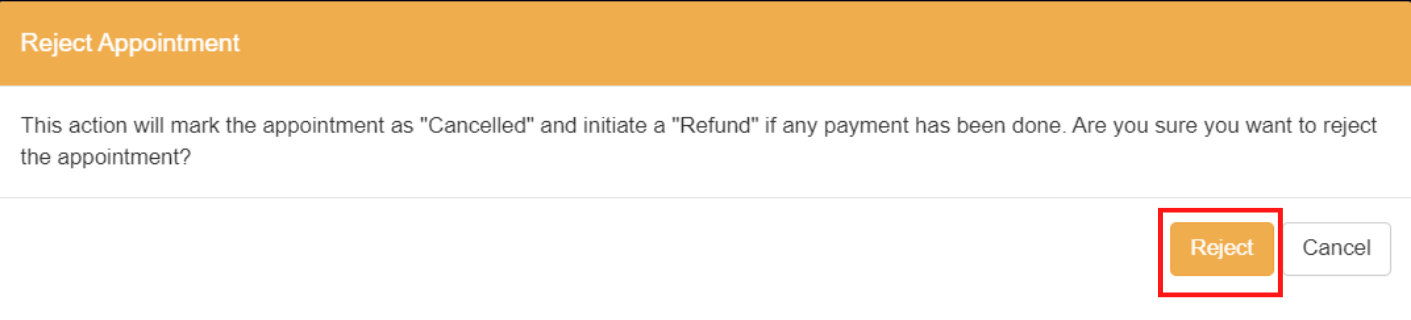
Step 8: Click Reject in the Reject Appointment pop-up.
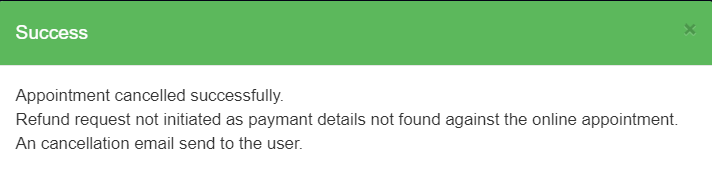
The requested Online/ In Clinic appointment will be cancelled.
How to view the previous diagnosis of a patient in MyRx?
Step 1: Go to MyRx Login Page
Step 2: Enter User Id and Password
Step 3: Click on LogIn! button
Step 4: Once logged in, you will be directed to the dashboard.
Step 5: Go to Appointments -> View & Manage
Step 6: Enter the patient’s name in the search box and click on Search.
Step 7: Click on the Dropdown button beside the Write prescription option and click on “Previous Diagnosis”.
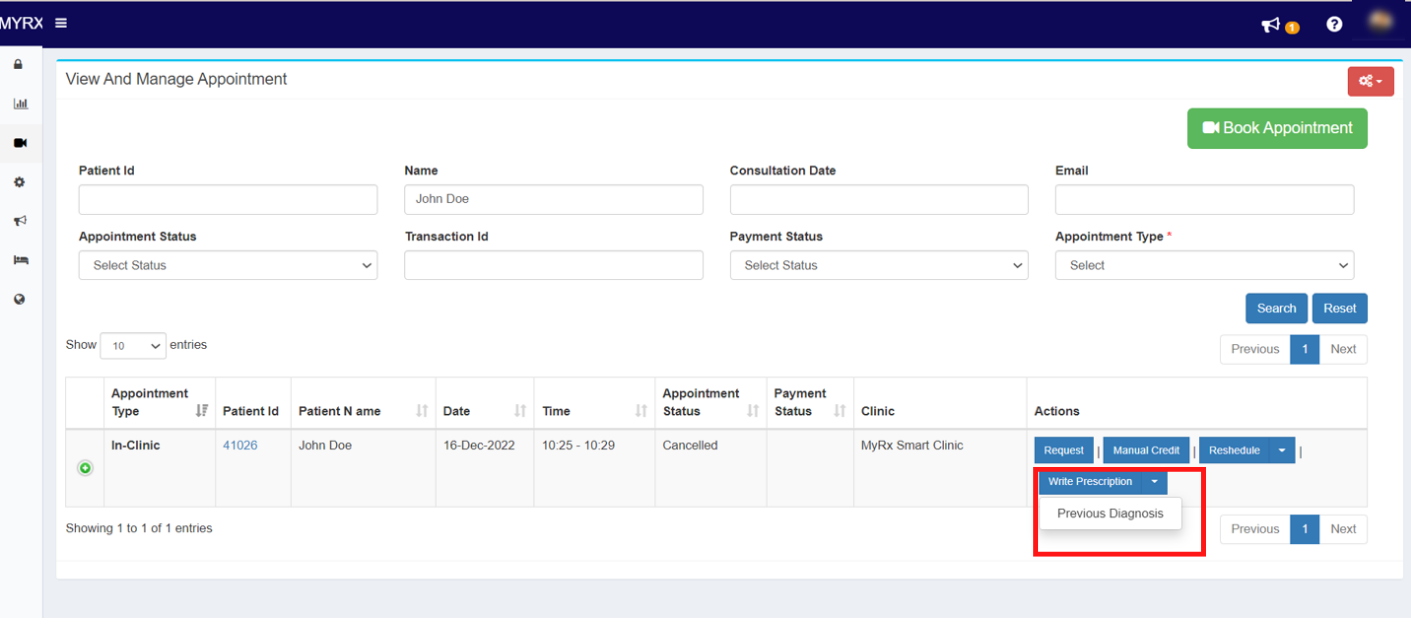
You can view the previous diagnosis of the patient with the date.

How to add a new Unavailability in MyRx?
Step 1: Go to MyRx Login Page
Step 2: Enter User Id and Password
Step 3: Click on LogIn! button
Step 4: Once logged in, you will be directed to the dashboard.
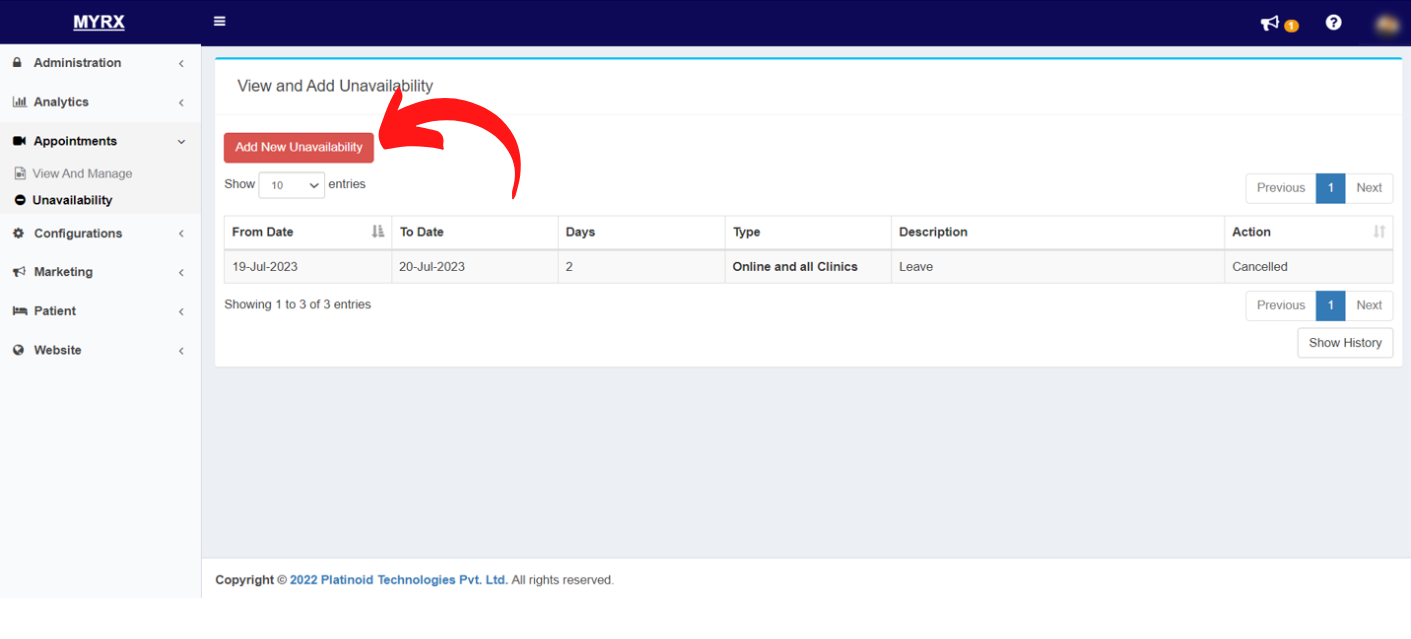
Step 5: Go to Appointments -> Unavailability
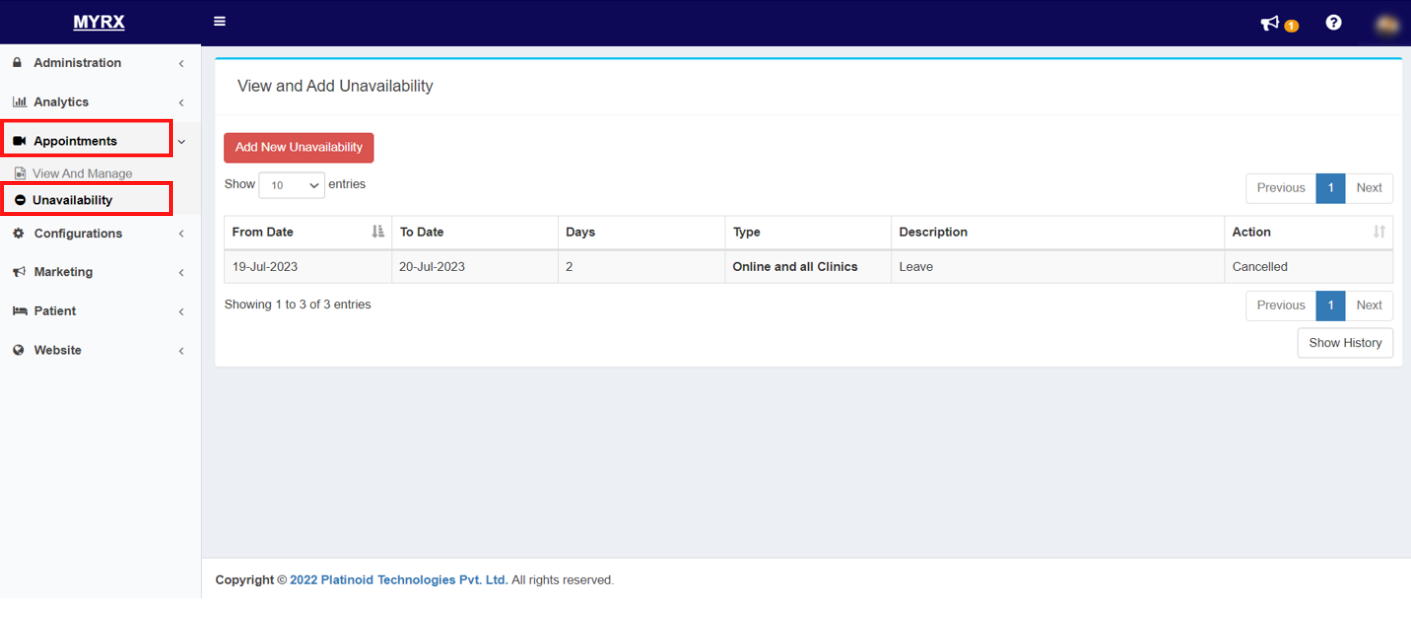
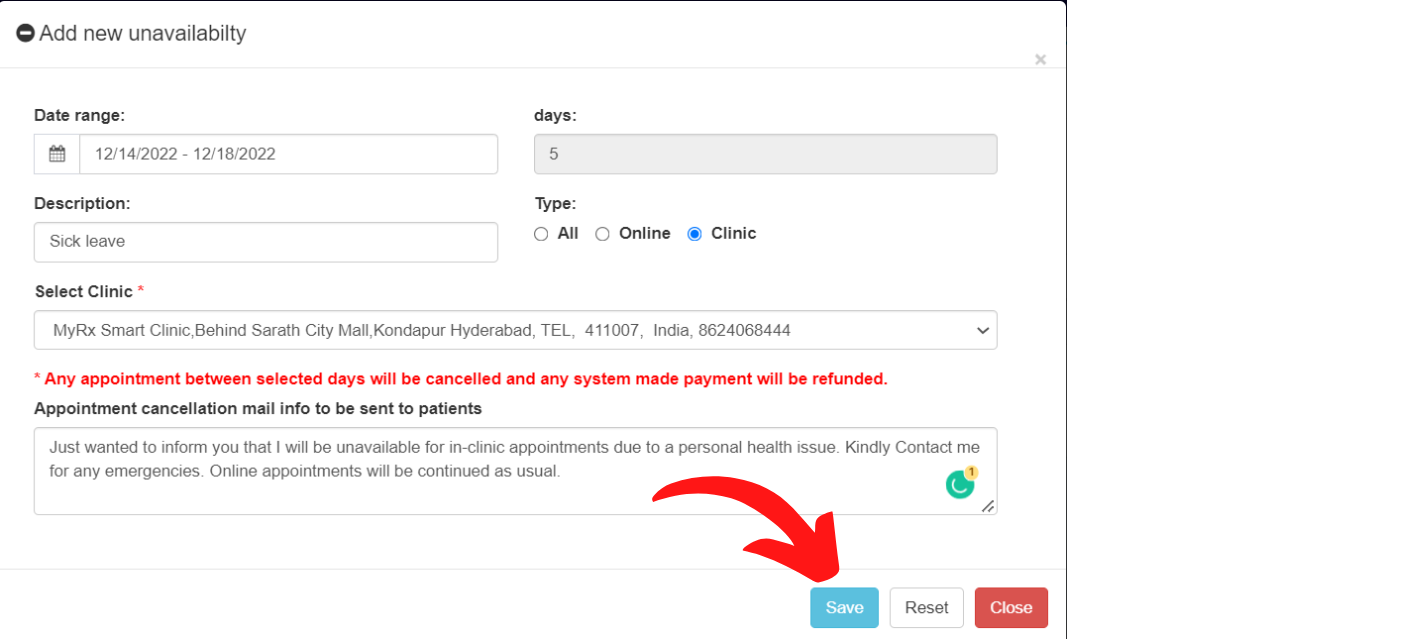
Step 6: Click on Add New Unavailability button.
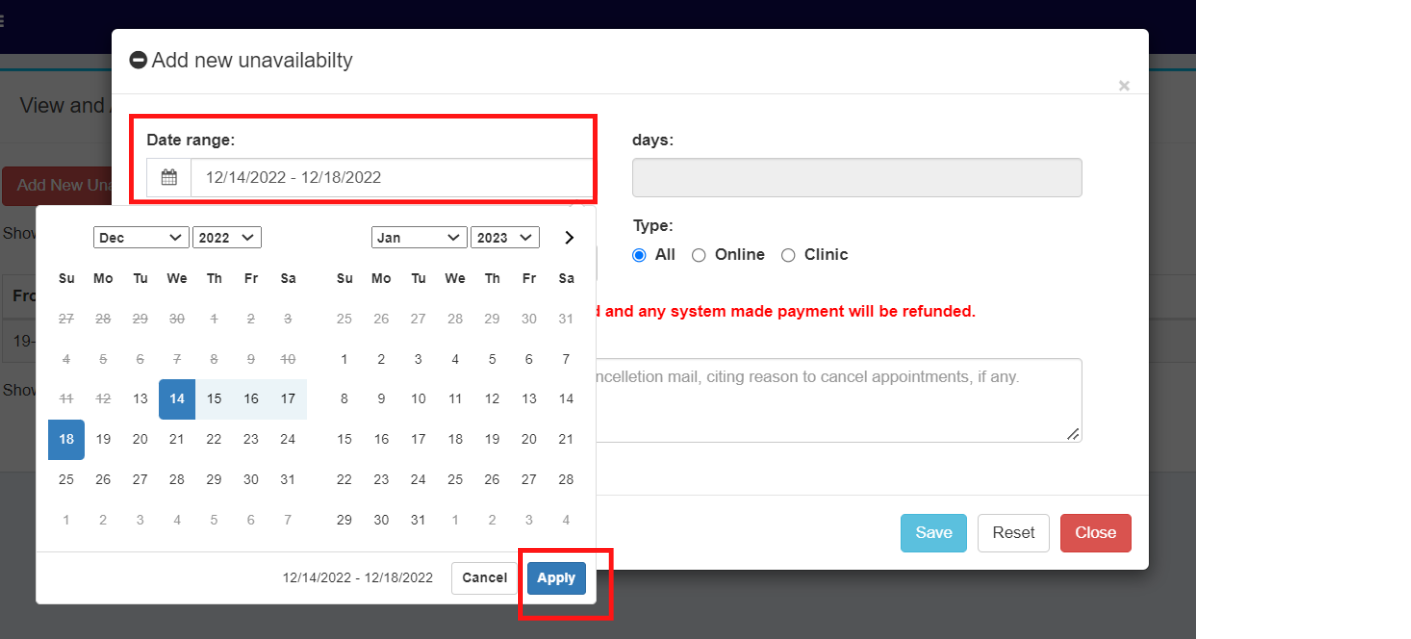
Step 7: Enter the date range according to your unavailability in the Date Range option & click on Apply, The days will be calculated automatically.
Step 8: Enter the unavailability information in the Description option.
Step 9: Select the Type of unavailability. Example: Clinic, Online, or Both.
If you have selected Clinic, select the clinic for which you will be unavailable.
Step 10: If necessary, write a statement outlining your absence that you want to send to patients via email.
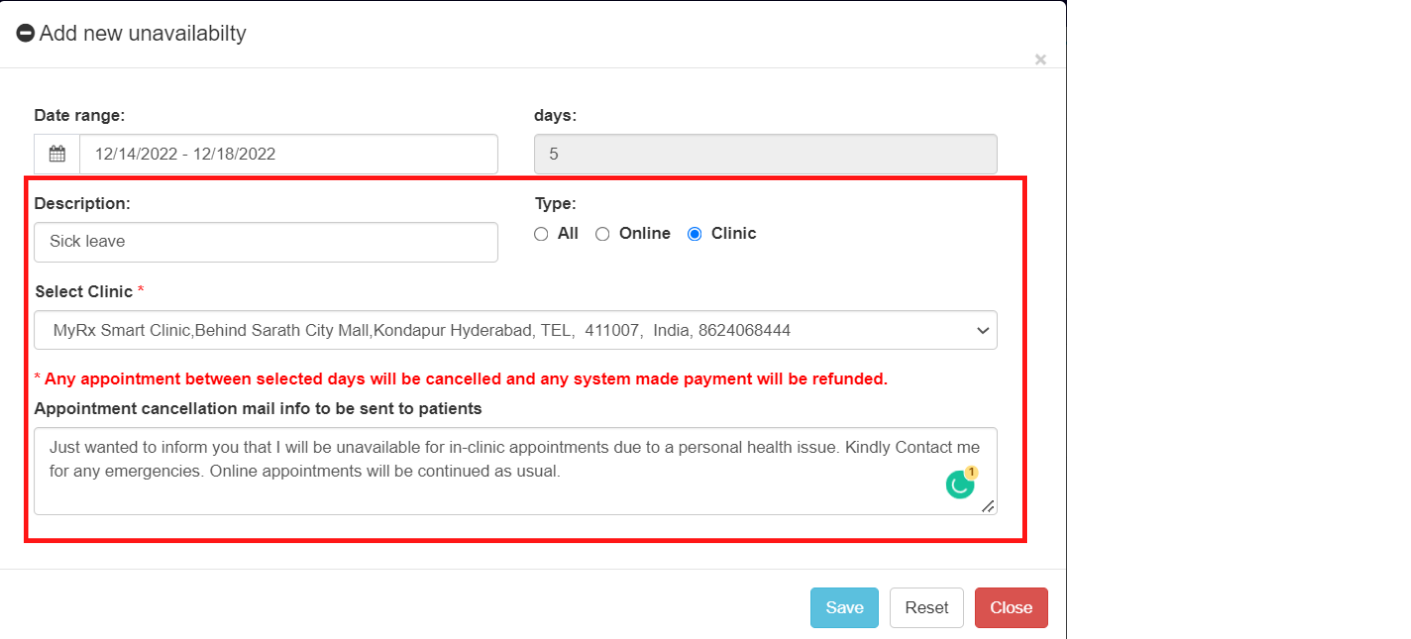
Step 11: Click on Save.
Your Unavailability will be saved successfully.
8. Articles
How to Publish an Article on my website in MyRx?
Step 1: Go to MyRx Login Page
Step 2: Enter User Id and Password
Step 3: Click on Sign In! Button
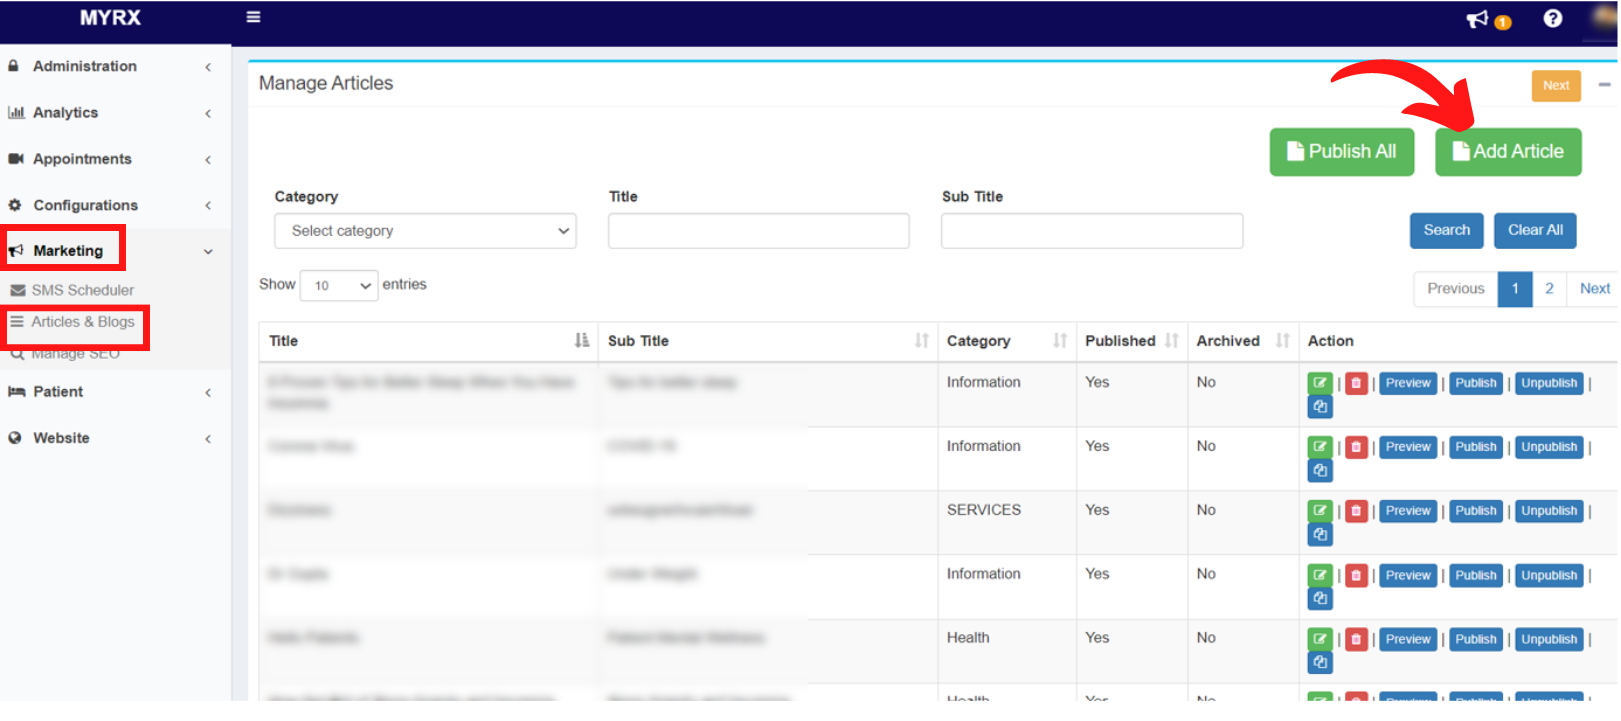
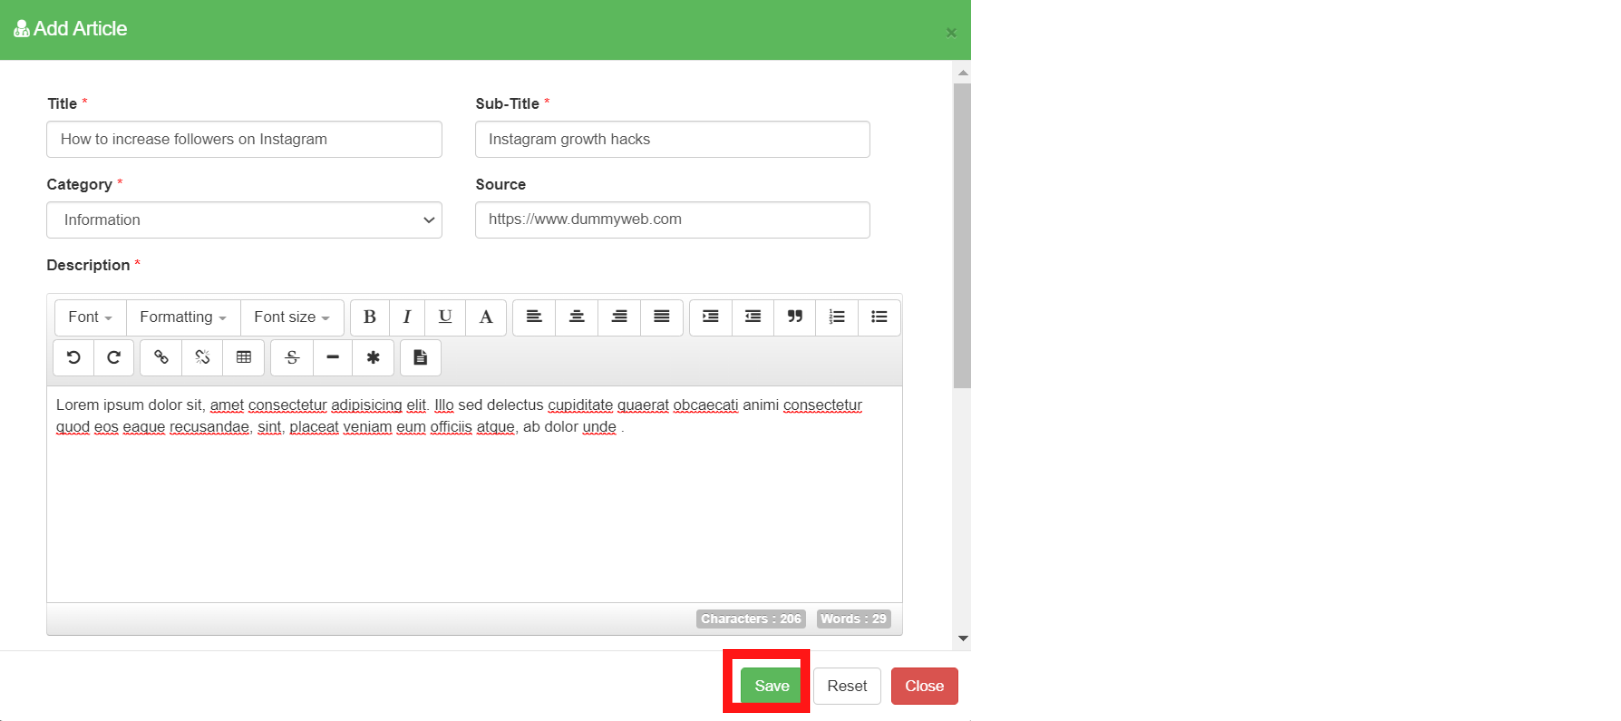
Step 4: Go to Marketing -> Articles & Blogs -> Add Article (Button)
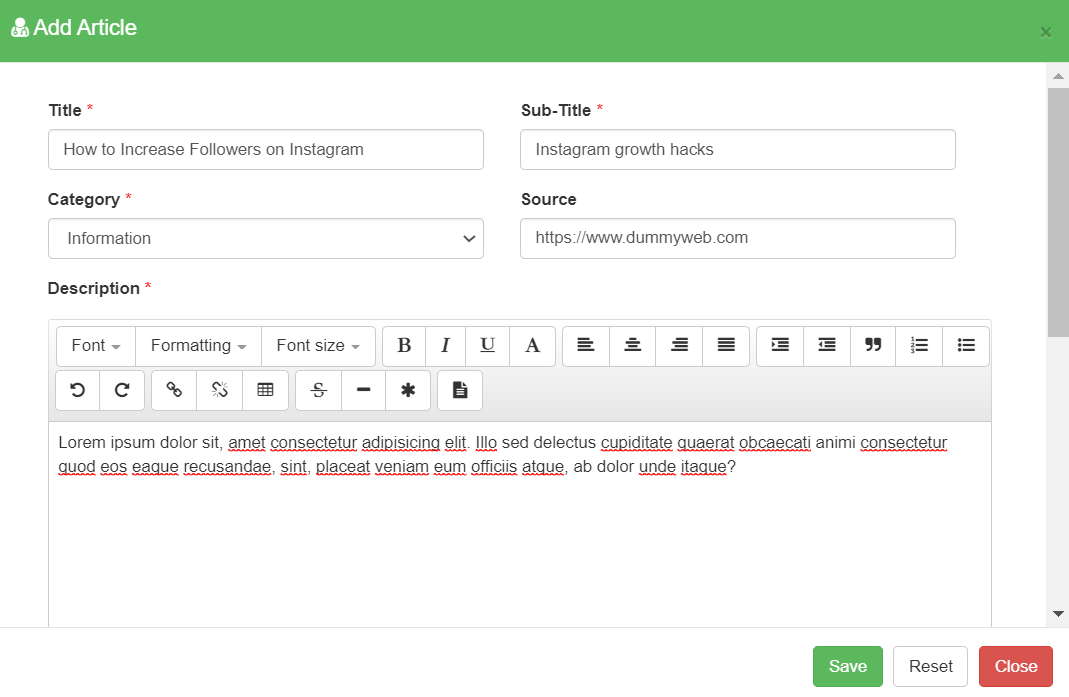
Step 5: Enter Title and SubTitle for the article
Step 6: Add a reference source for the article, if any.
Step 7: Choose a Category
Step 8: Type / Paste your article in the Description box
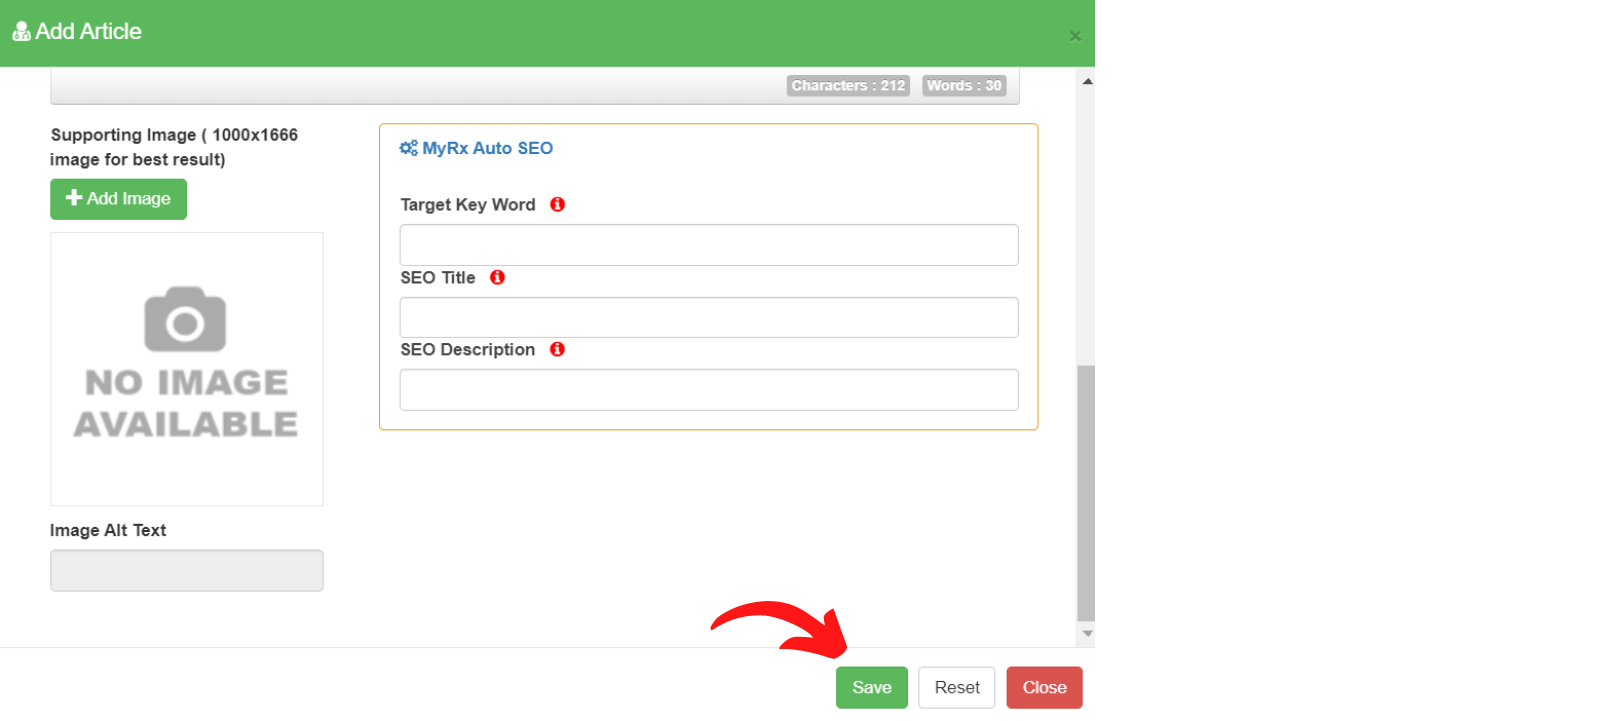
Step 9: Scroll Down, Choose a supporting Image for the article
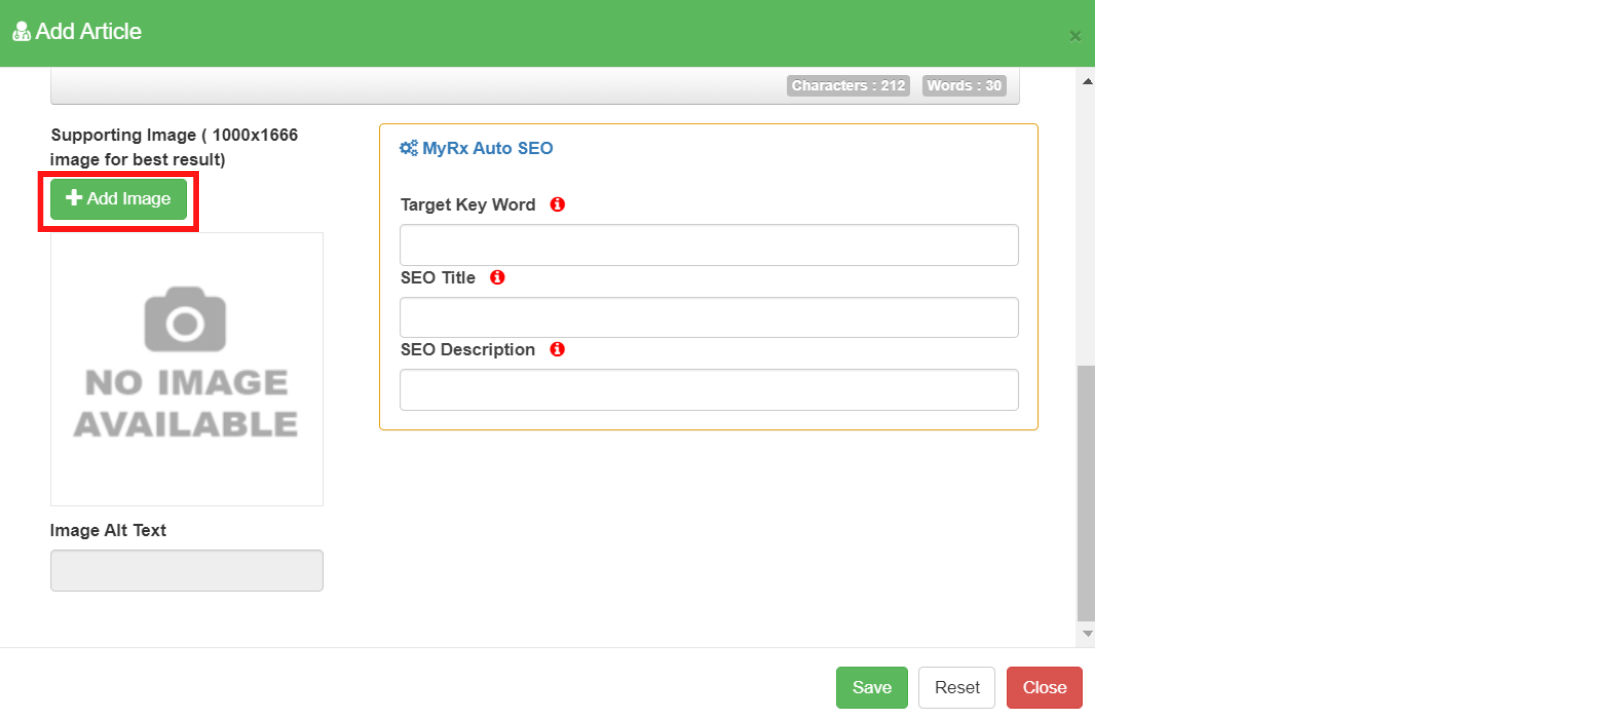
Step 10: Click on the Save button.
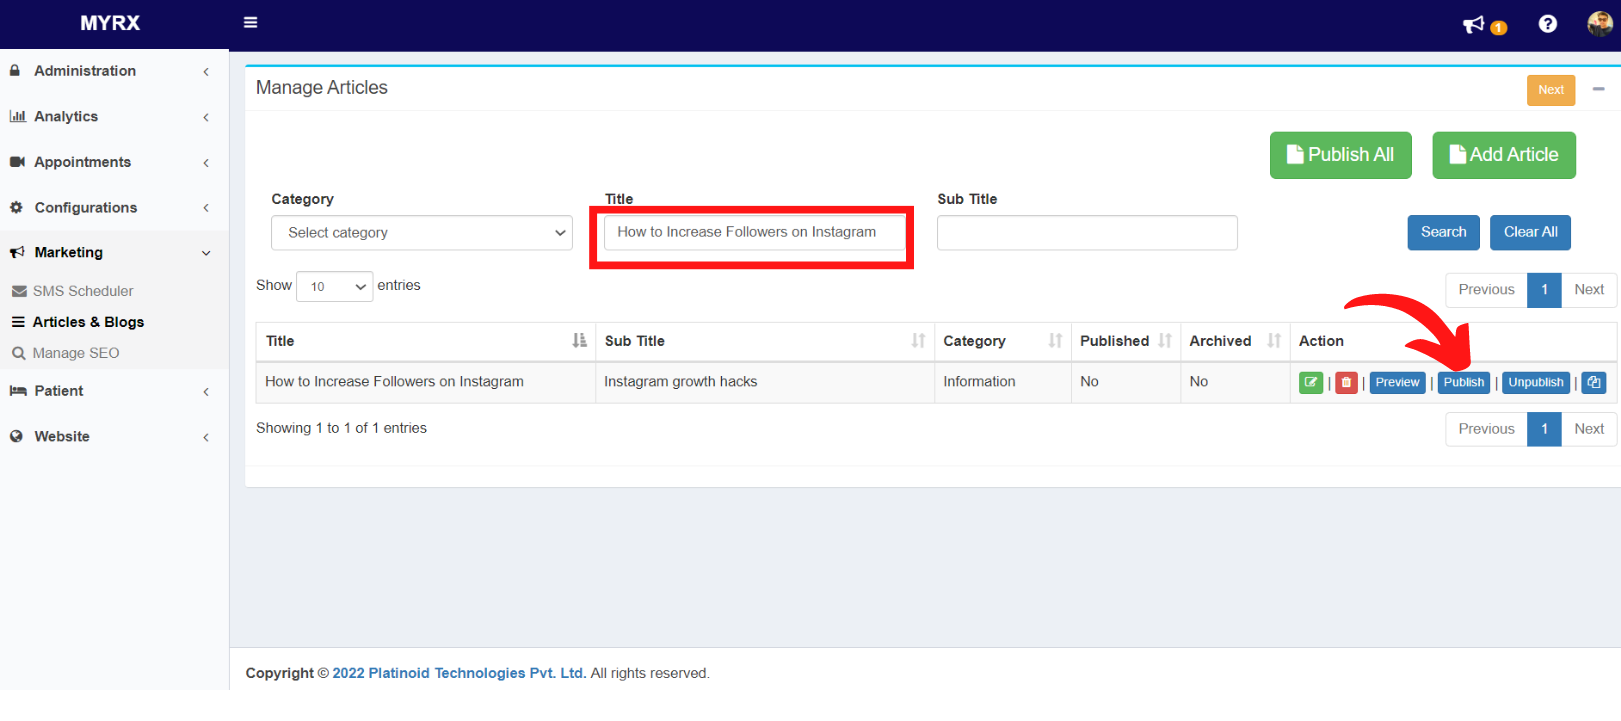
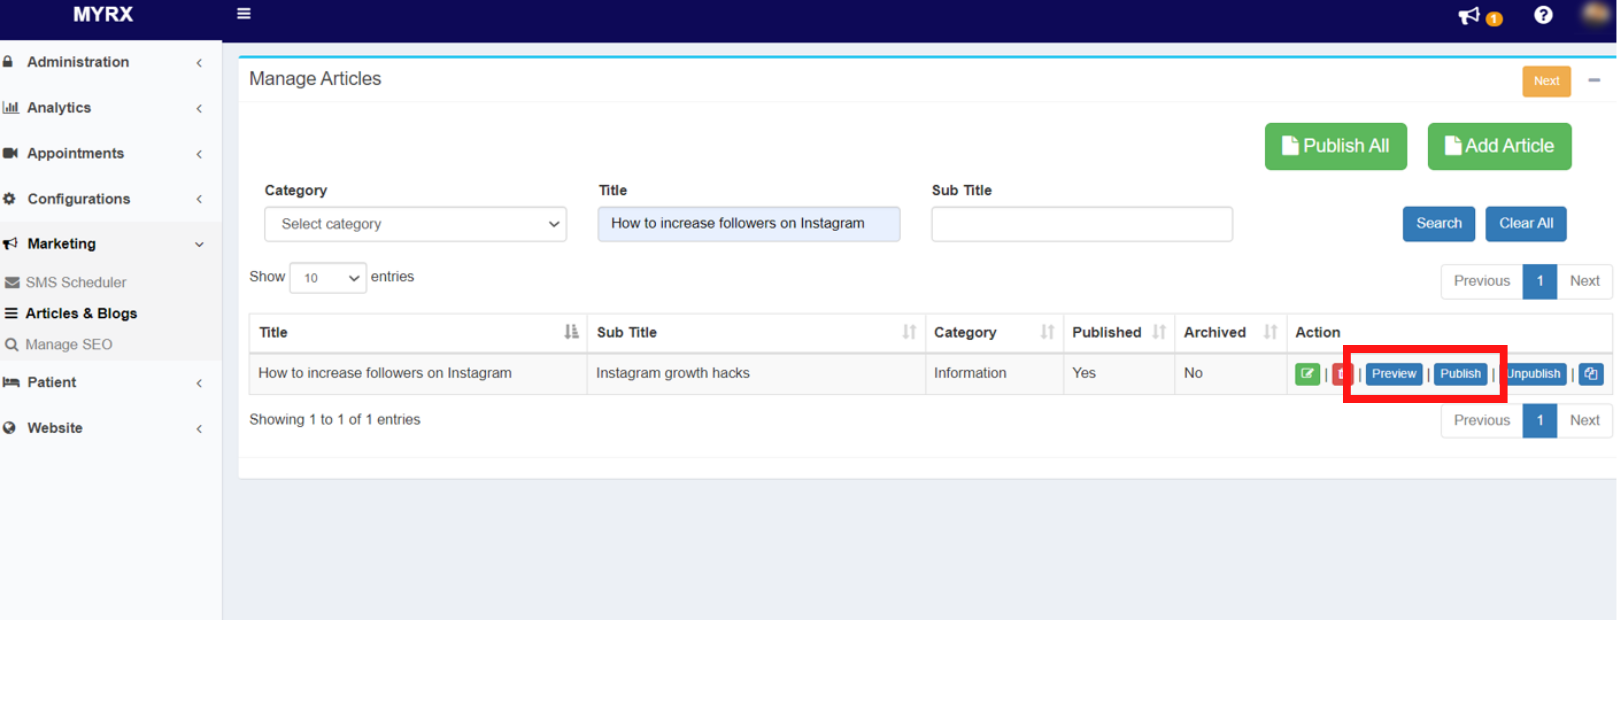
Step 11: Go to Manage articles section and search the article
Step 12: Click on Publish for the required article
Step 13: Click on the Publish button for “Are you sure you want to publish your article?” confirmation pop-up.

Article will be published successfully and will be available on your website. 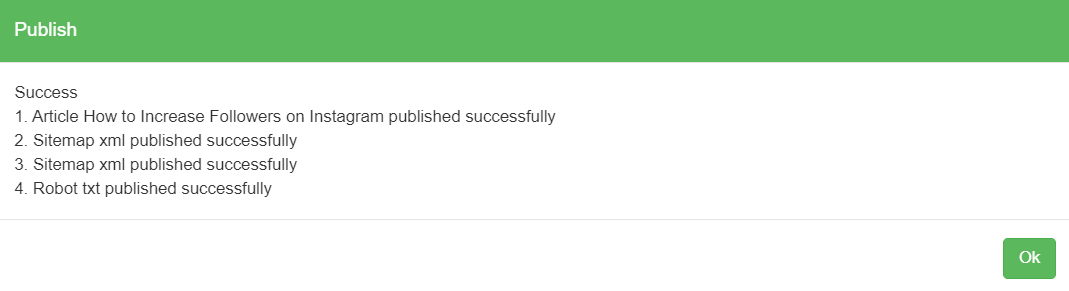
How can I edit my article in MyRx?
Step 1: Go to MyRx Login Page
Step 2: Go to Marketing -> Articles & Blogs
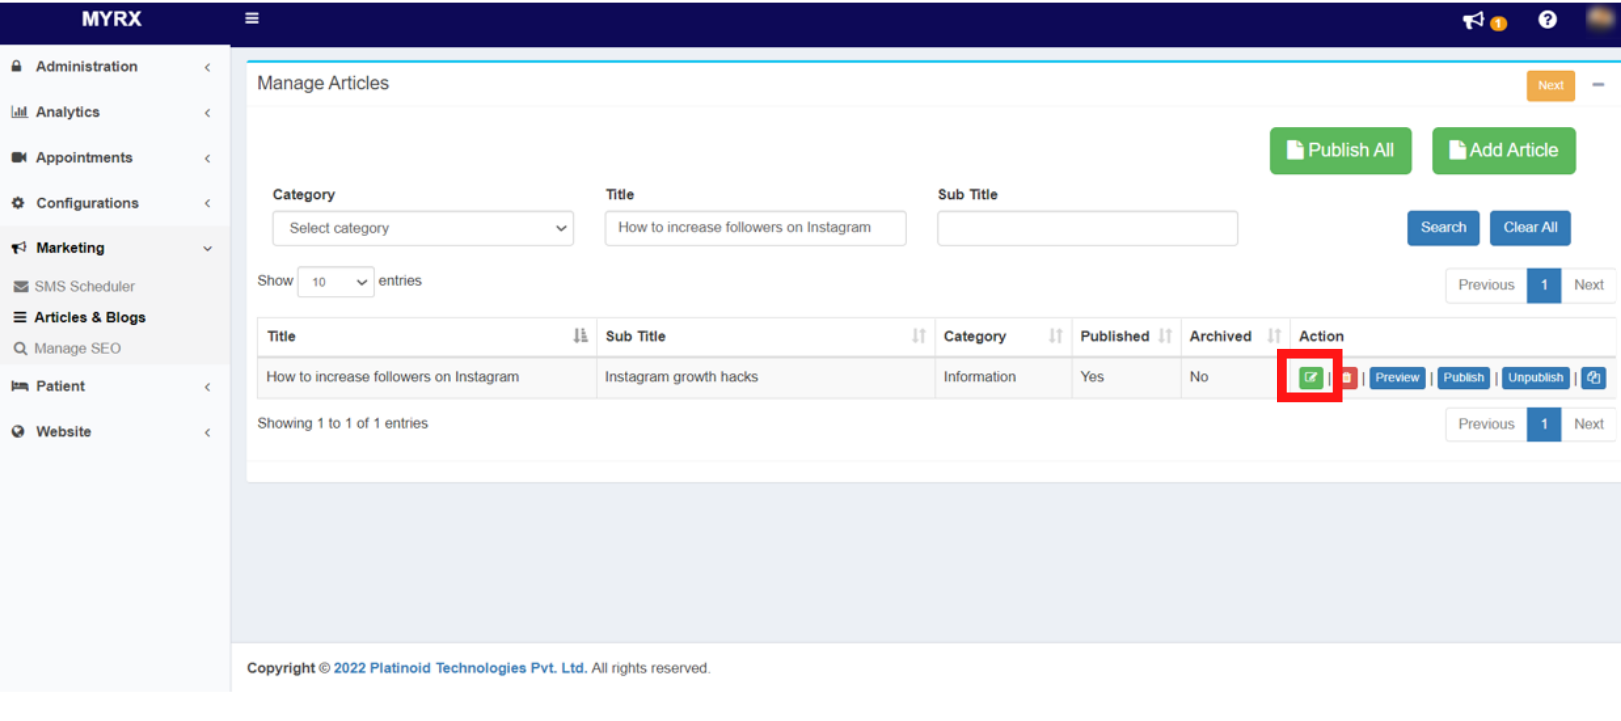
Step 3: Go to Manage articles section and search the article
Step 4: Click on Edit icon for the required article
Step 5: Make necessary changes in the Add Article section
Step 6: Click on Save button
Step 7: Preview/ Publish article from the Manage Article section
Step 8: Click on the Publish button for “Are you sure you want to publish your article?” confirmation pop-up.
All the changes made to the article will reflect on the website.
How can I remove an article from my website in MyRx?
Step 1: Go to MyRx Login Page
Step 2: Go to Marketing -> Articles & Blogs
Step 3: Go to Manage articles section and search the article
Step 4: Click on Unpublish button
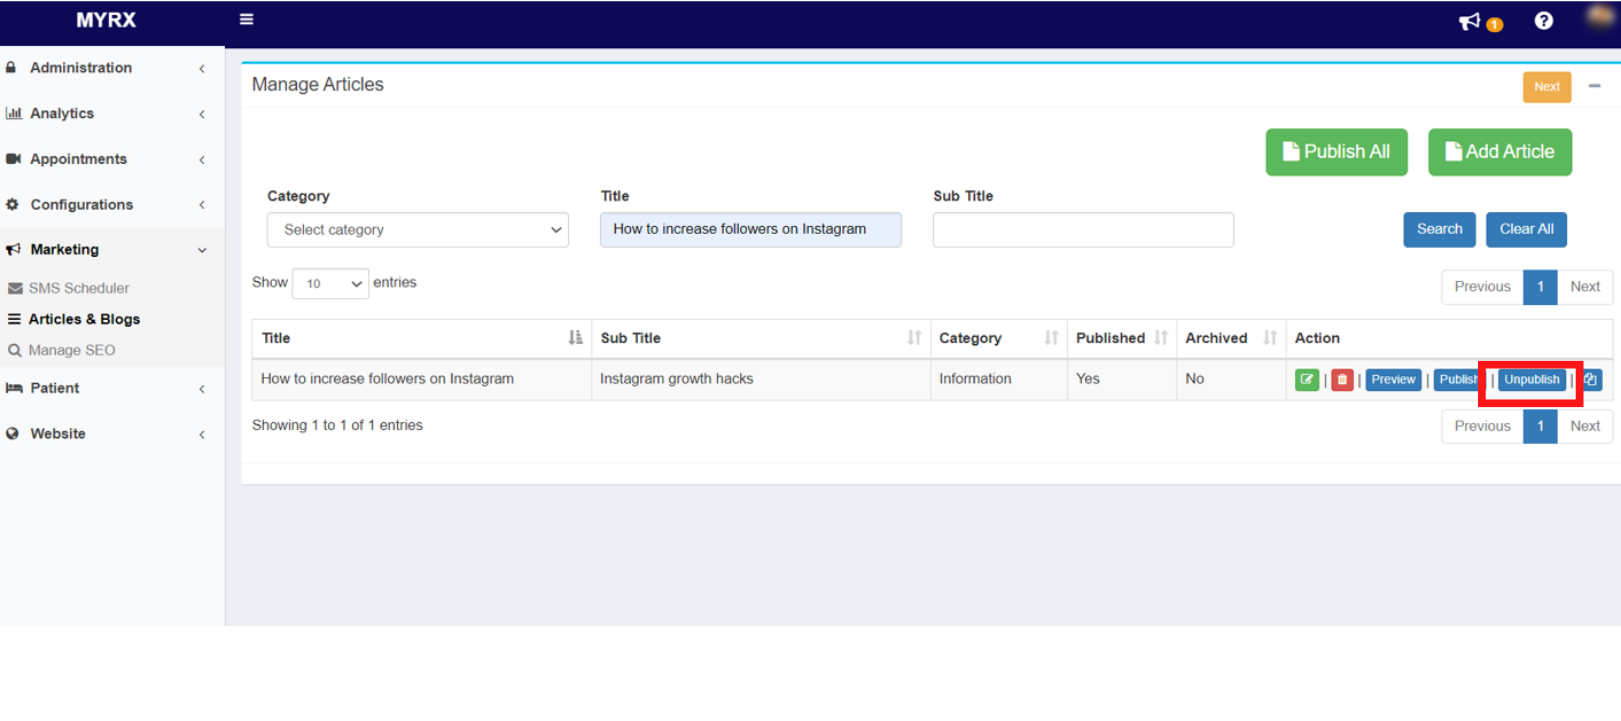
The article will be successfully removed from your website.
How to preview an article before publishing in MyRx?
Step 1: Go to MyRx Login Page
Step 2: Go to Marketing -> Articles & Blogs
Step 3: Create a new article / search for an existing article in Manage Articles section
Step 4: Click on Preview for the required article
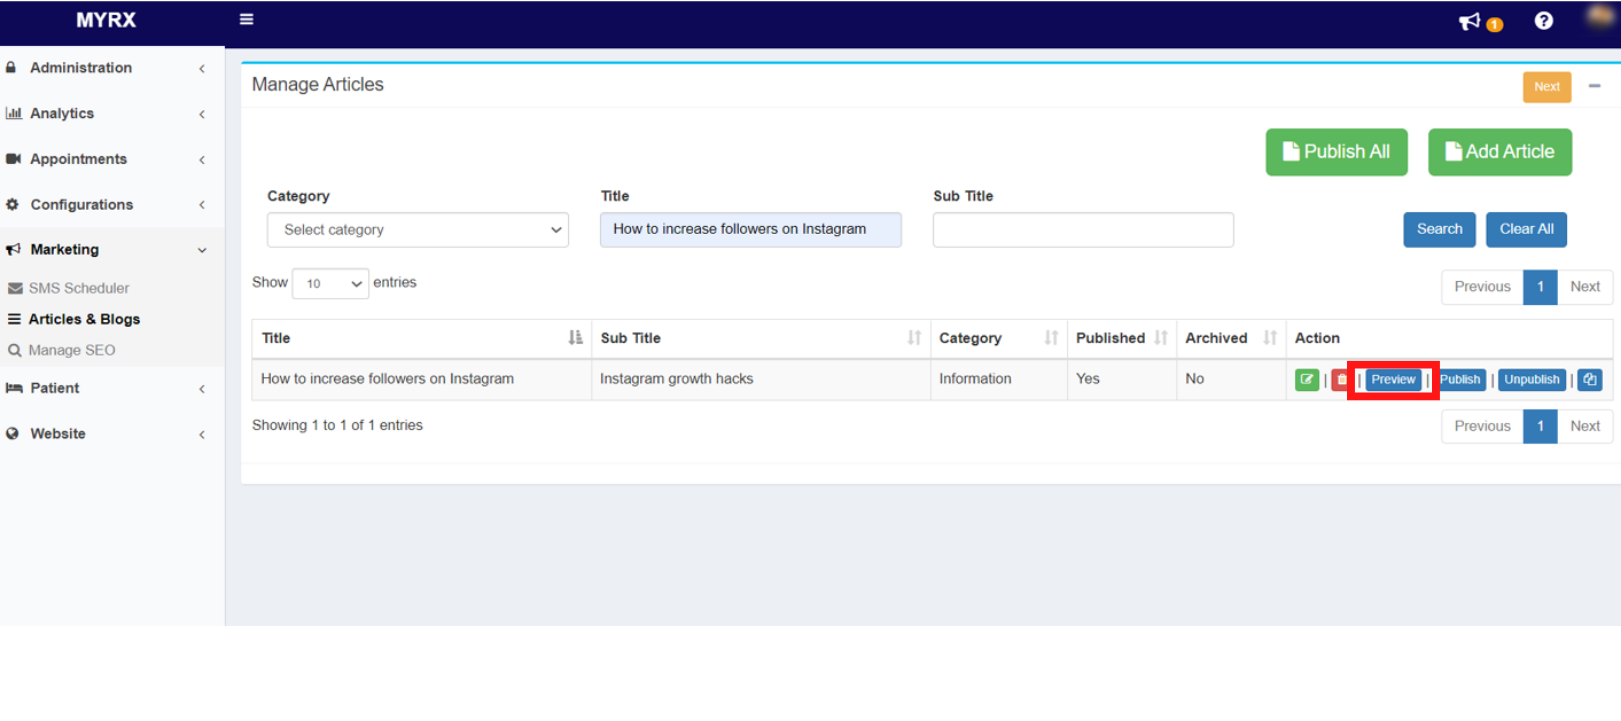
You will be redirected to the article preview page for your website.

How to permanently delete an article from my portal as well as my website in MyRx?
Step 1: Go to MyRx Login Page
Step 2: Go to Marketing -> Articles & Blogs
Step 3 Search for an existing article in Manage Articles section
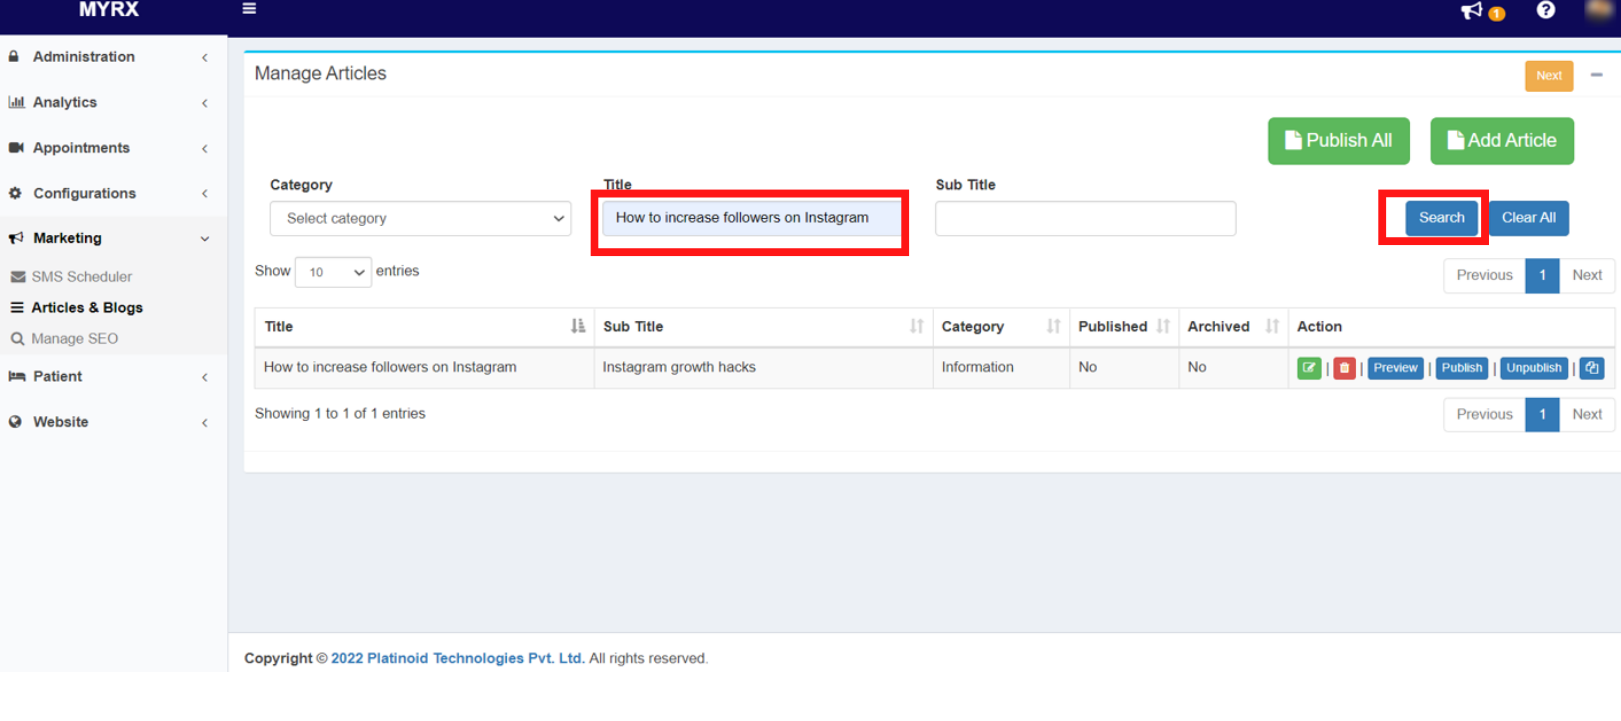
Step 4: Click on Delete icon for the required article
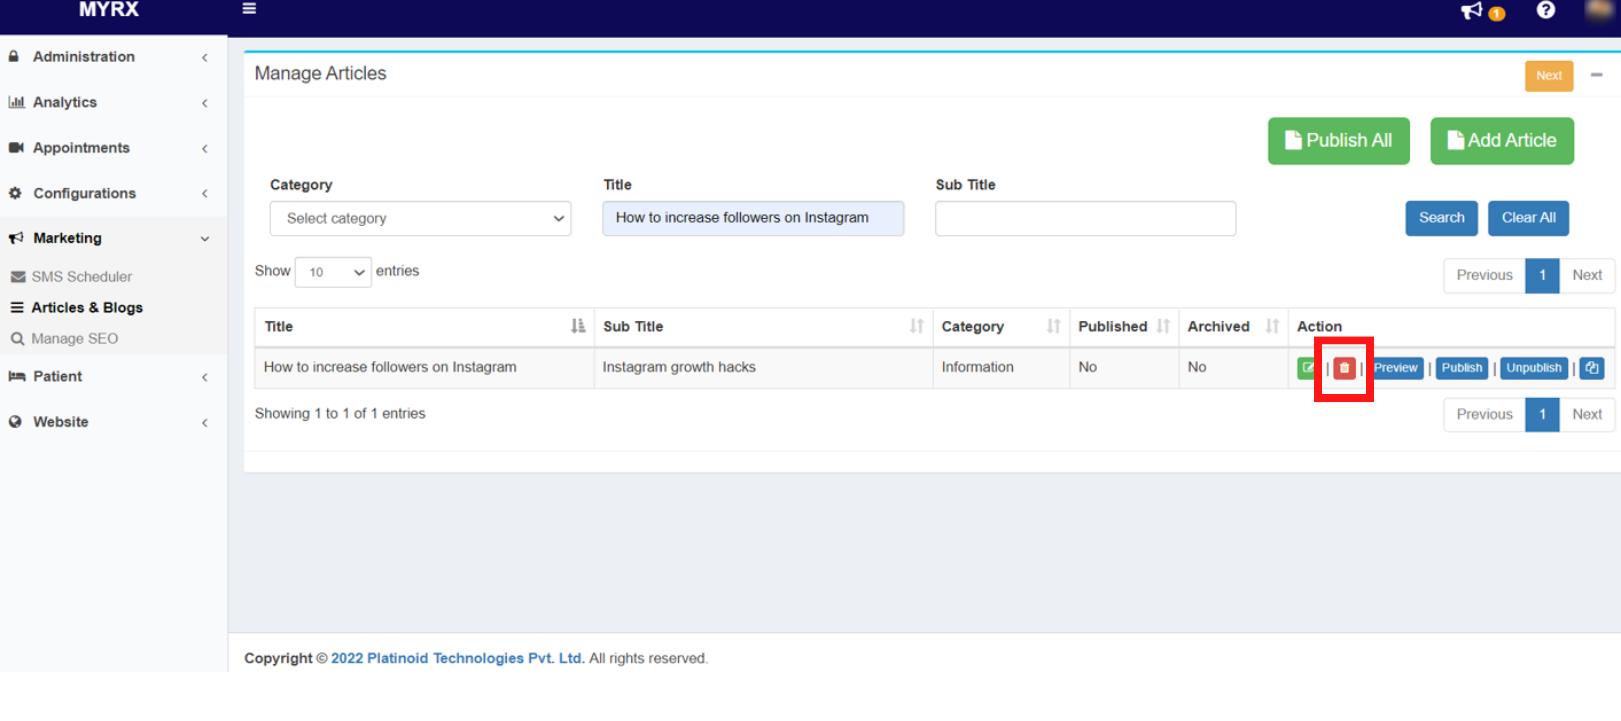
Step 5 : Click on the Delete option for the “ Are you sure you want to delete your article” popup. (This action can not be undone)
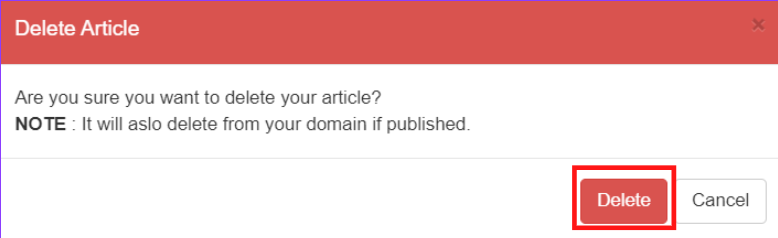
The requested article will be successfully removed.
9. Gallery
How to add/ update the homepage image of my website in MyRx?
Step 1: Go to MyRx Login Page
Step 2: Go to Website -> Gallery
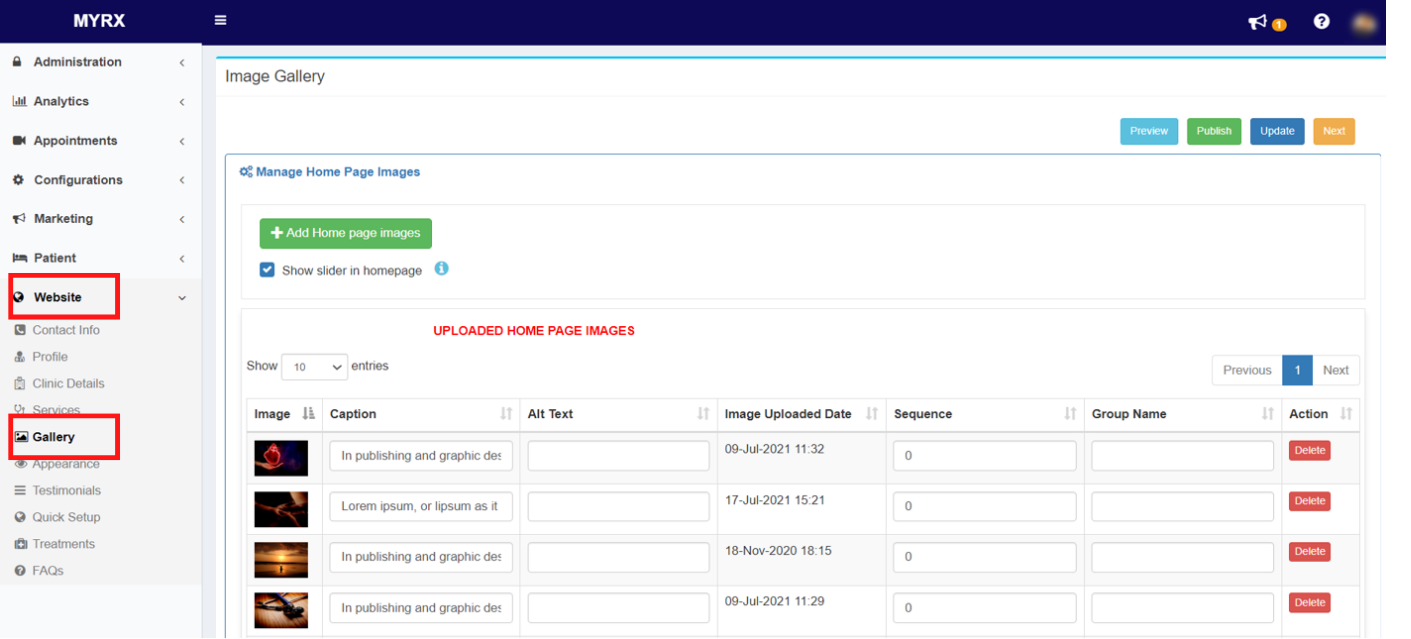
Step 3: Click on “Add Home page images” under the Home Image section.
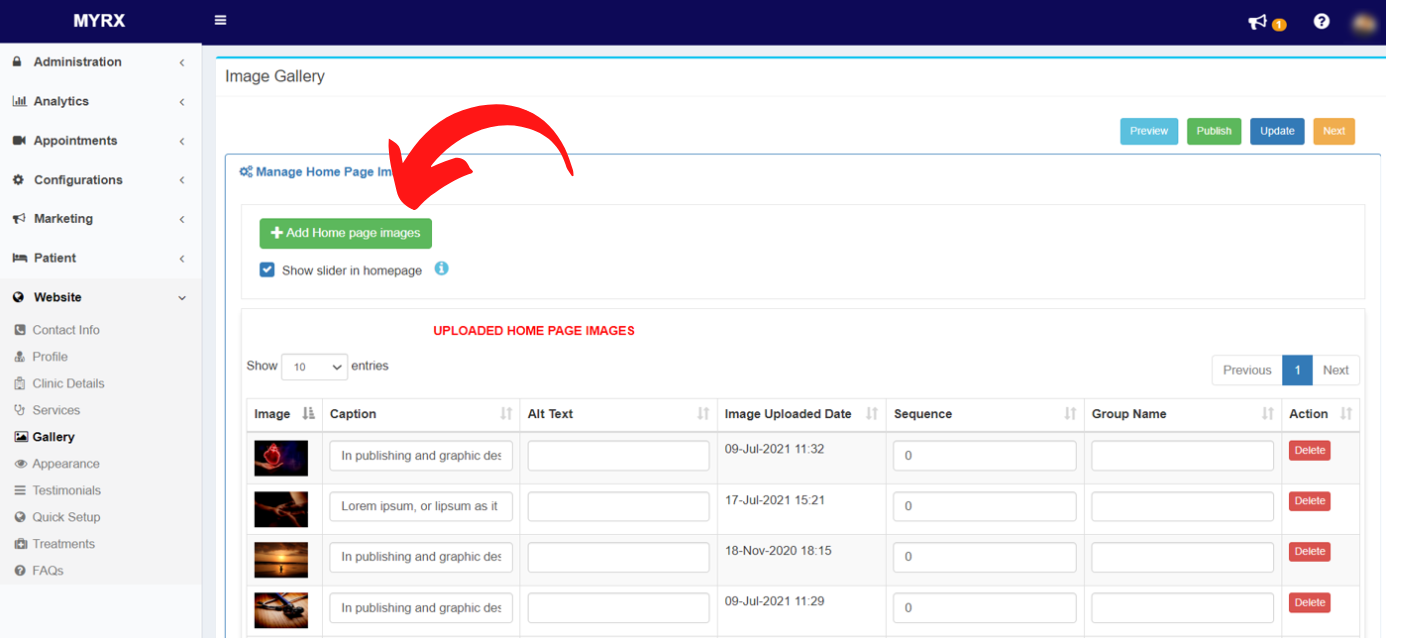
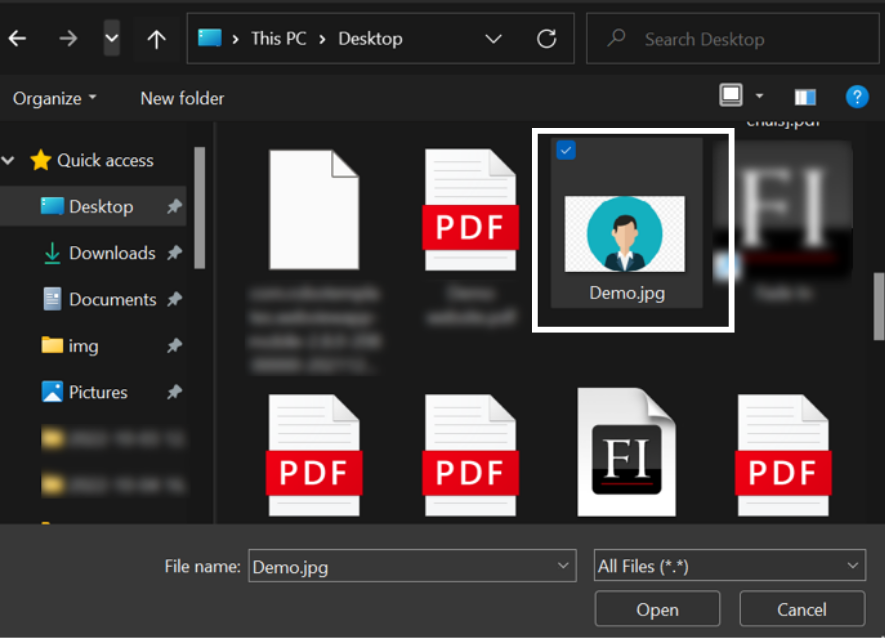
Step 4: Select an Image from your PC/ Mobile.
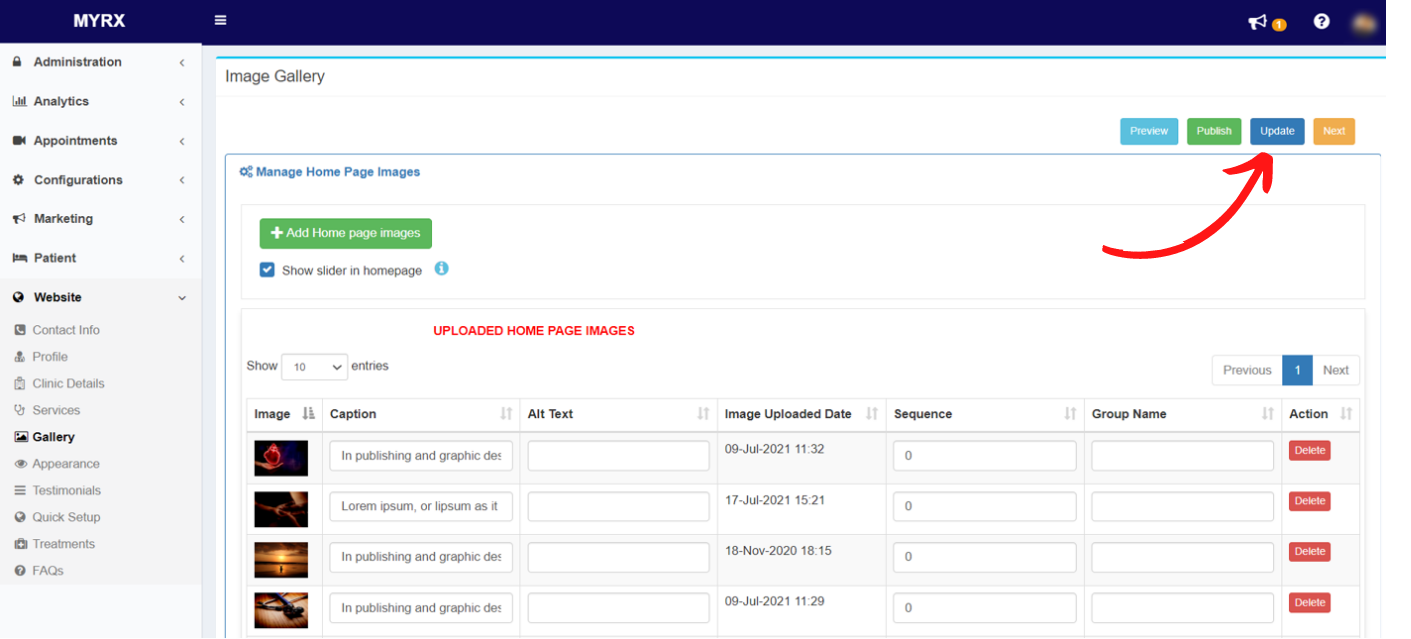
Step 5: Click on the Update button on the top right corner.
Step 6: Go to Website -> Gallery
Step 7: Click on the Publish button to update the changes on your website.
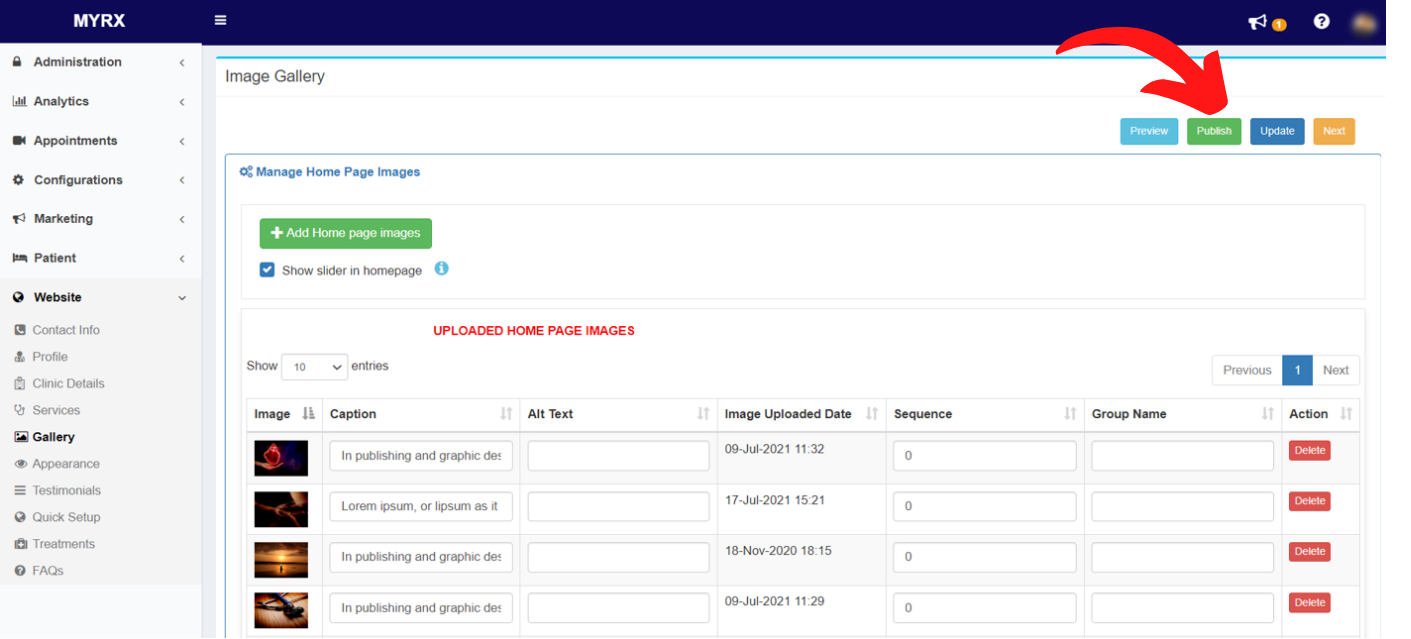
Step 8: Publish Website confirmation message will pop up. Click on Publish button
Step 9: Click on the Ok button on the publish confirmation pop up.
The homepage image will be updated and the same will be reflected on your website.
How to add images to the Gallery section on my website in MyRx?
Step 1: Go to MyRx Login Page
Step 2: Go to Website -> Gallery
Step 3: Click on “Add gallery images” under the Gallery Images section.
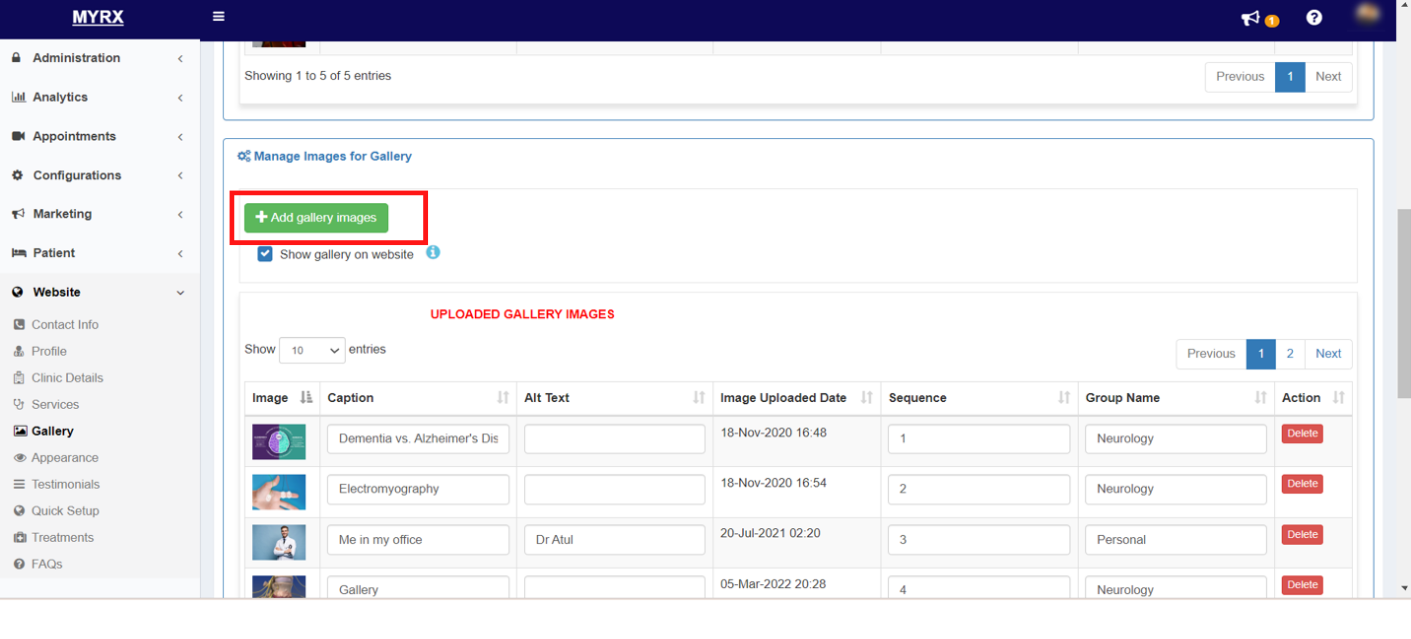
Step 4: Select an Image/ multiple images from your PC/ Mobile.
Step 5: Click on the Update button at the bottom of the Image Gallery page.
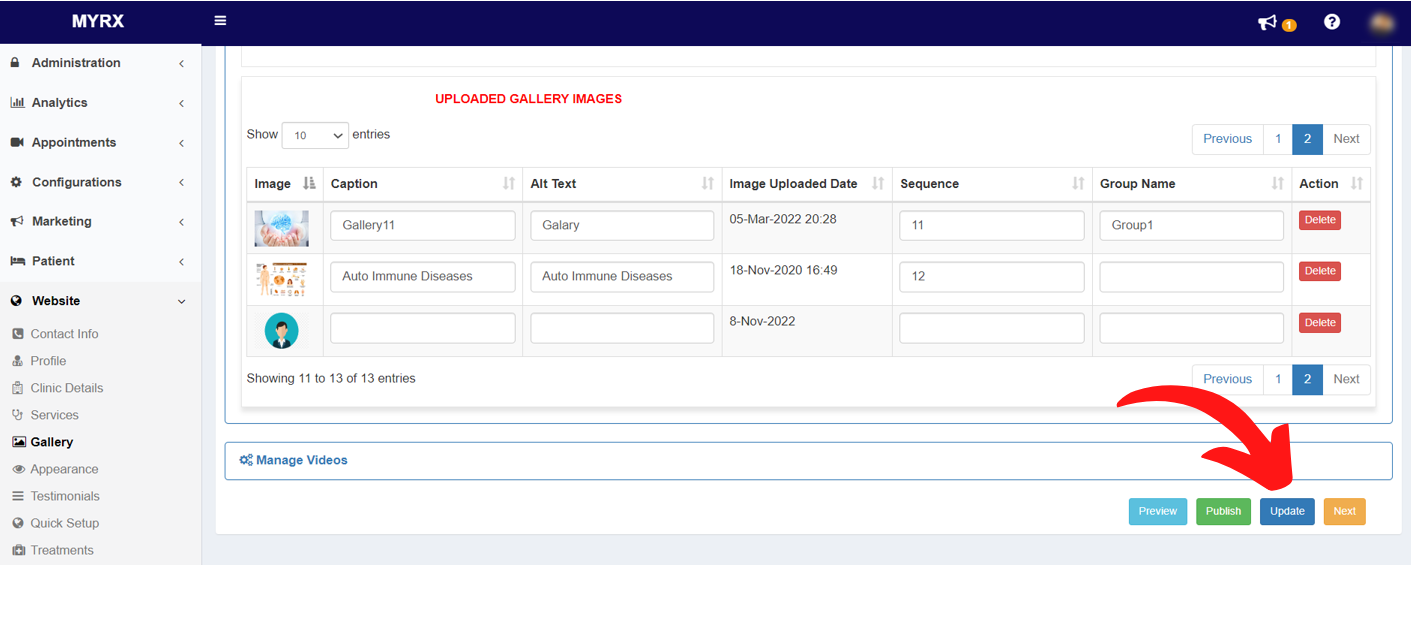
Step 6: Go to Website -> Gallery
Step 7: Click on the Publish button to update the changes on your website.
Step 8: Publish Website confirmation message will pop up. Click on Publish button
Step 9: Click on the Ok button on the publish confirmation pop up.
The gallery images will be added and the same will be reflected on your website.
How to delete an Image from the Gallery section on my website in MyRx?
Step 1: Go to MyRx Login Page
Step 2: Go to Website -> Gallery
Step 3: Search for the image to be deleted from the Image table.
Step 4: Click on ‘Delete’ action button against the image to be deleted.
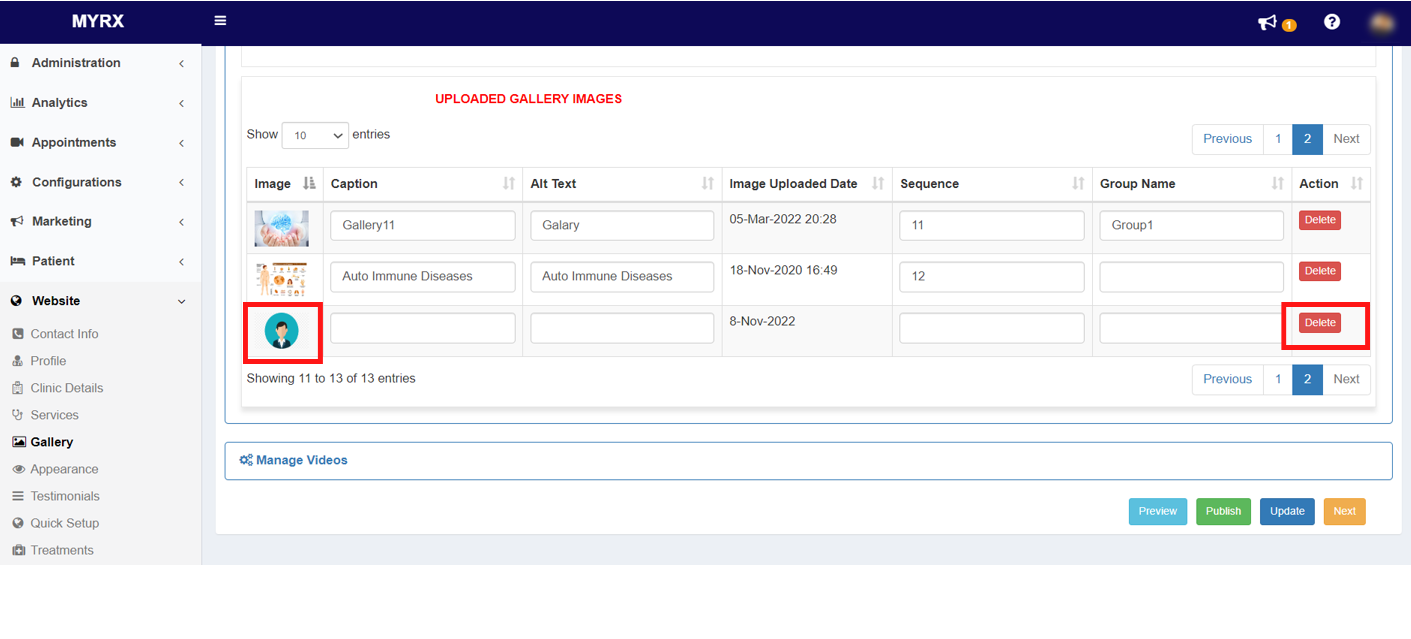
Step 5: Click on the Update button at the bottom of the Image Gallery page.
Step 6: Go to Website -> Gallery
Step 7: Click on the Publish button to update the changes on your website.
Step 8: Publish Website confirmation message will pop up. Click on Publish button
Step 9: Click on the Ok button on the publish confirmation pop up.
The gallery images will be added and the same will be reflected on your website.
10. Appearance
How to change the appearance of my website in MyRx?
Step 1: Go to MyRx Login Page
Step 2: Go to Website -> Appearance
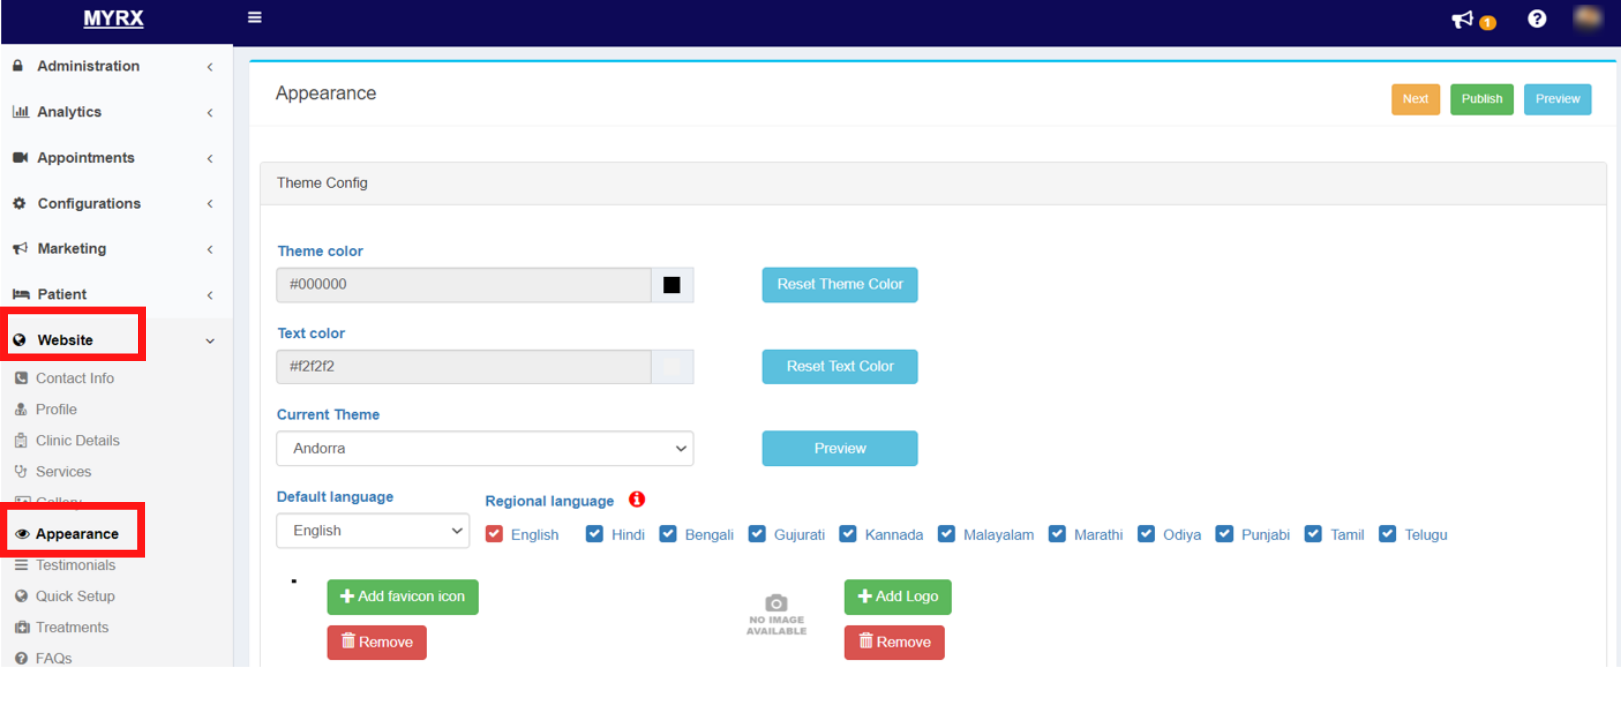
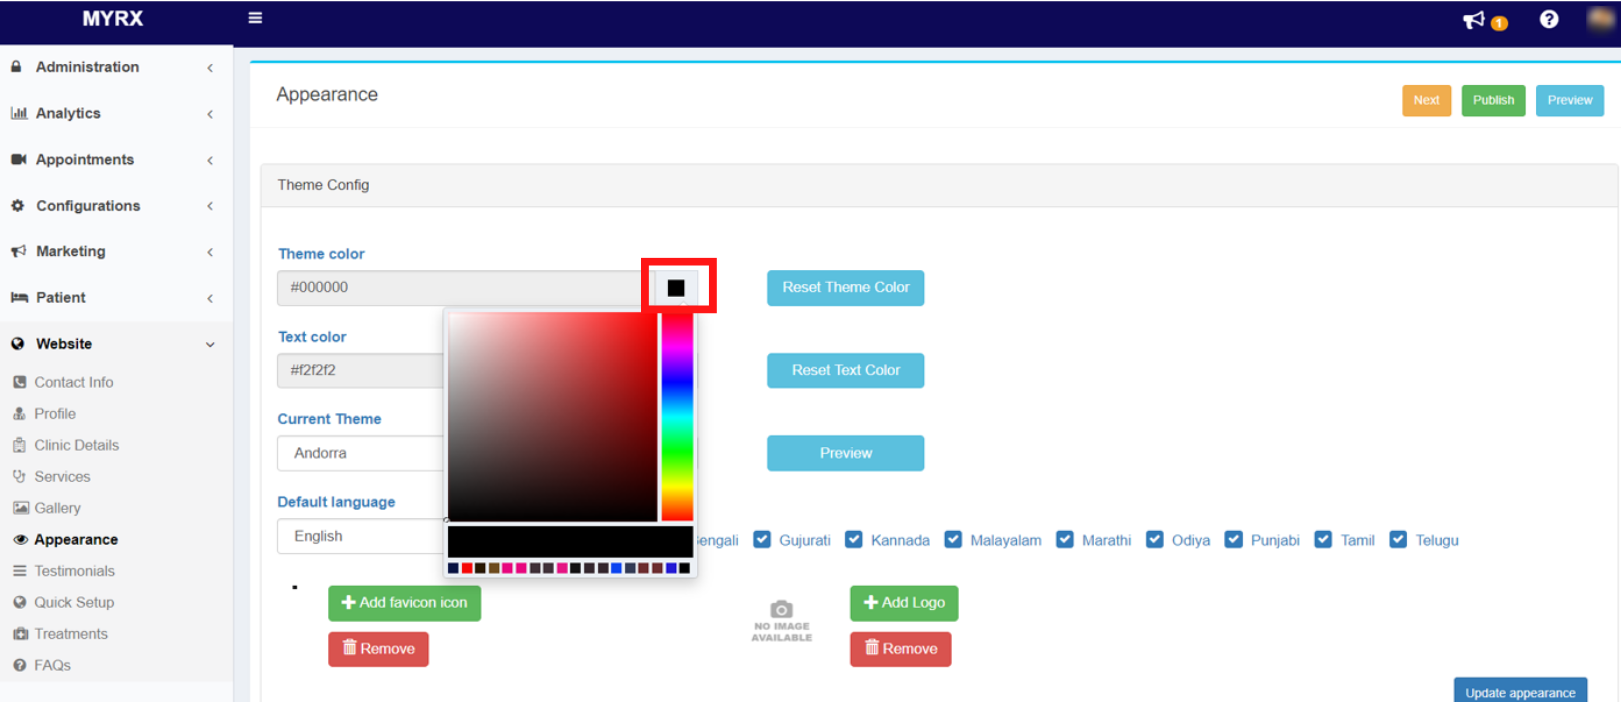
Step 3: Click on the color box under the “Theme Color” and select the desired color.
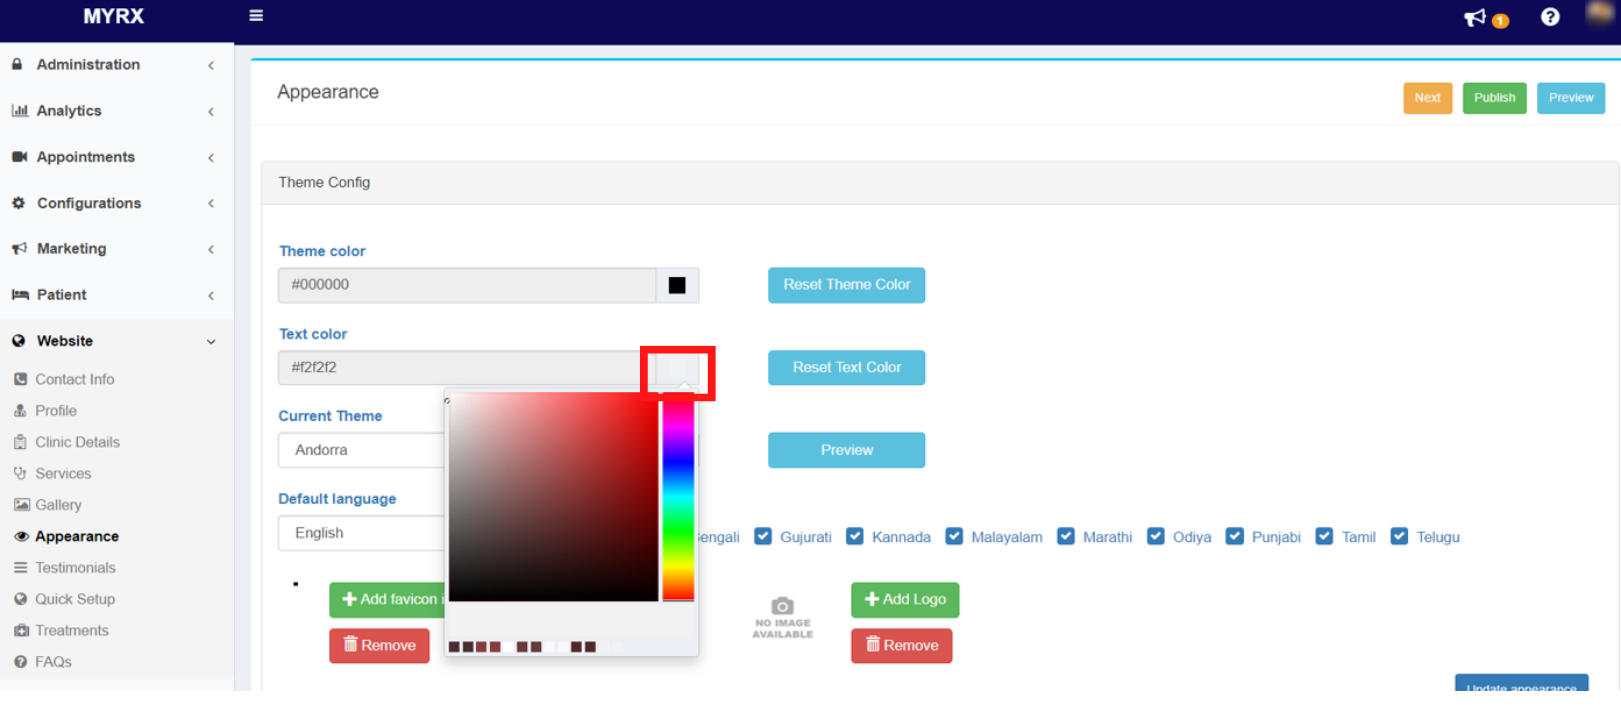
Step 4: Click on the Color box under Text color to choose a color contrasting with the theme color for elegant appearance.
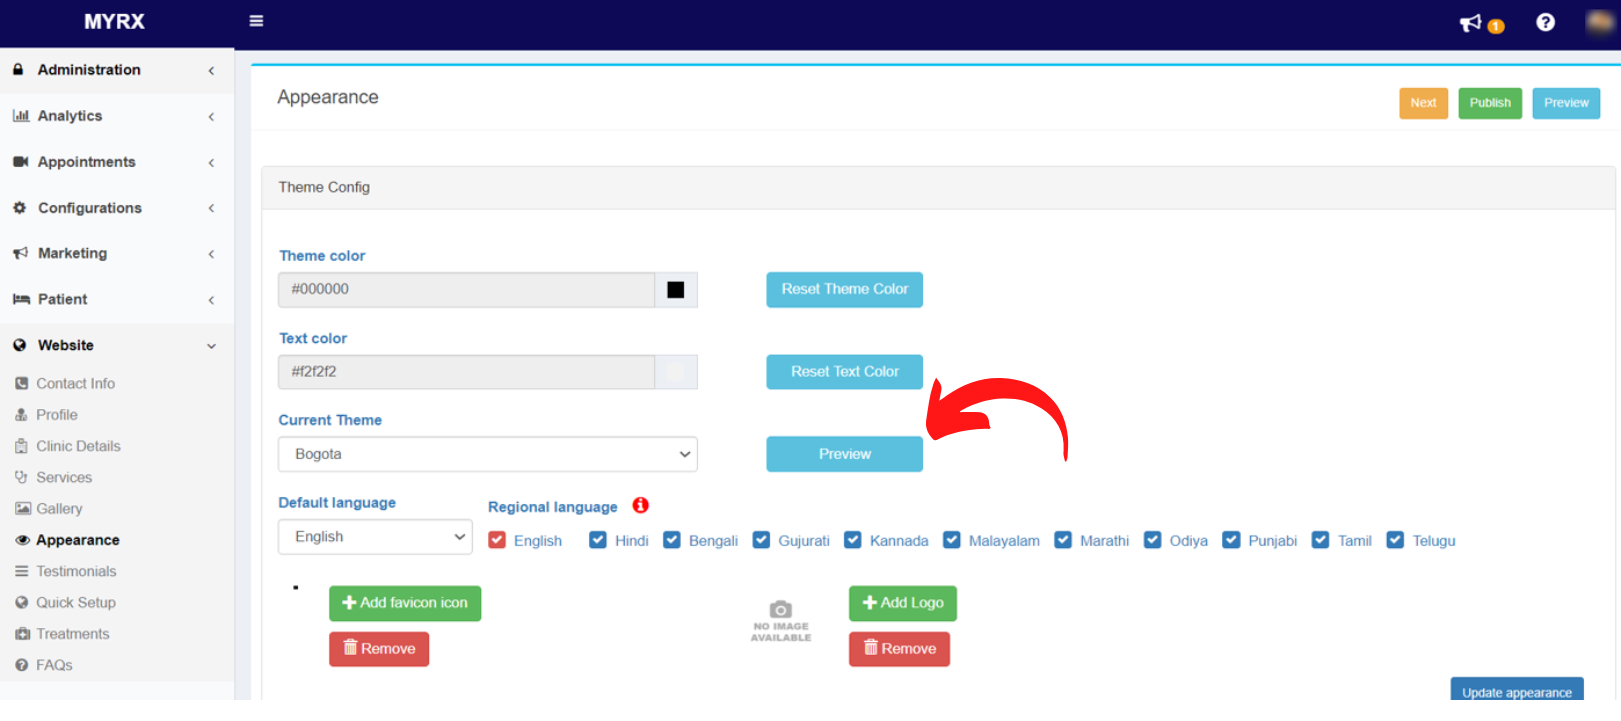
Step 5: Select a desired theme from the dropdown under Current theme
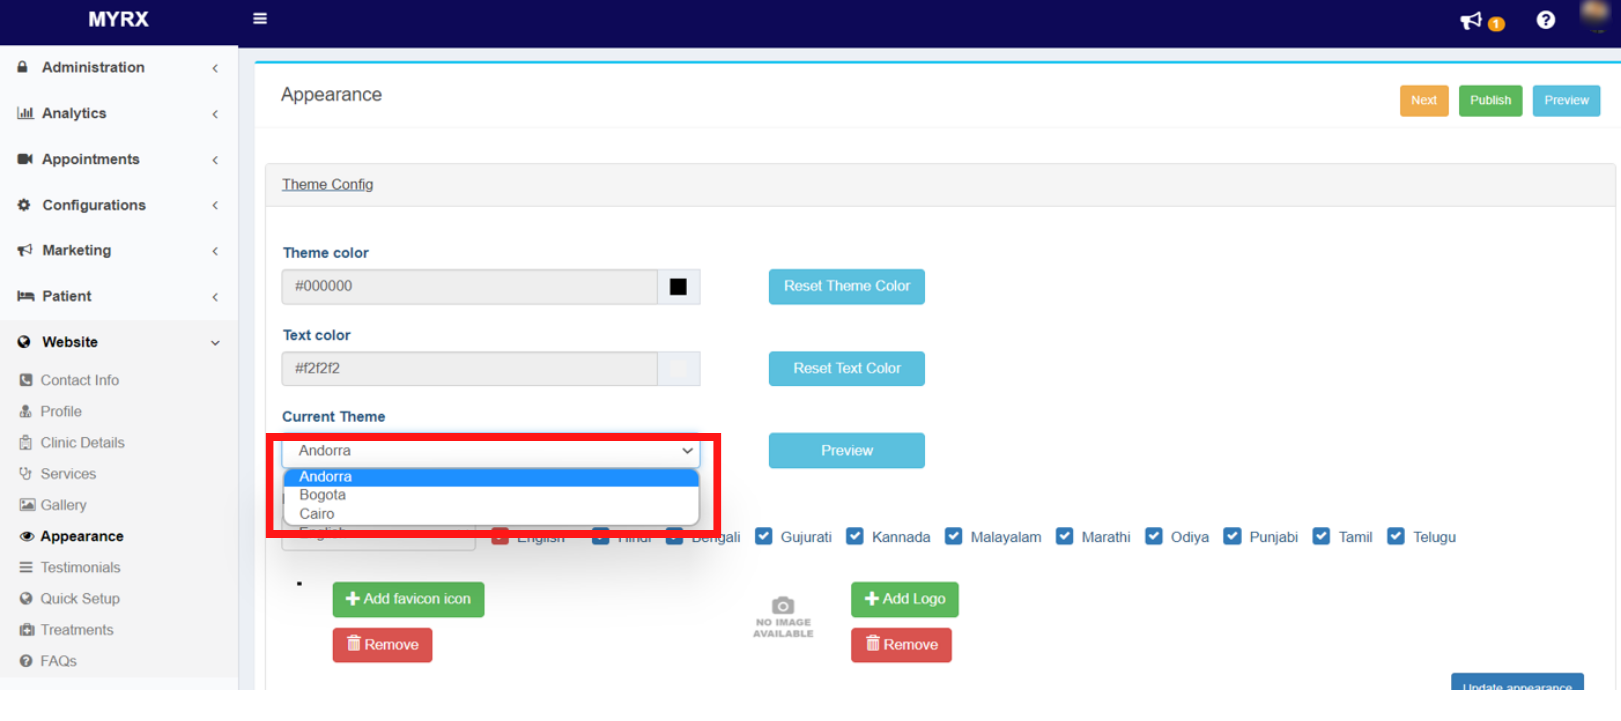
Step 6: Click on the Preview button to review the appearance of your website.
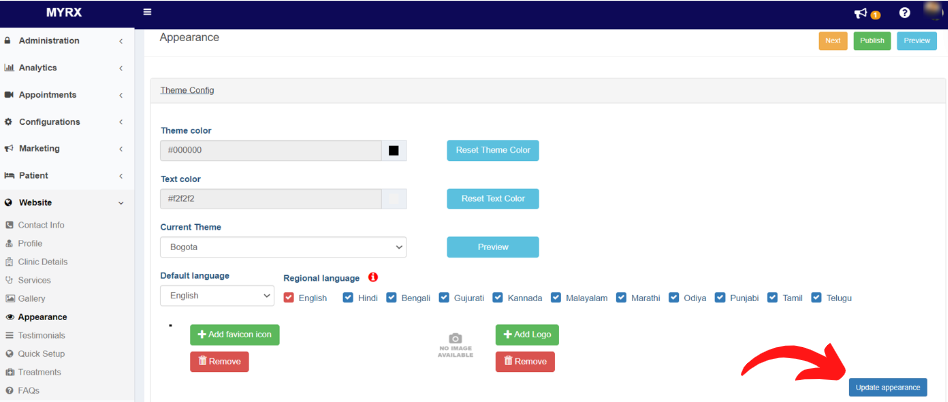
Step 7:Click on the Update button.
Step 8: Go to Website -> Appearance
Step 9: Click on the Publish button to update the changes on your website.
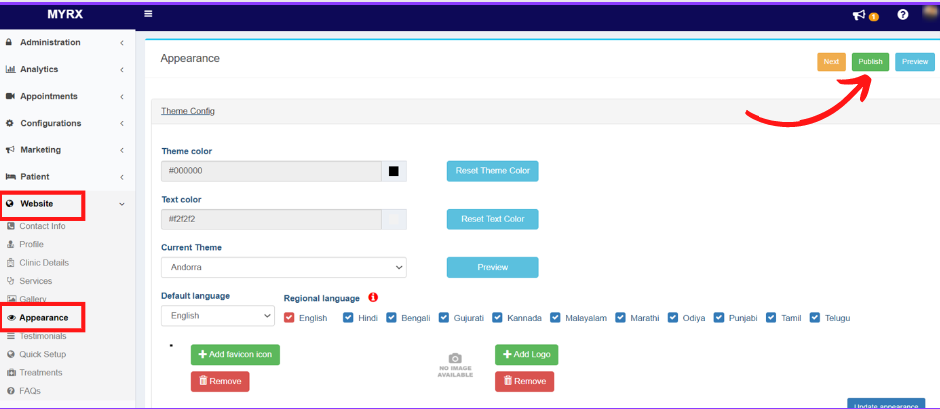
Step 10: Publish Website confirmation message will pop up. Click on Publish button

Step 11: Click on the Ok button on the publish confirmation pop up.
The appearance of the website will be modified and the same will be reflected on your website.
11. Services
How to add a new Service in MyRx?
Step 1: Go to MyRx Login Page
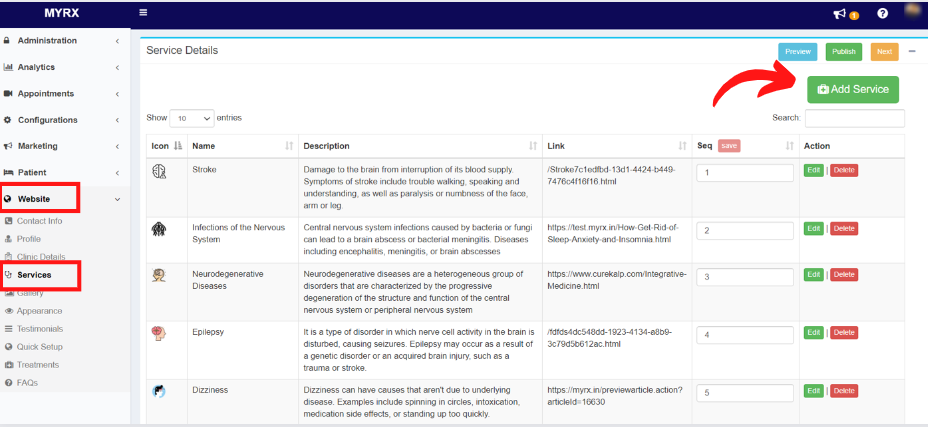
Step 2: Go to Website -> Services -> Add service button
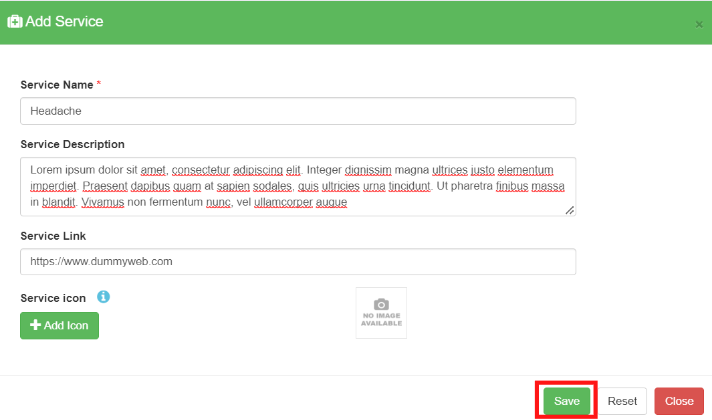
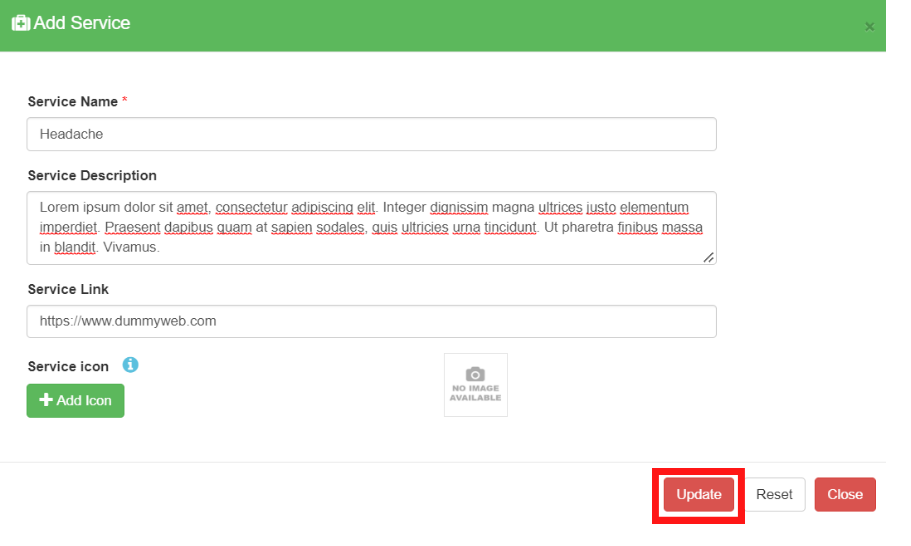
Step 3: Enter Service Name, Service Description and Price (if required).
Step 4: Click on the Save button.
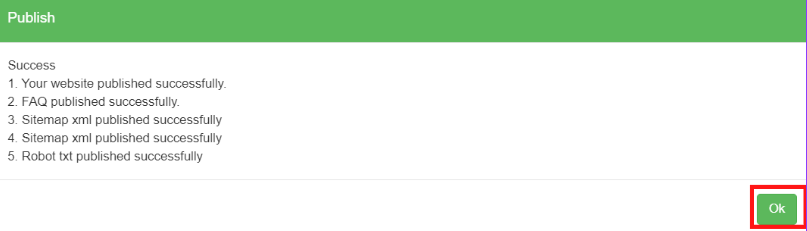
Step 5: Service details will be saved successfully.Click Ok on the confirmation message.

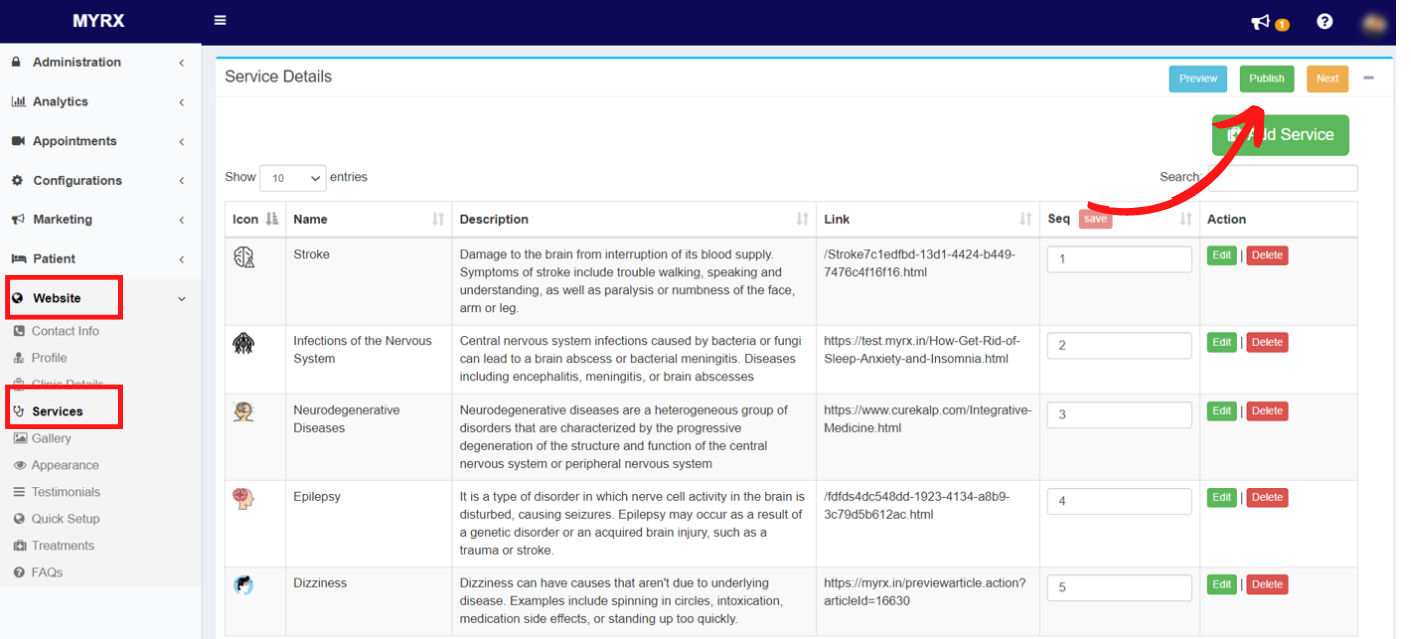
Step 6: Go to Website -> Services
Step 7: Click on the Publish button to update the changes on your website.
Step 8: Publish Website confirmation message will pop up. Click on Publish button
Step 9: Click on the Ok button on the publish confirmation pop up.
The newly added Service will be reflected on your website in the Services section.
How to Modify an existing Service on my website in MyRx?
Step 1: Go to MyRx Login Page
Step 2: Go to Website -> Services
Step 3: Search for the required service by entering the service name on the Search box or by scrolling through the list of services.
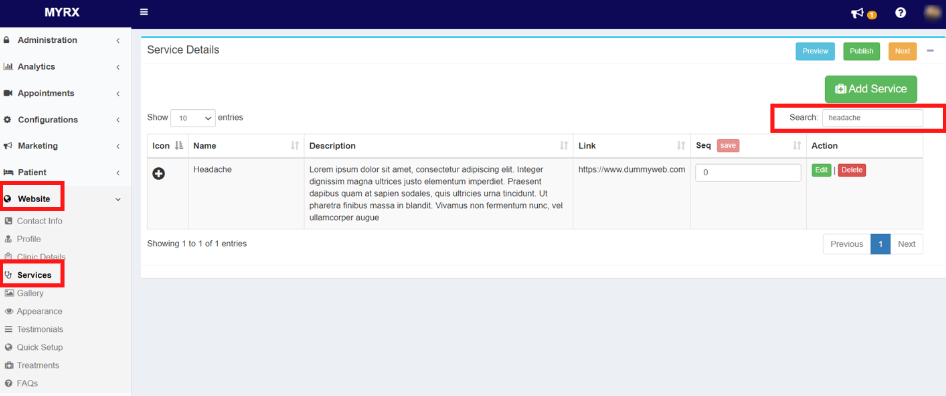
Step 4: Click on the Edit button against the service to be modified.

Step 5: Make necessary changes in the Create Services section.
Step 6: Click on Update Button.
Step 7: Service details will be saved successfully. Click Ok on the confirmation message.
Step 8: Go to Website -> Services
Step 9: Click on the Publish button to update the changes on your website.
Step 10: Publish Website confirmation message will pop up. Click on Publish button
Step 11: Click on the Ok button on the publish confirmation pop up.
The modified Service will be reflected on your website under the Services section with the recent changes. 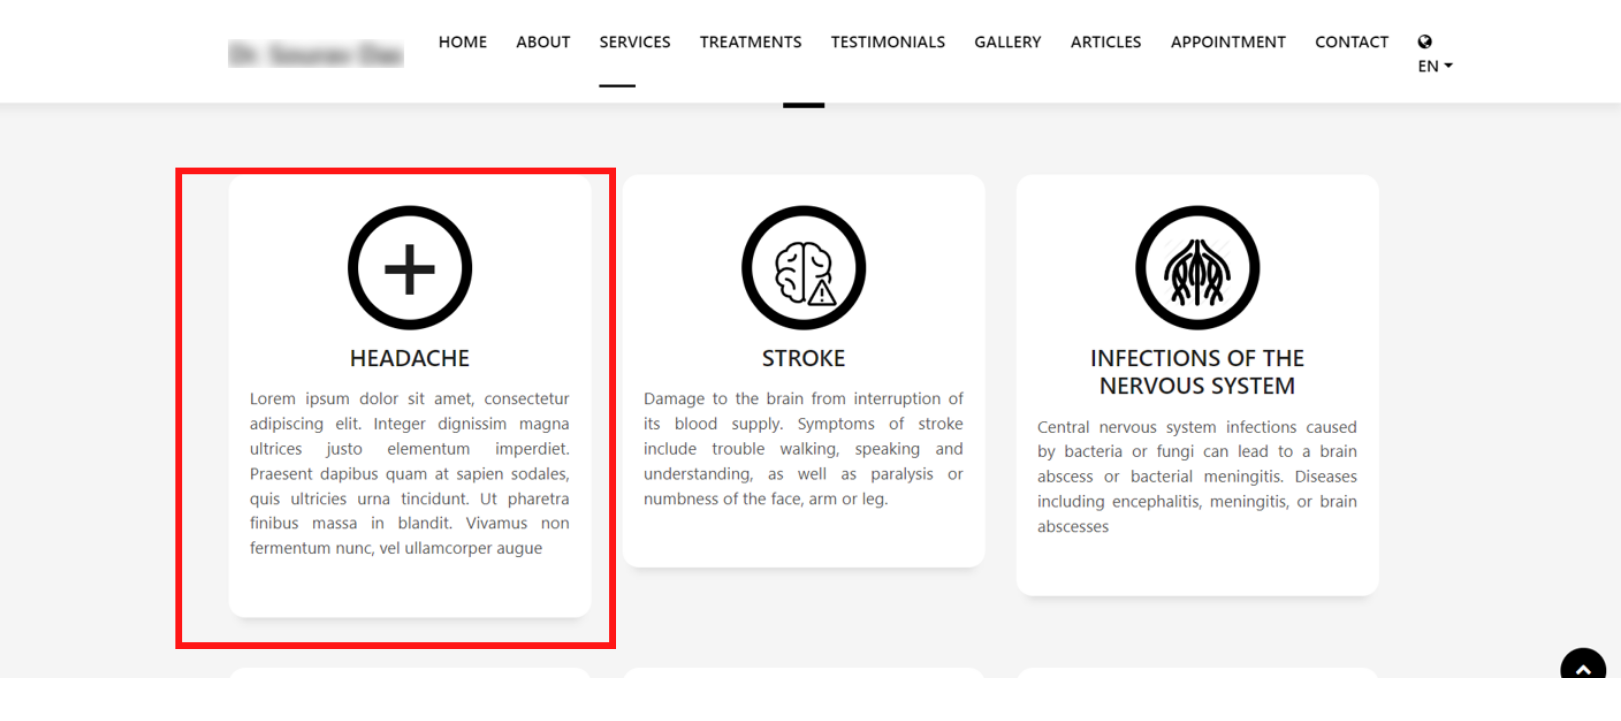
How to Delete an existing Service from my website in MyRx?
Step 1: Go to MyRx Login Page
Step 2: Go to Website -> Services
Step 3: Search for the required service by entering the service name on the Search box or by scrolling through the list of services.
Step 4: Click on the Delete button against the service to be modified.
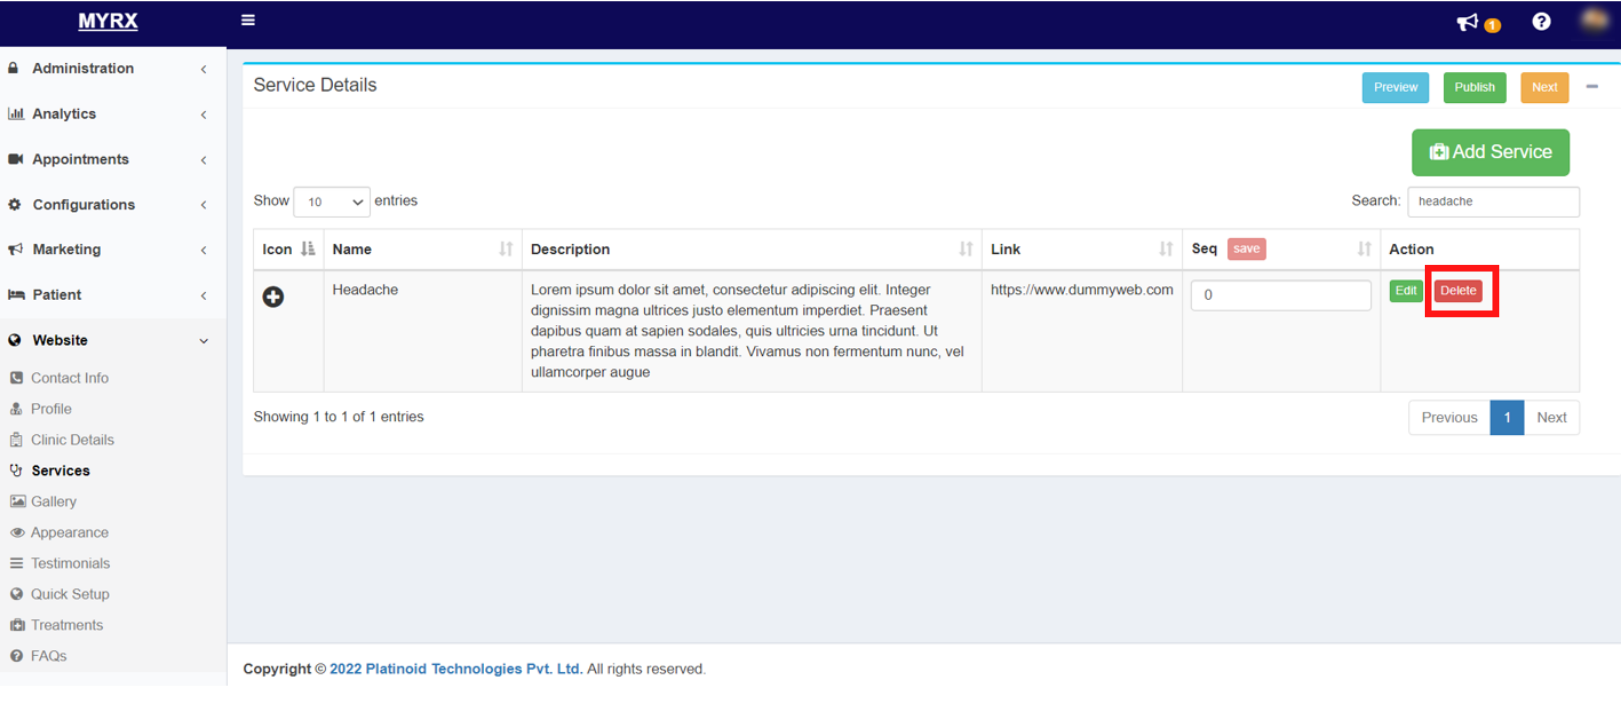
Step 5: Delete Service message will pop up, Click on Delete
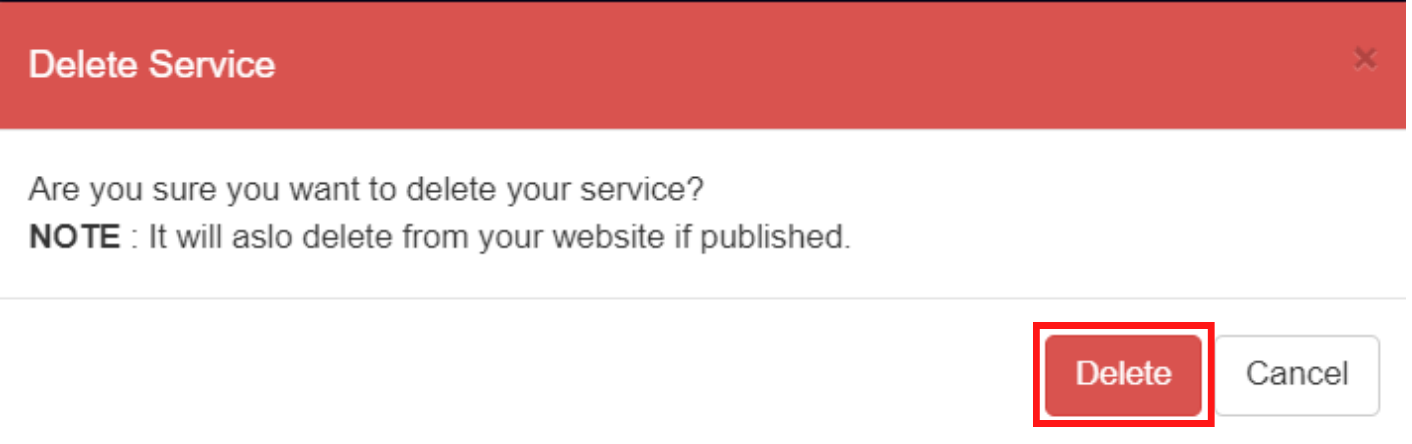
Step 6: Service delete confirmation will pop up, Click Ok

Step 7: Go to Website -> Services
Step 8: Click on the Publish button to update the changes on your website.
Step 9: Publish Website confirmation message will pop up. Click on Publish button
Step 10: Click on the Ok button on the publish confirmation pop up.
The deleted Service will no longer be displayed on your website.
12. Testimonials
How to add a new Testimonial on my website in MyRx?
Step 1: Go to MyRx Login Page
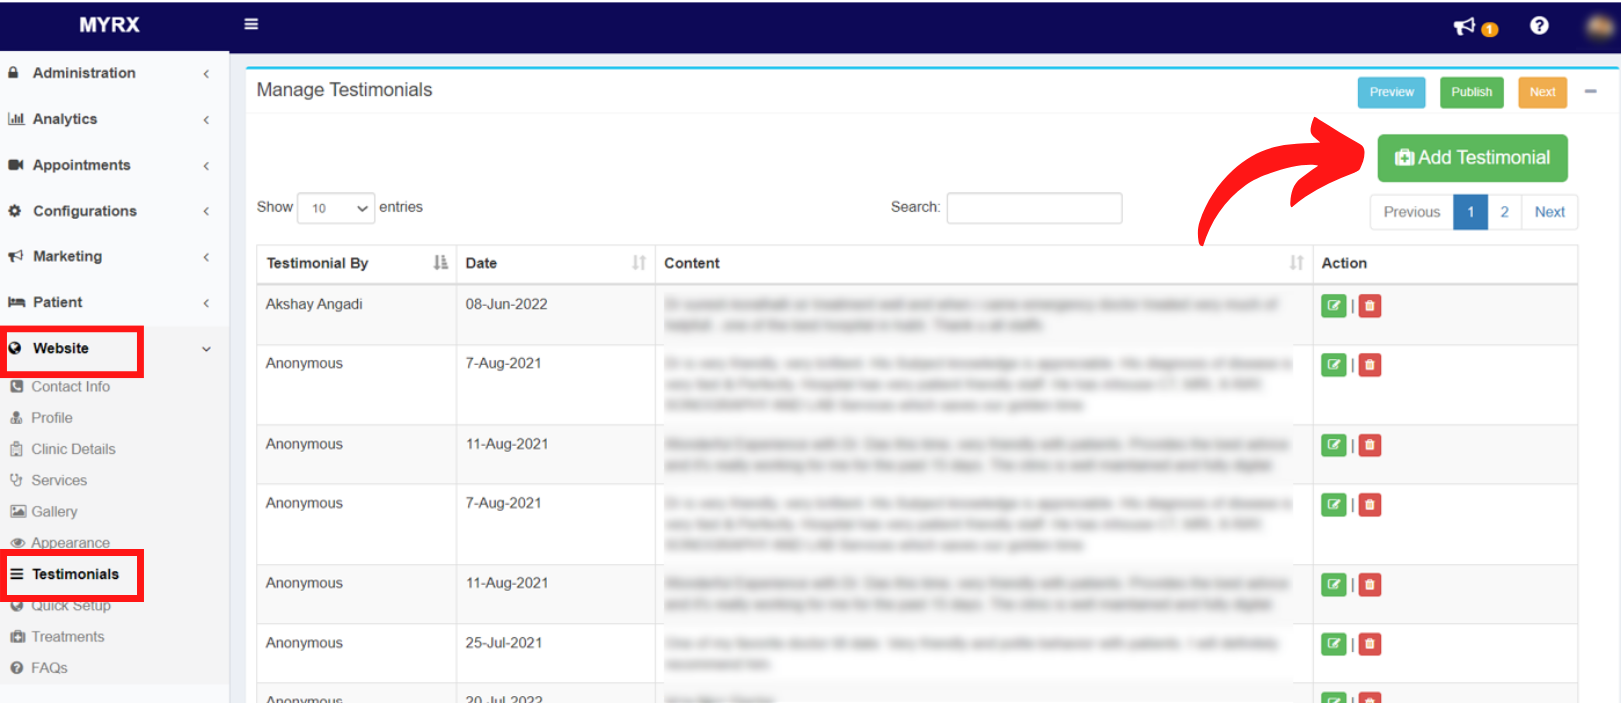
Step 2: Go to Website -> Testimonials section, Click on “Add Testimonial”
Step 3: Enter the name of the reviewer in the “Testimonial Given By” textbox.
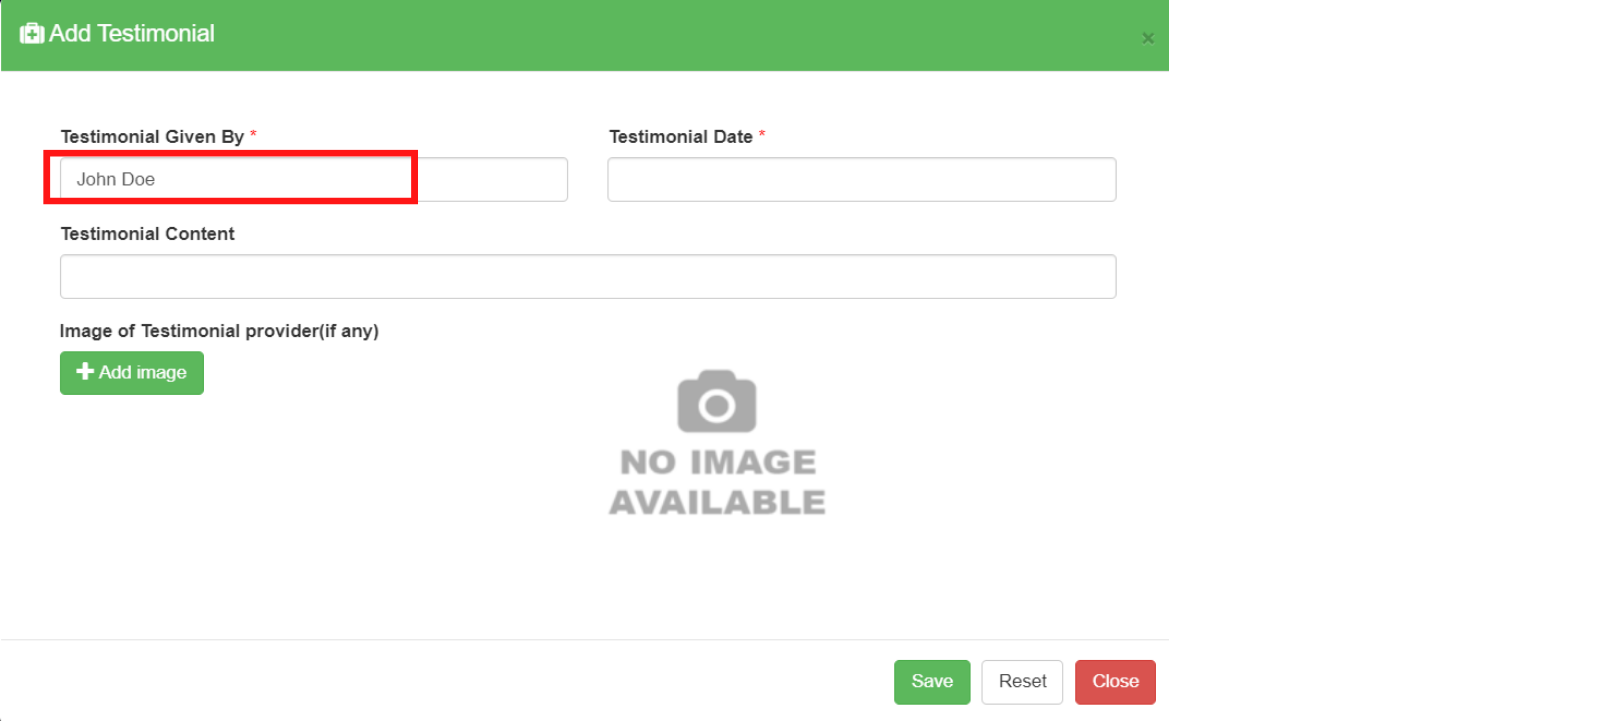
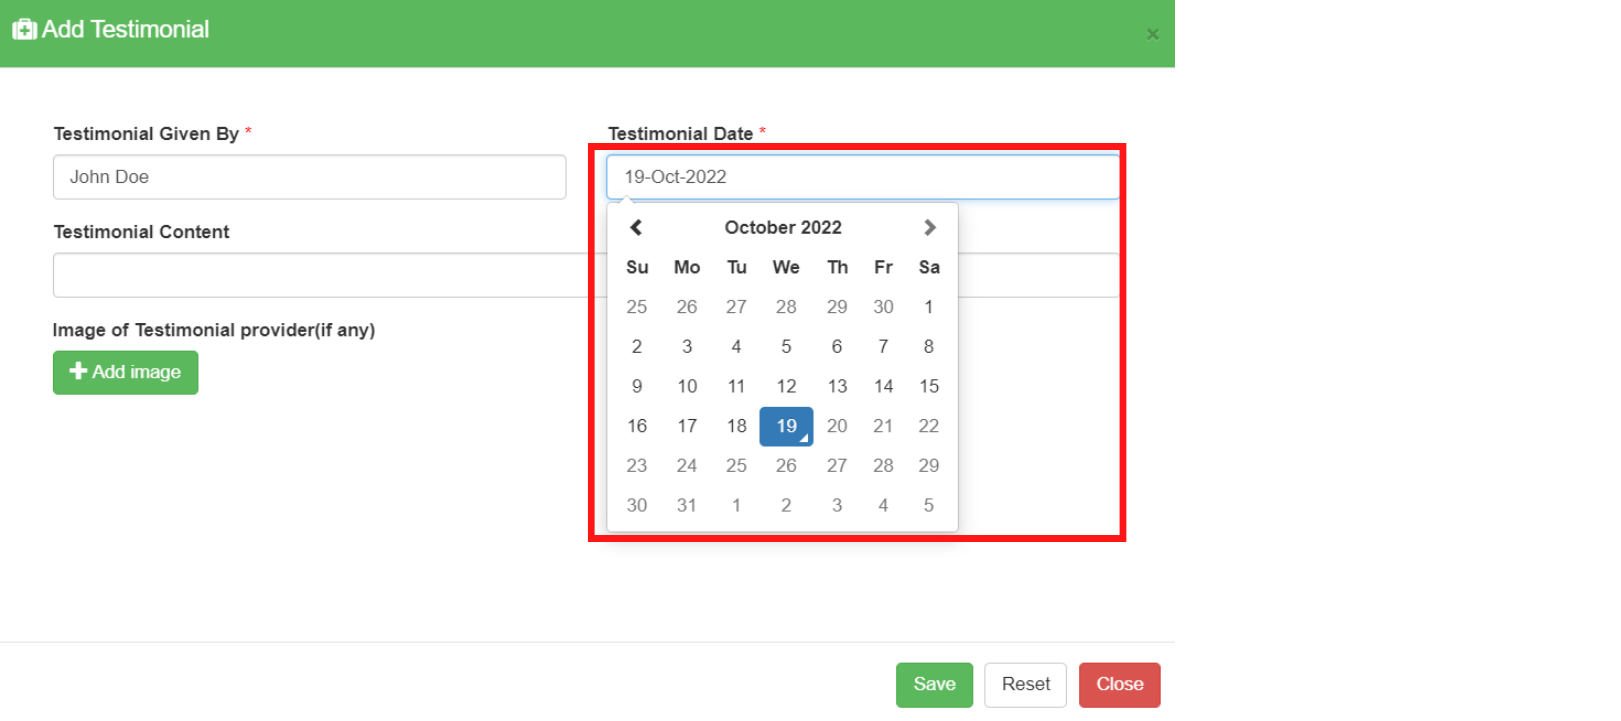
Step 4: Choose the date of review from the calendar under the “Testimonial Date” field.
Step 5: Fill in the Testimonial Content accordingly.
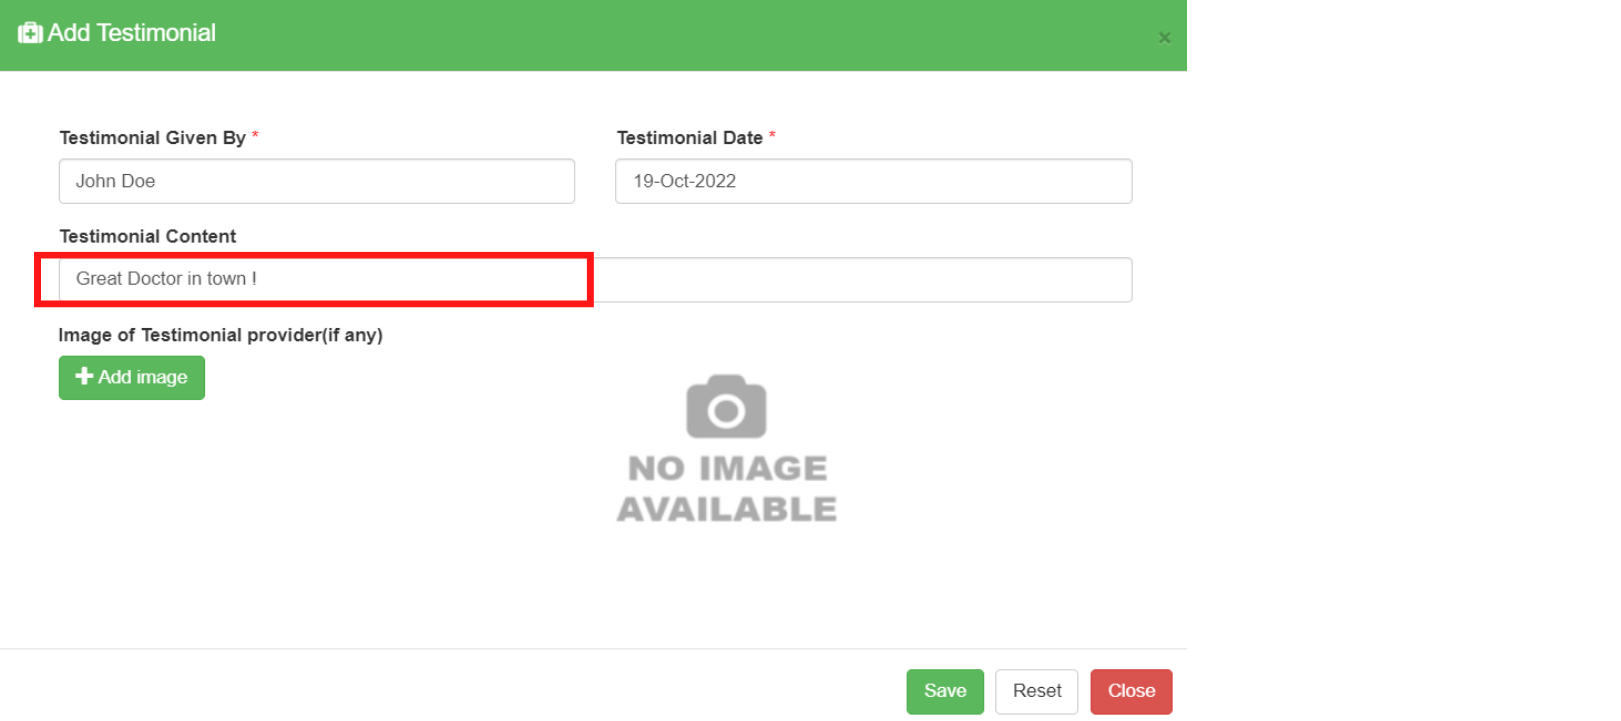
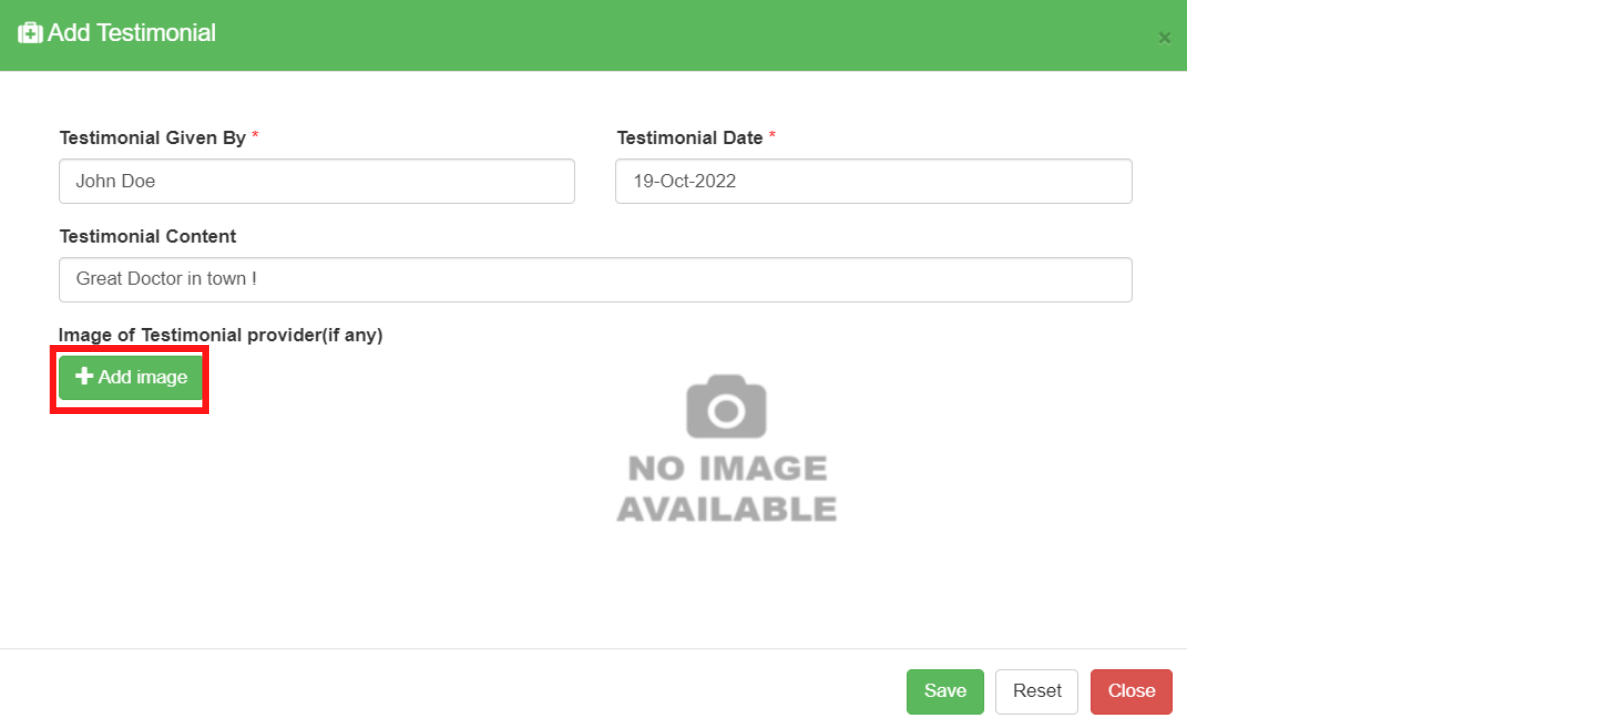
Step 6: Click on Add Image button to select an image of the reviewer , if any.
Step 7: Click on Save button
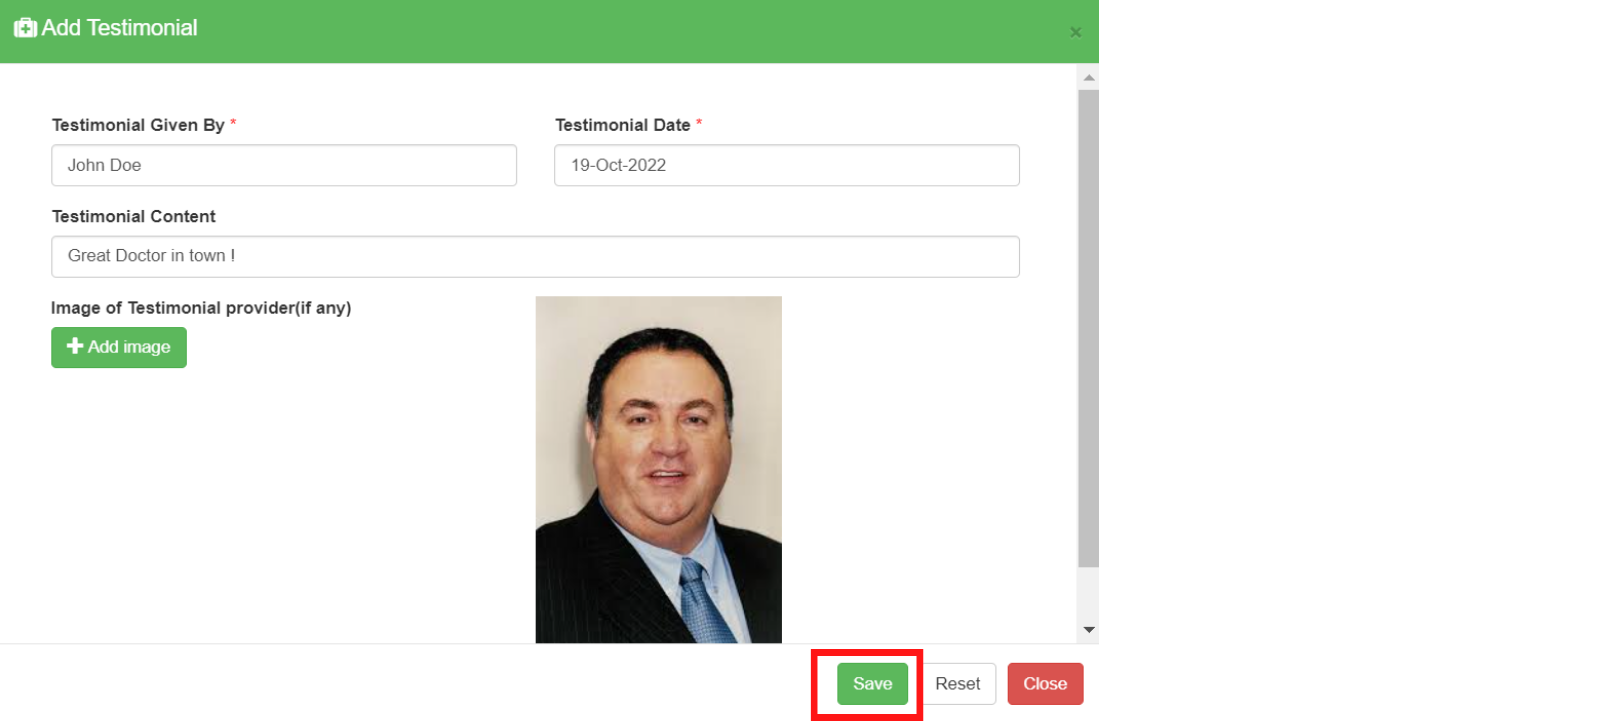
Step 8: Click Ok on the save success message.

Step 9: Go to Website -> Testimonials
Step 10: Click on the Publish button to update the changes on your website.
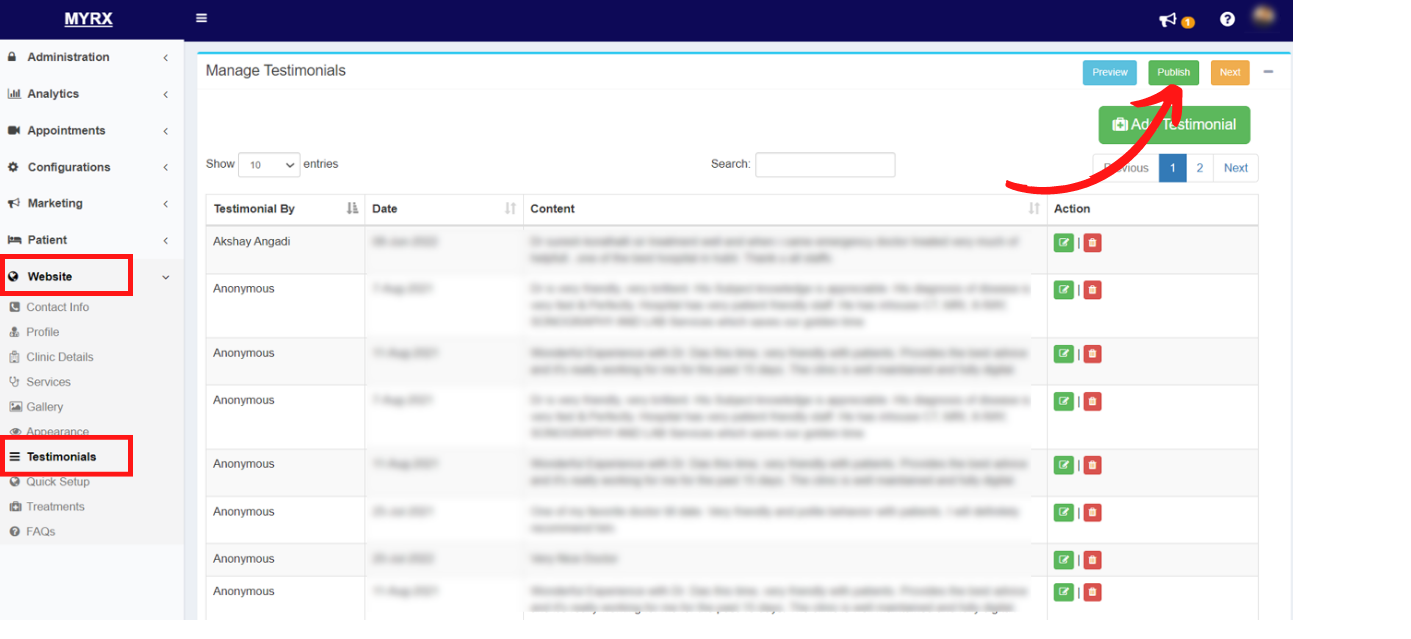
Step 11: Publish Website confirmation message will pop up. Click on Publish button
Step 12: Click on the Ok button on the publish confirmation pop up.
The Testimonial will be updated and the same will be reflected in the Testimonials section of your MyRx website.
How to modify an existing Testimonial from my website in MyRx?
Step 1: Go to MyRx Login Page
Step 2: Go to Website -> Testimonials
Step 3: Search for the required Testimonial by entering the testimonial name in the Search box or by scrolling through the list of testimonials.
Step 4: Click on the Edit icon against the Testimonial to be modified.
Step 5: Make necessary changes in the Add Testimonial section.
Step 6: Click on Save Button.

Step 7: Testimonial details will be saved successfully. Click Ok on the confirmation message.
Step 8: Go to Website -> Testimonials
Step 9: Click on the Publish button to update the changes on your website.
Step 10: Publish Website confirmation message will pop up. Click on Publish button
Step 11: Click on the Ok button on the publish confirmation pop up.
The Testimonial will be modified and the same will be reflected in the Testimonials section on your MyRx website.
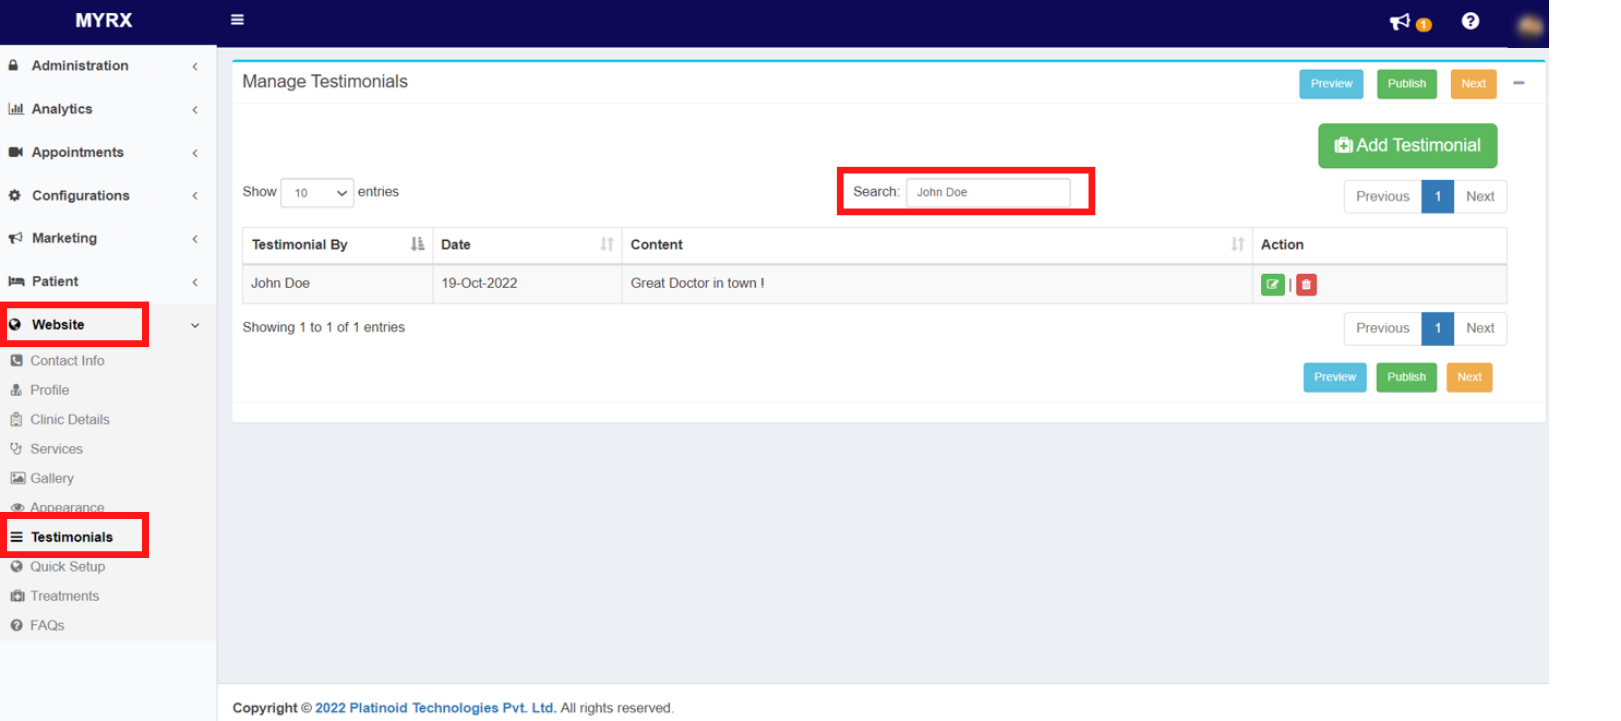
How to Delete an existing Testimonial from my website in MyRx?
Step 1: Go to MyRx Login Page
Step 2: Go to Website -> Testimonials
Step 3: Search for the required Testimonial by entering the testimonial name in the Search box or by scrolling through the list of testimonials.
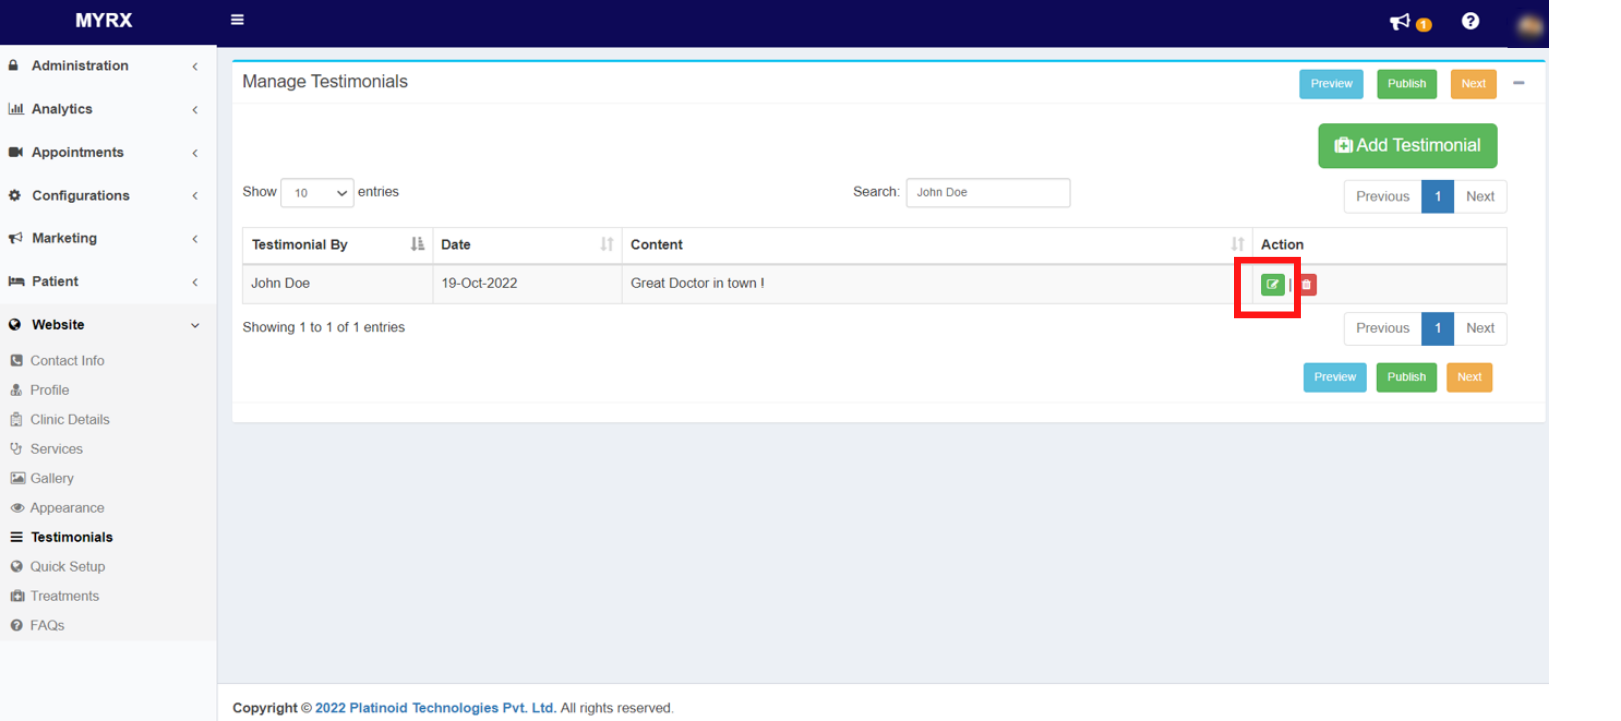
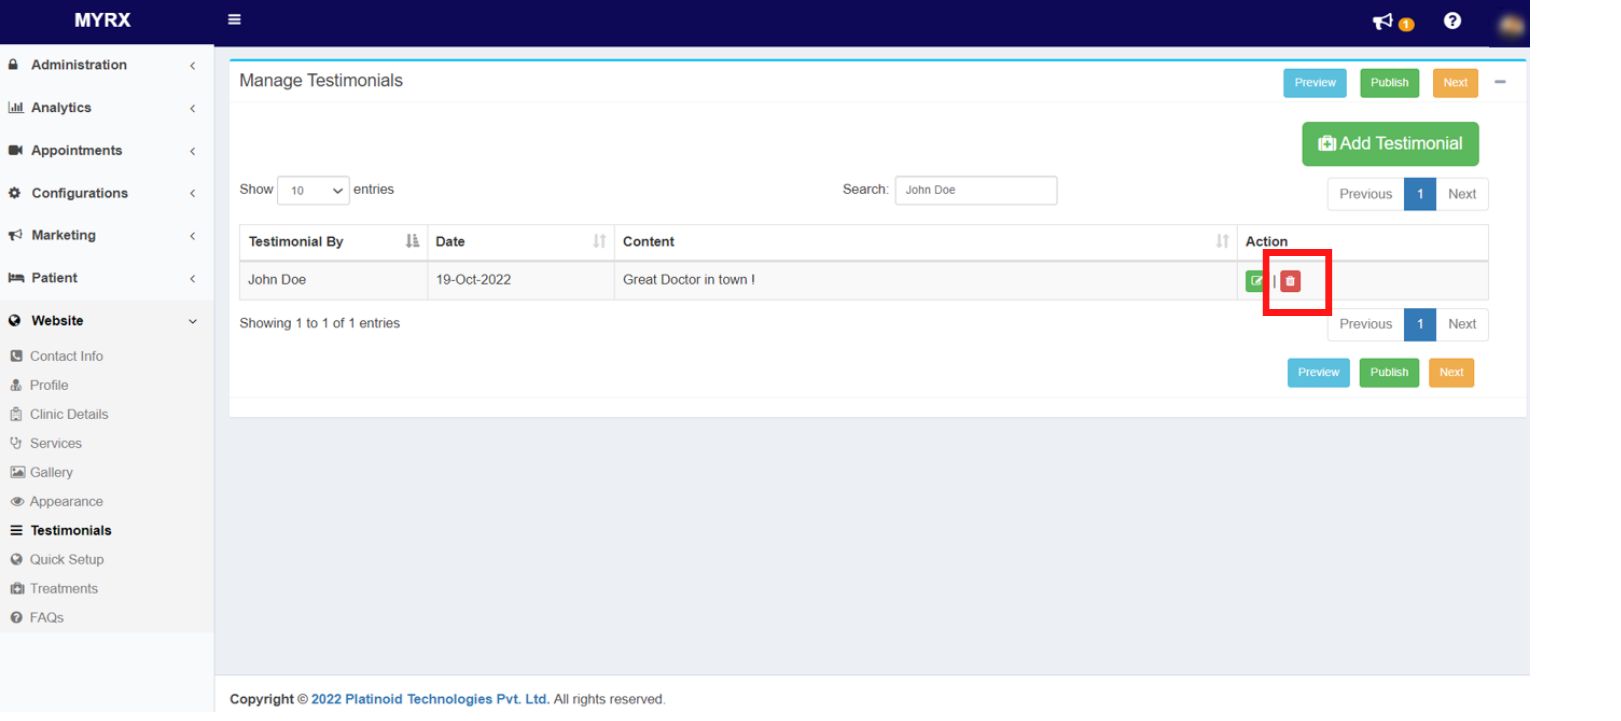
Step 4: Click on the Delete icon against the Testimonial to be modified.
Step 5: Click on the Delete button on the delete confirmation pop up.
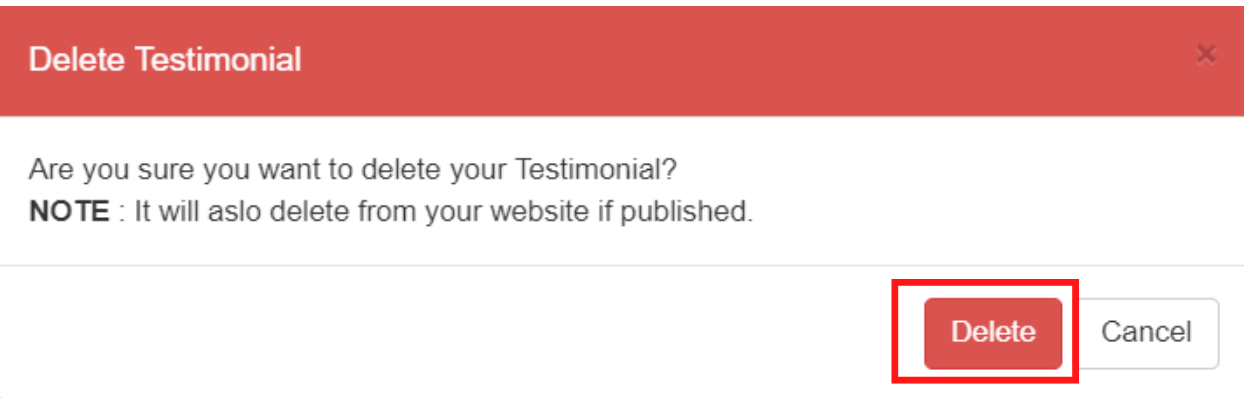
Step 6: Testimonial details will be deleted successfully.
Step 7: Go to Website -> Testimonials
Step 8: Click on the Publish button to update the changes on your website.
Step 9: Publish Website confirmation message will pop up. Click on Publish button
Step 10: Click on the Ok button on the publish confirmation pop up.
The deleted testimonial will no longer be displayed on your website.
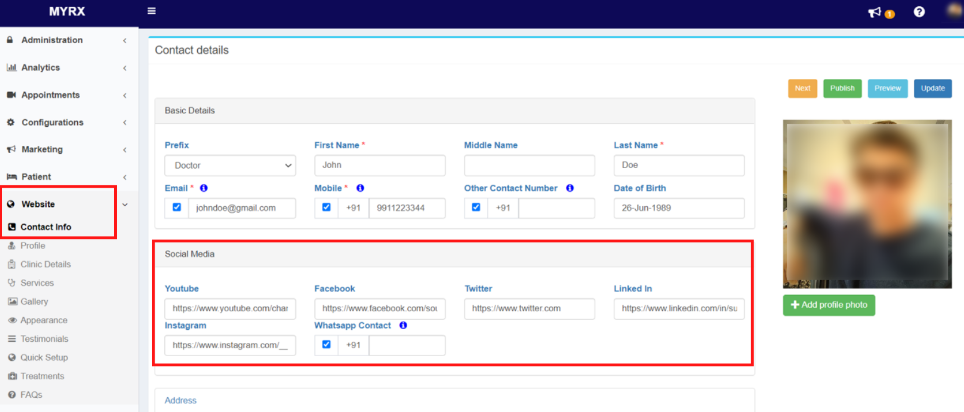
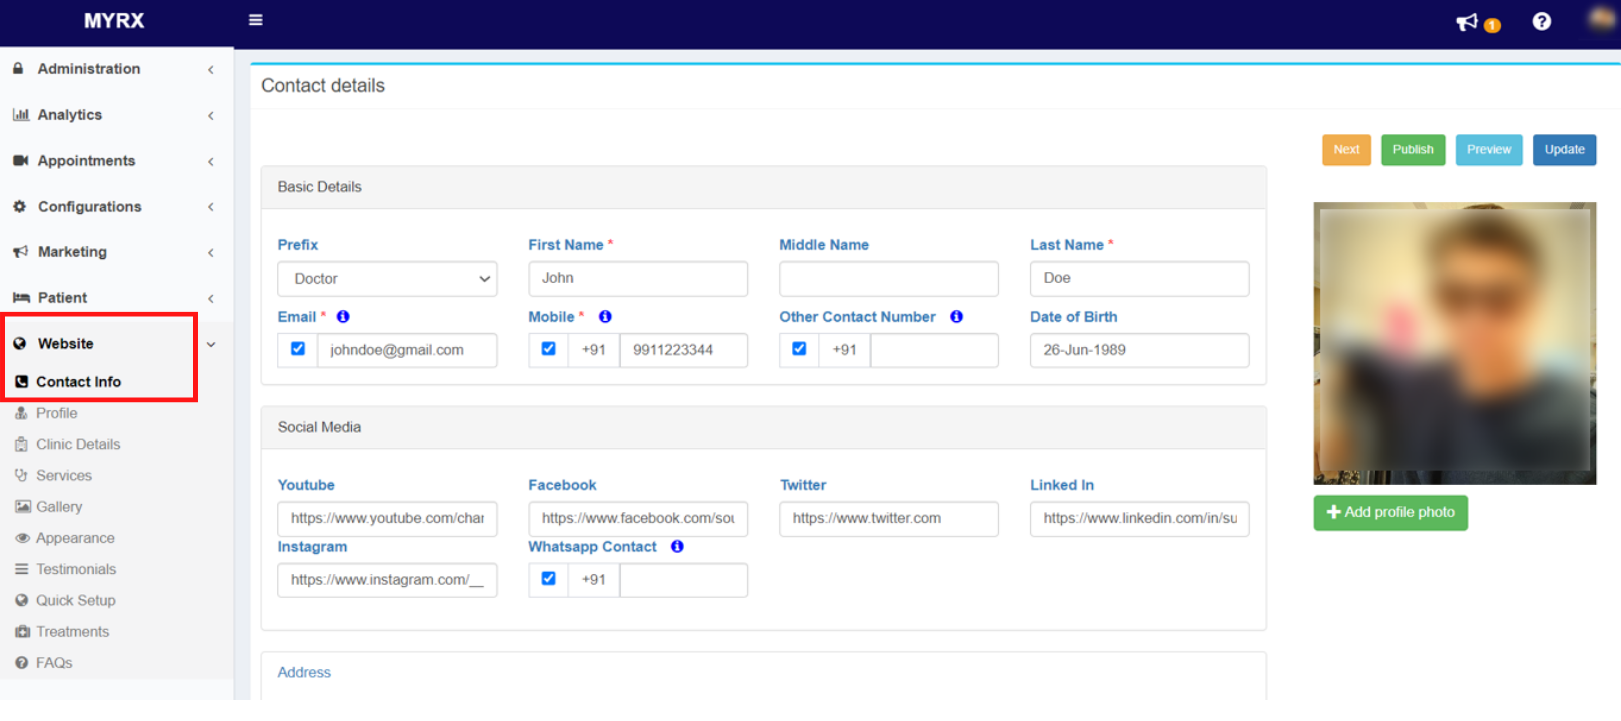
13. Contact Info
How to add / update my personal info on Contact page information in MyRx?
Step 1: Go to MyRx Login Page
Step 2: Go to Website -> Contact Info
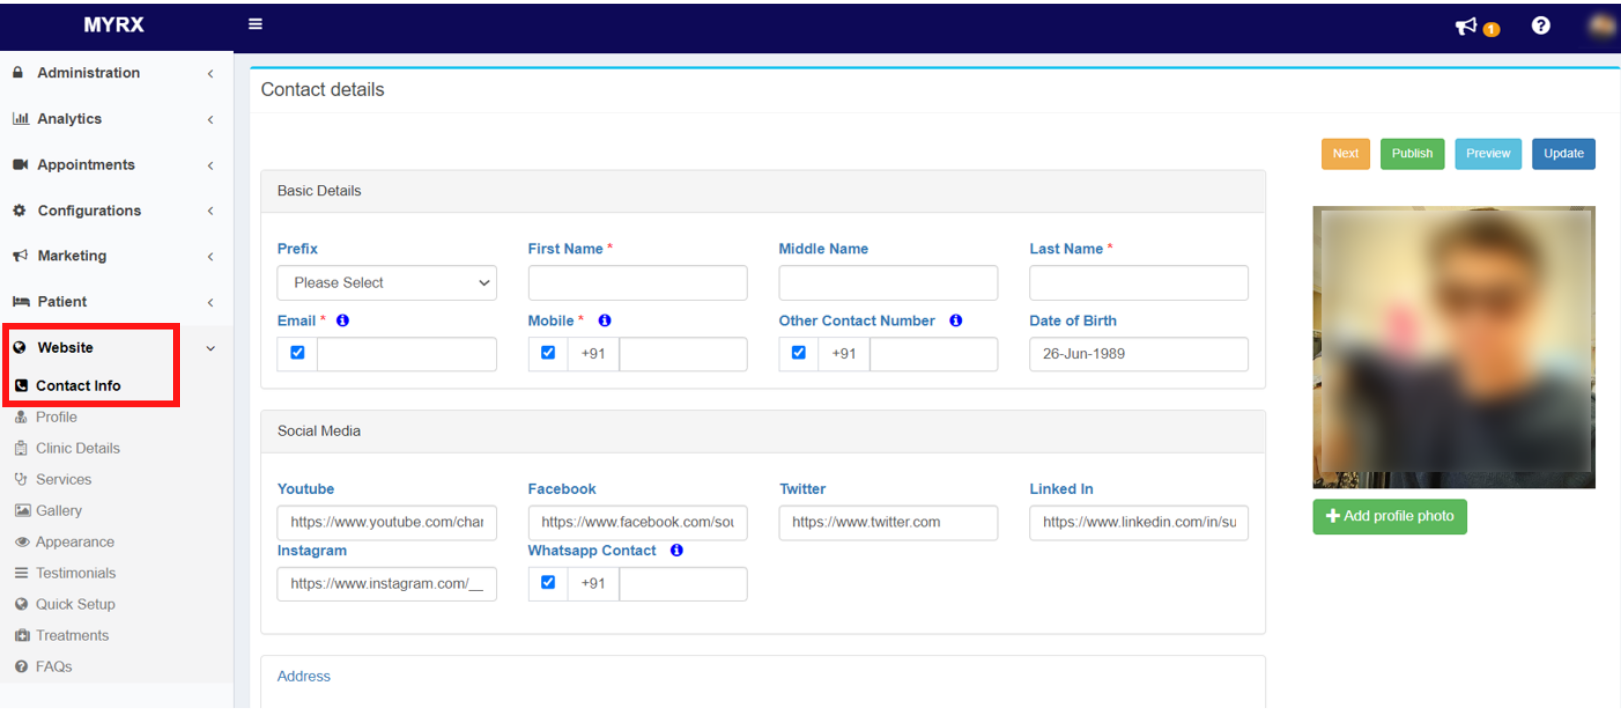
Step 3: Make necessary changes to Name, Email Id, Contact numbers and Date of Birth in the personal info section
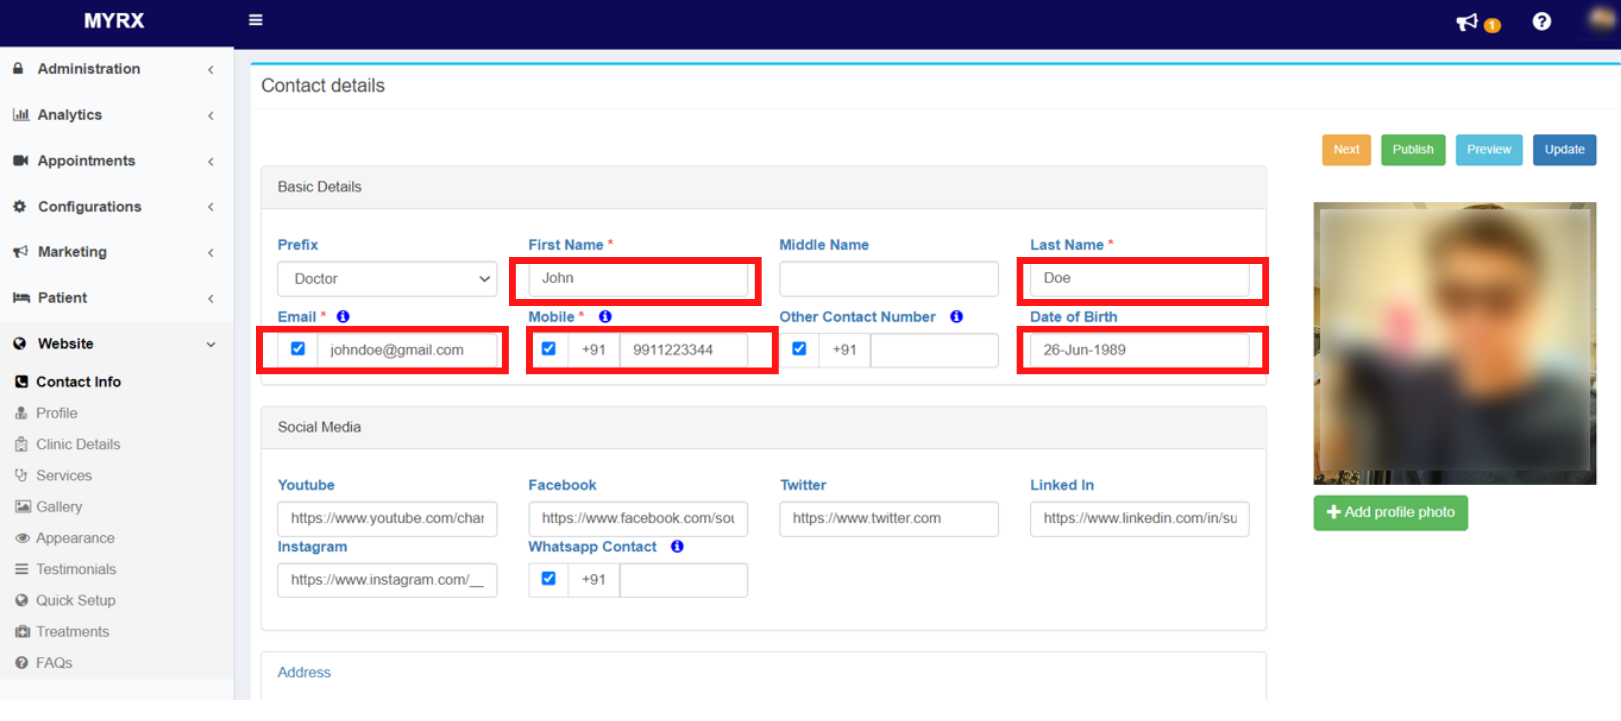
Step 4: Click on Update Button.
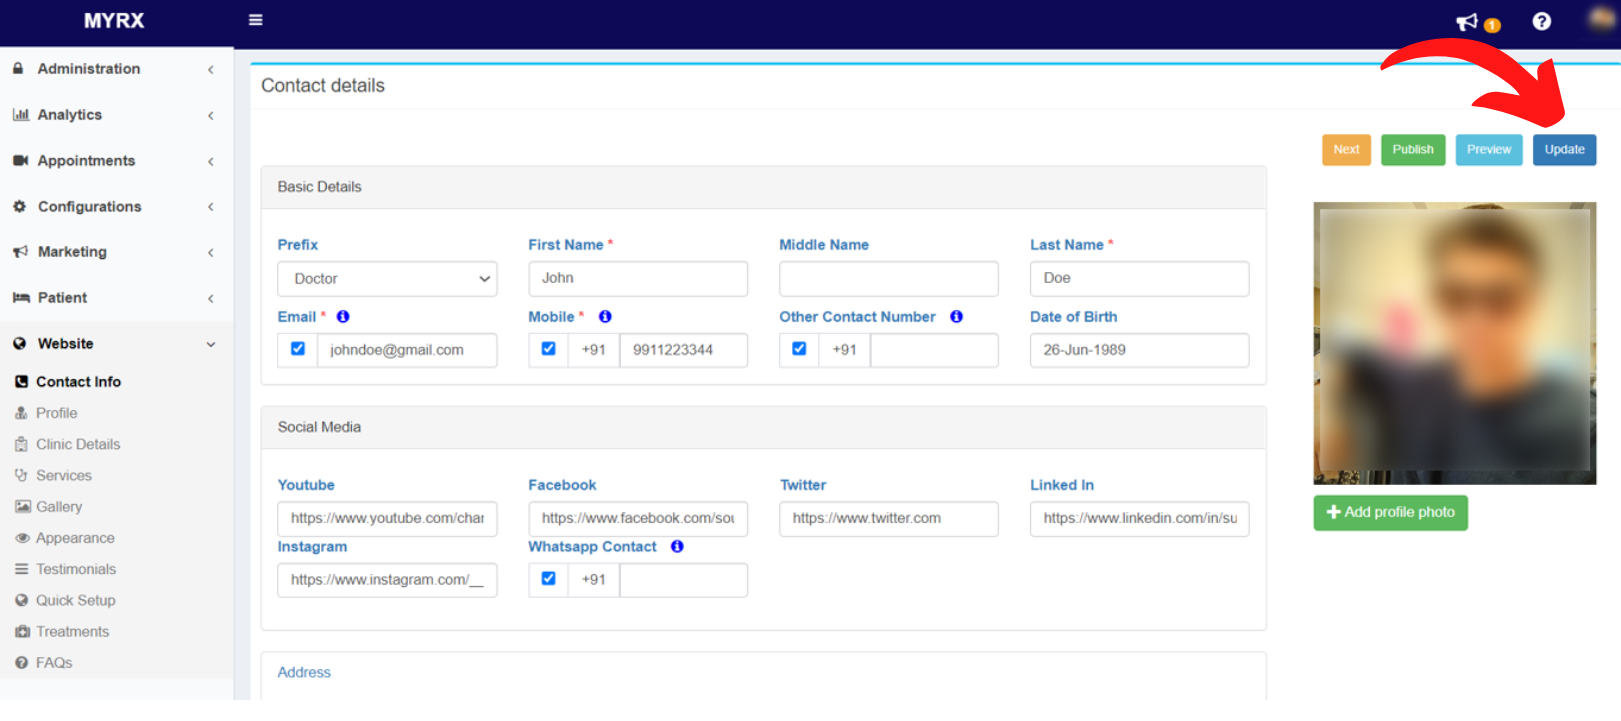
Step 5: Contact details will be saved successfully.

Step 6: Go to Website -> Contact Info
Step 7: Click on the Publish button to update the changes on your website.
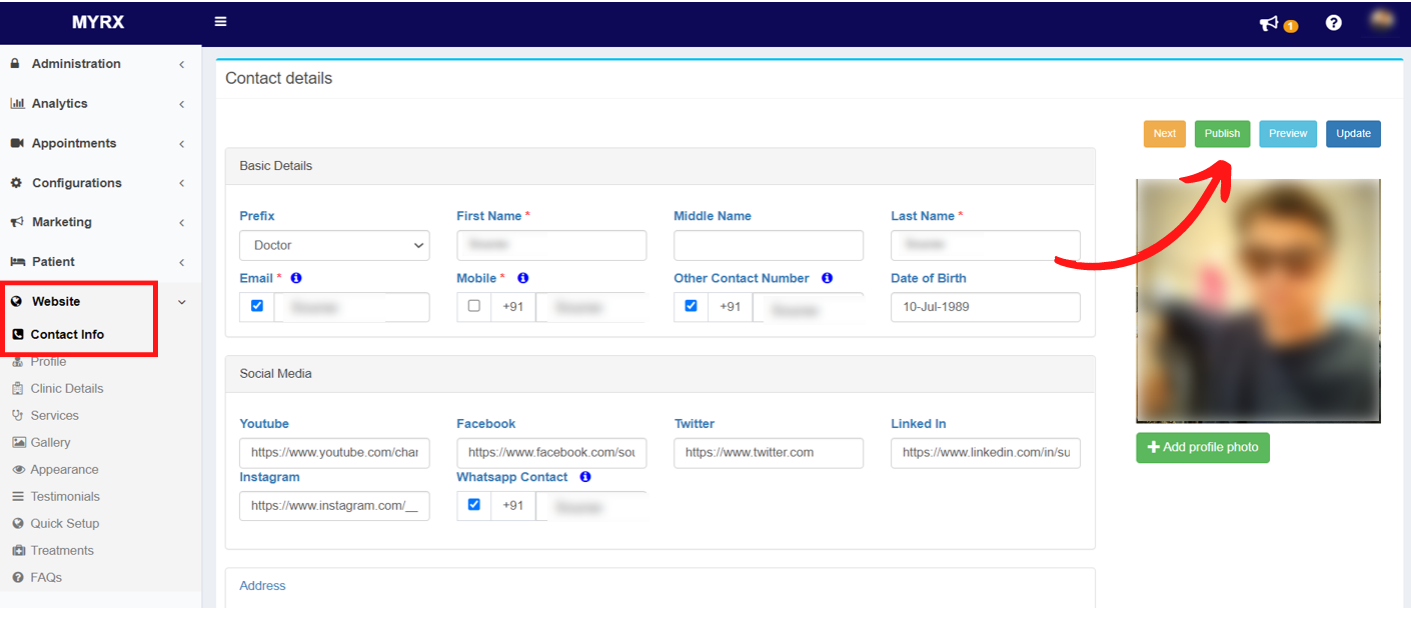
Step 8: Publish Website confirmation message will pop up. Click on Publish button
Step 9: Click on the Ok button on the publish confirmation pop up.
The updated information will be published successfully on your website.
How to link my Social Media profiles to my website in MyRx?
Step 1: Go to MyRx Login Page
Step 2: Go to Website -> Contact Info -> Social Media Section
Step 3: Add/ Update your social media profile links.
Step 4: Click on Update Button.
Step 5: Contact details will be saved successfully.
Step 6: Go to Website -> Contact Info
Step 7: Click on the Publish button to update the changes on your website.
Step 8: Publish Website confirmation message will pop up. Click on Publish button
Step 9: Click on the Ok button on the publish confirmation pop up.
The social media handles will be successfully linked to your website.
How to add/ update my profile picture in MyRx?
Step 1: Go to MyRx Login Page
Step 2: Go to Website -> Contact Info
Step 3: Click on the “Add Profile Photo” button on the right side of the Contact Details page.
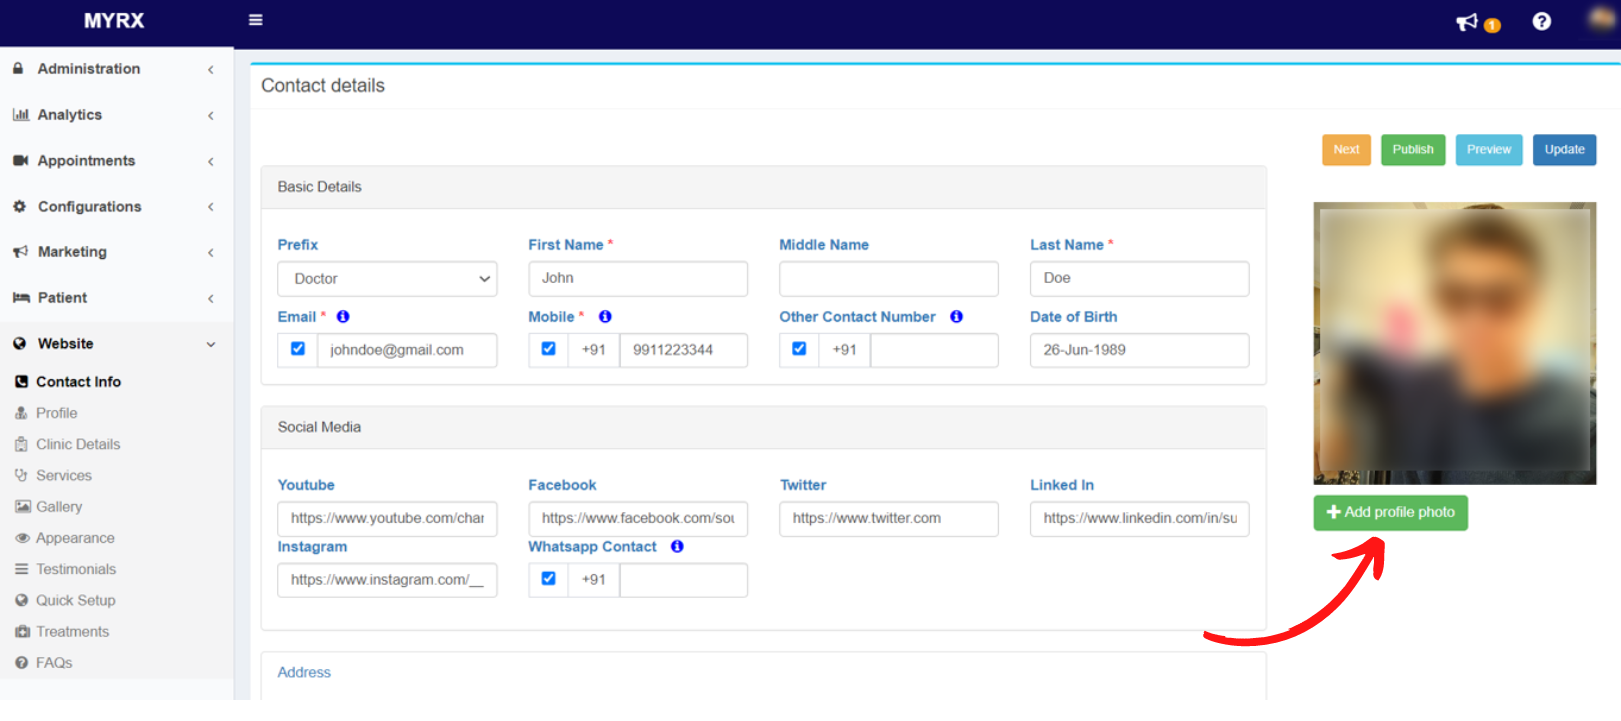
Step 4: Select a Photo from your Mobile/PC storage.
Step 5: Click on Update Button.
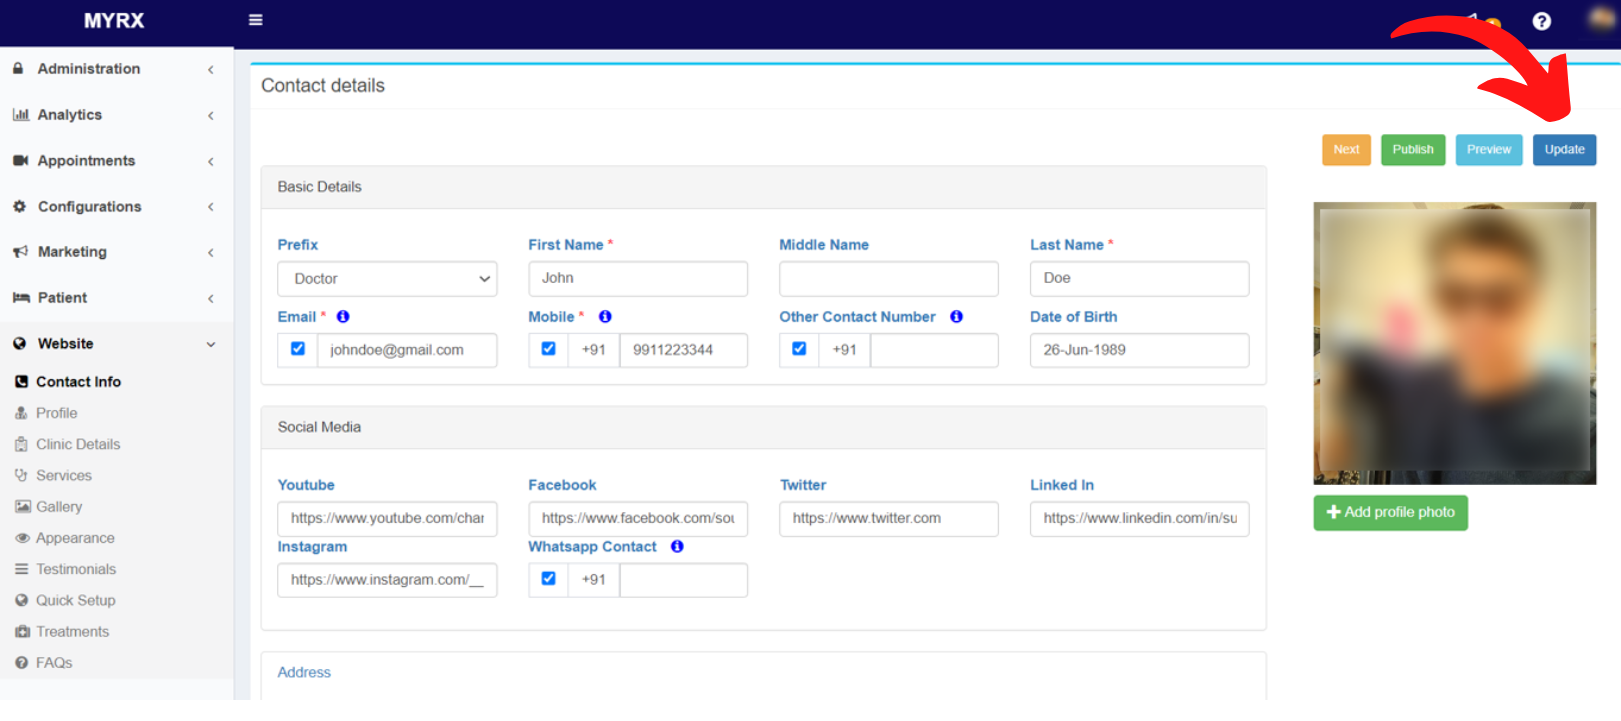
Step 6: Contact details will be saved successfully.
Step 7: Go to Website -> Contact Info
Step 8: Click on the Publish button to update the changes on your website.
Step 9: Publish Website confirmation message will pop up. Click on Publish button
Step 10: Click on the Ok button on the publish confirmation pop up.
Profile picture will be successfully published on your website.
How to add / update my Contact address in MyRx?
Step 1: Go to MyRx Login Page
Step 2: Go to Website -> Contact Info
Step 3: Make necessary changes to Address Lines in the Address section
Step 4: Add a Map link for the address in the Ember map box. (How to embed a map?)
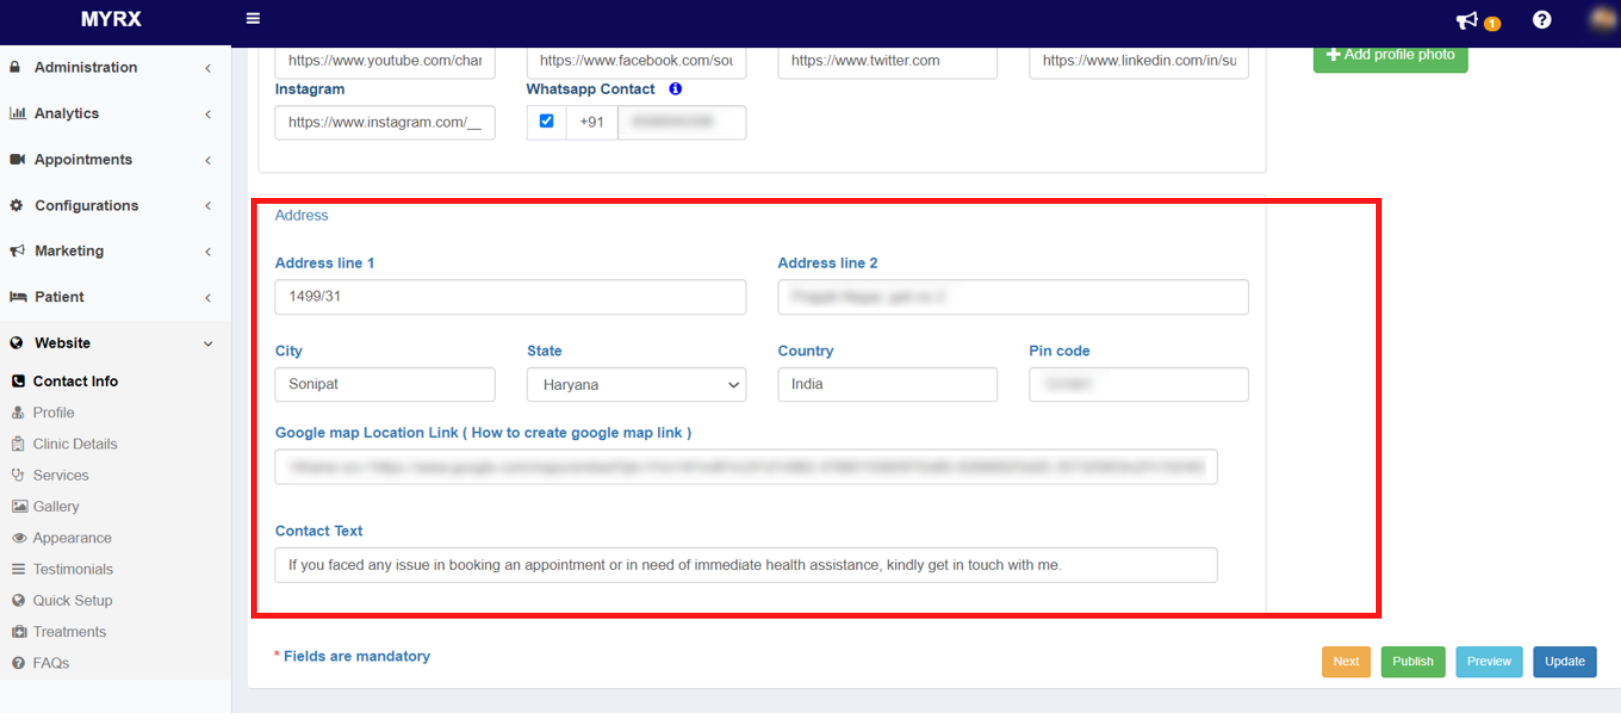
Step 5: Click on Update Button.
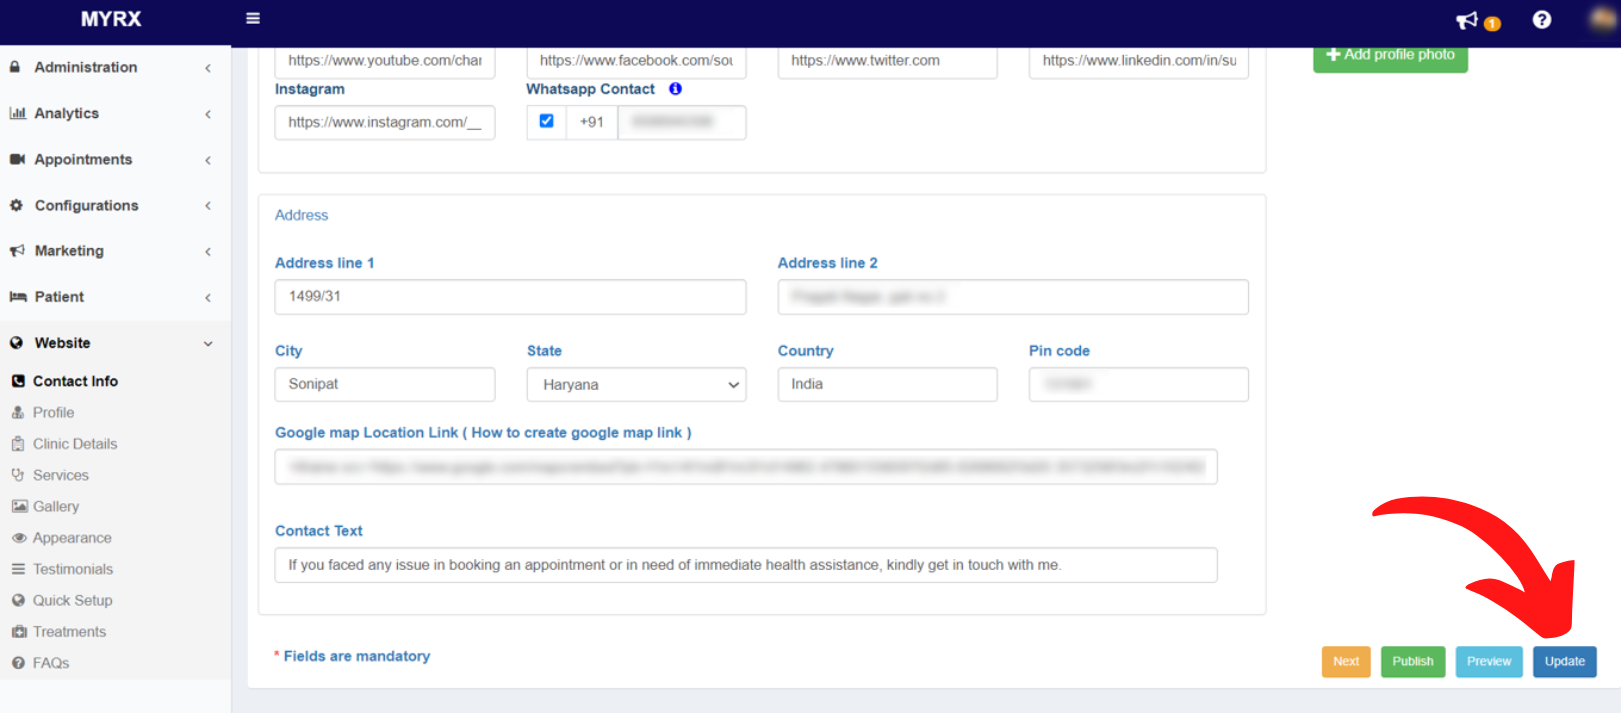
Step 6: Contact details will be saved successfully.
Step 7: Go to Website -> Contact Info
Step 8: Click on the Publish button to update the changes on your website.
Step 9: Publish Website confirmation message will pop up. Click on Publish button
Step 10: Click on the Ok button on the publish confirmation pop up.
The address information will be published successfully on your MyRx website.
14. Profile
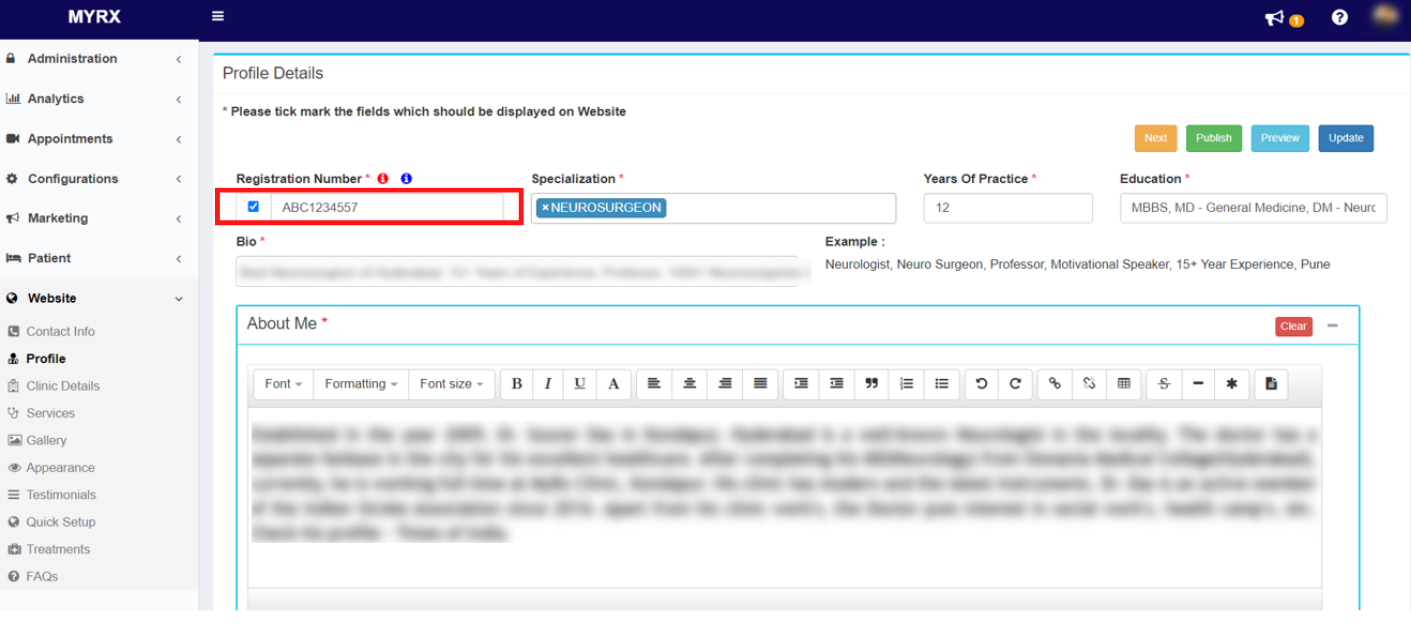
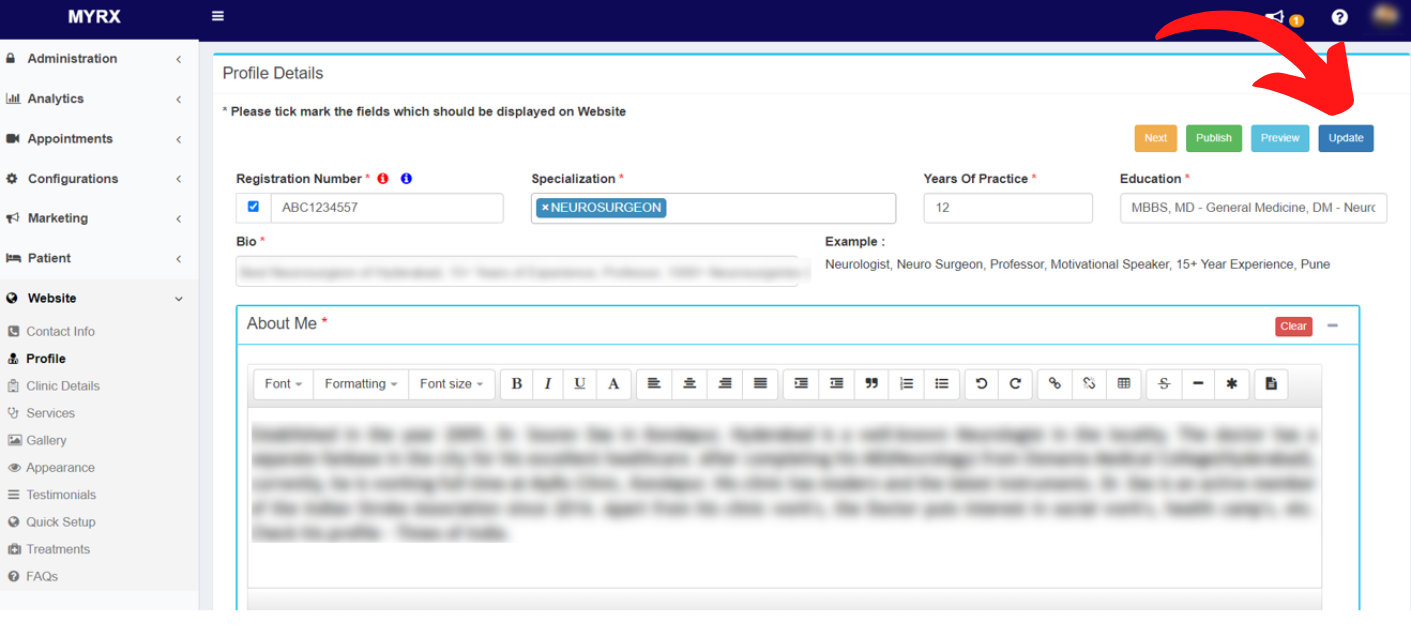
How to edit my Registration number, in case of error during Sign Up in MyRx?
Step 1: Go to MyRx Login Page
Step 2: Go to Website -> Profile
Step 3: Make necessary changes to Registration number in Profile Details page.
Step 4: Click on Update Button.
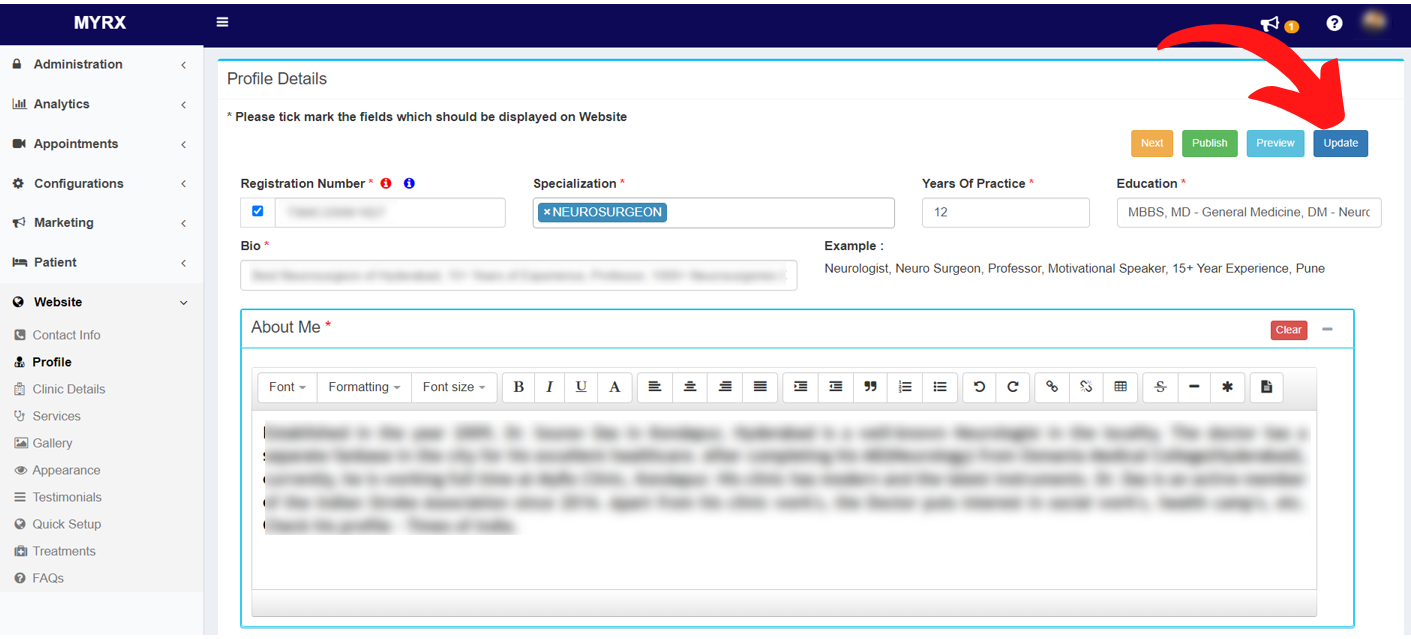
Step 5: Profile details will be saved successfully.

Step 6: Go to Website -> Profile
Step 7: Click on the Publish button to update the changes on your website.
Step 8: Publish Website confirmation message will pop up. Click on Publish button
Step 9: Click on the Ok button on the publish confirmation pop up.
The Registration number will be published successfully on your website.
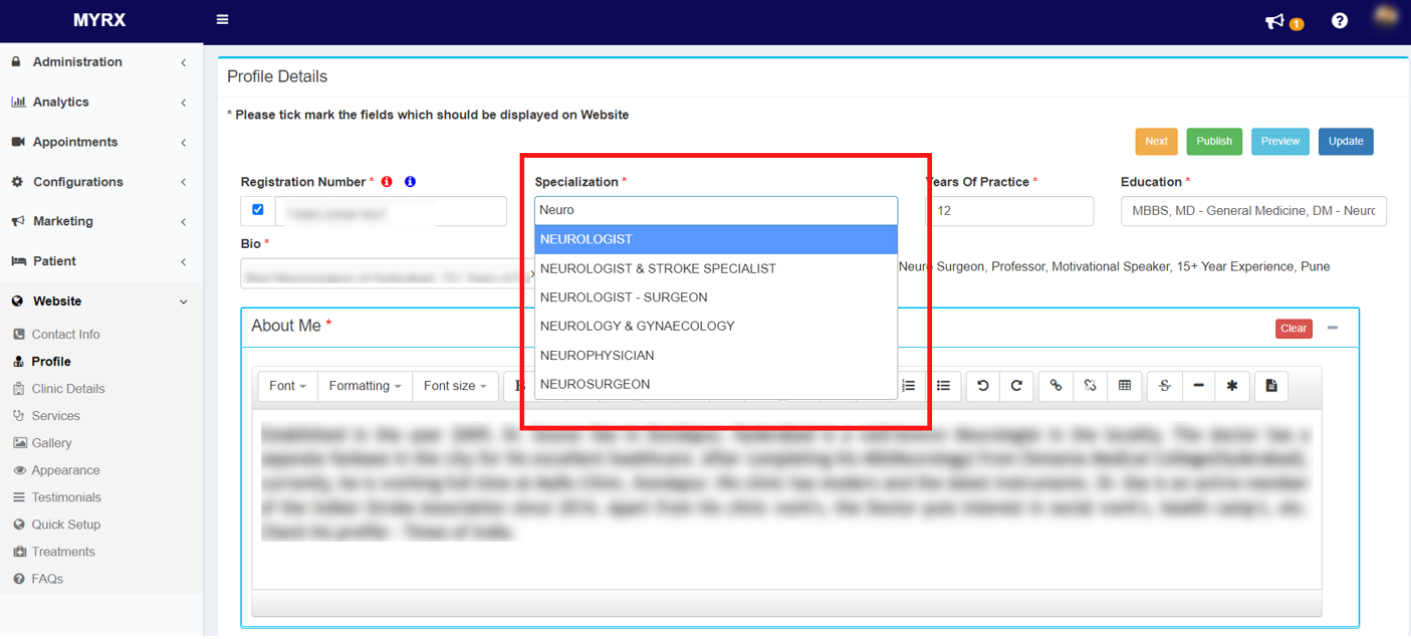
How to update Specialty in the About section of my website in MyRx?
Step 1: Go to MyRx Login Page
Step 2: Go to Website -> Profile
Step 3: Select your specialty from the Specialization dropdown.
Step 4: Click on Update Button.
Step 5: Profile details will be saved successfully.
Step 6: Go to Website -> Profile
Step 7: Click on the Publish button to update the changes on your website.
Step 8: Publish Website confirmation message will pop up. Click on Publish button
Step 9: Click on the Ok button on the publish confirmation pop up.
The Specialization will be published successfully on your website.
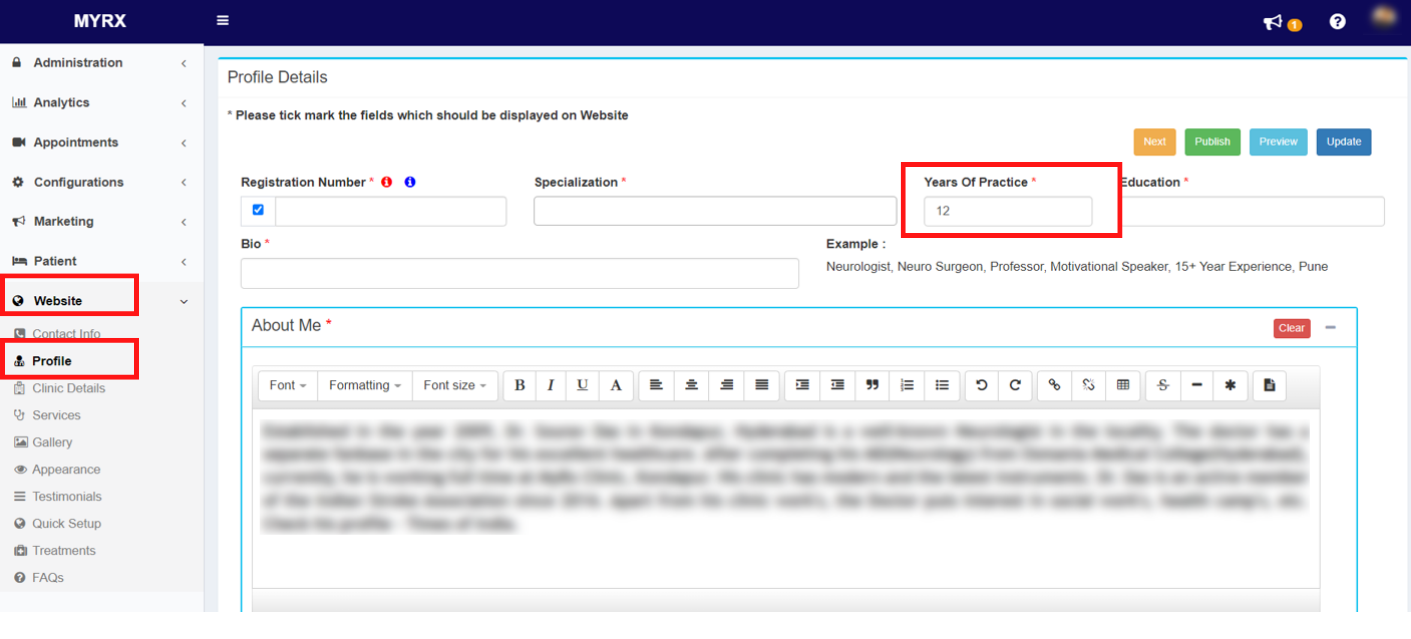
How to update my Experience in the About section of my website in MyRx?
Step 1: Go to MyRx Login Page
Step 2: Go to Website -> Profile
Step 3: Add number of years to “Years of Practice” field in Profile Details page.
Step 4: Click on Update Button.
Step 5: Profile details will be saved successfully.
Step 6: Go to Website -> Profile
Step 7: Click on the Publish button to update the changes on your website.
Step 8: Publish Website confirmation message will pop up. Click on Publish button
Step 9: Click on the Ok button on the publish confirmation pop up.
Years of practice will be published successfully to the Experience field in the About section of your website.
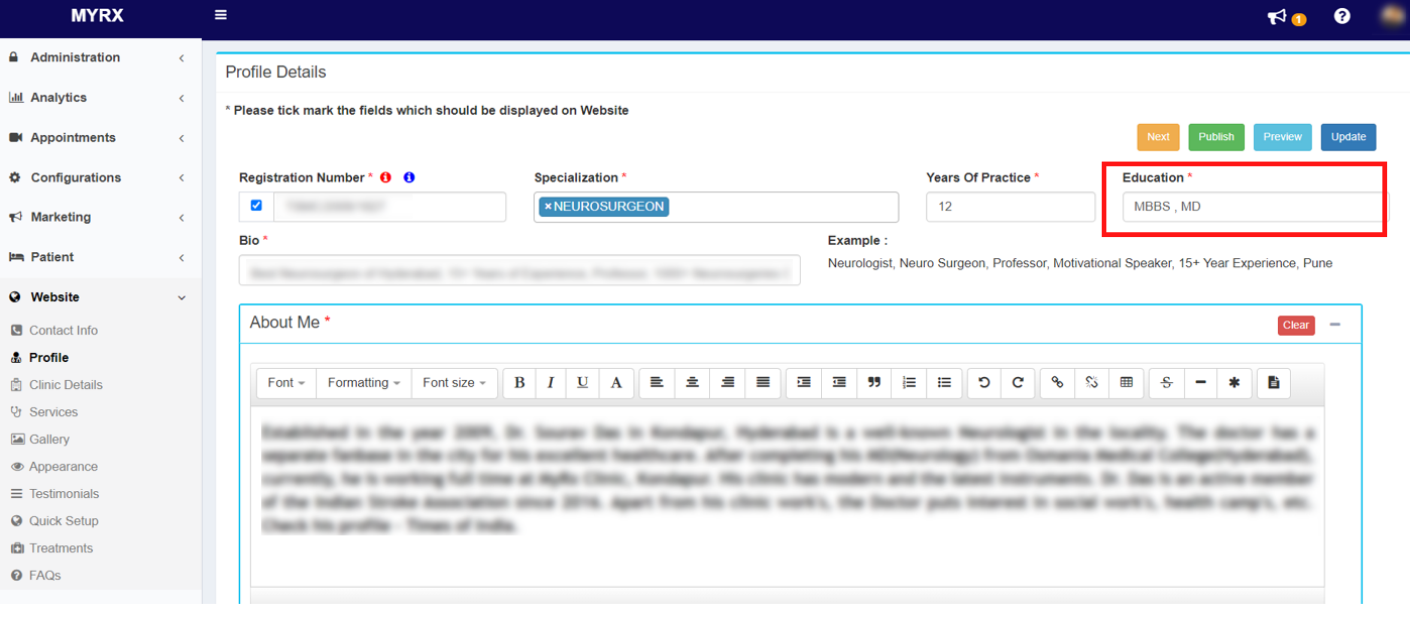
How to update my educational qualification in MyRx?
Step 1: Go to MyRx Login Page
Step 2: Go to Website -> Profile
Step 3: Add/ Update your qualification in the “Education” field in Profile details page. (Add multiple qualifications separated by commas)
Step 4: Click on Update Button.
Step 5: Profile details will be saved successfully.
Step 6: Go to Website -> Profile
Step 7: Click on the Publish button to update the changes on your website.
Step 8: Publish Website confirmation message will pop up. Click on Publish button
Step 9: Click on the Ok button on the publish confirmation pop up.
The educational qualifications will be published successfully to the Qualification field of About section on your website.
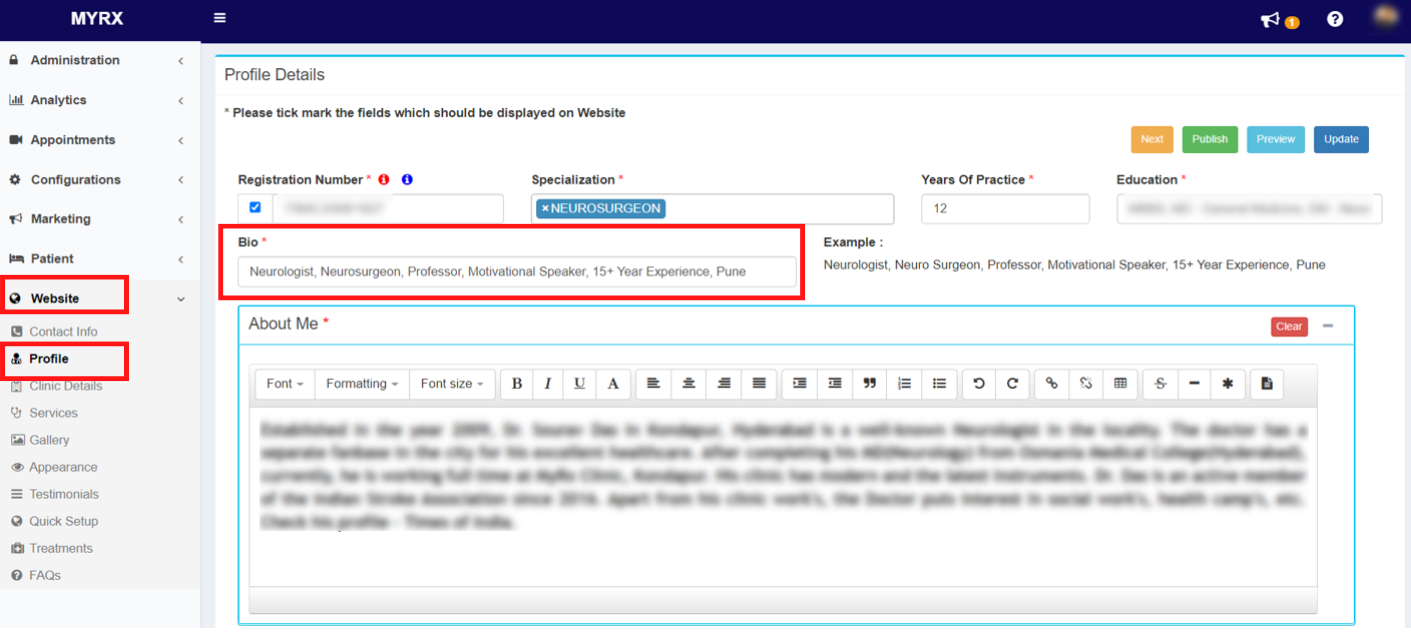
How to update bio on the homepage of my website in MyRx?
Step 1: Go to MyRx Login Page
Step 2: Go to Website -> Profile
Step 3: Add/ Update your display Bio in the “Bio” field in Profile details page. (Add multiple details separated by commas)
Example : Neurologist, Neurosurgeon, Professor, Motivational Speaker, 15+ Year Experience, Pune
Step 4: Click on Update Button.
Step 5: Profile details will be saved successfully.
Step 6: Go to Website -> Profile
Step 7: Click on the Publish button to update the changes on your website.
Step 8: Publish Website confirmation message will pop up. Click on Publish button
Step 9: Click on the Ok button on the publish confirmation pop up.
The bio will be published successfully and can be viewed on the homepage of your website.
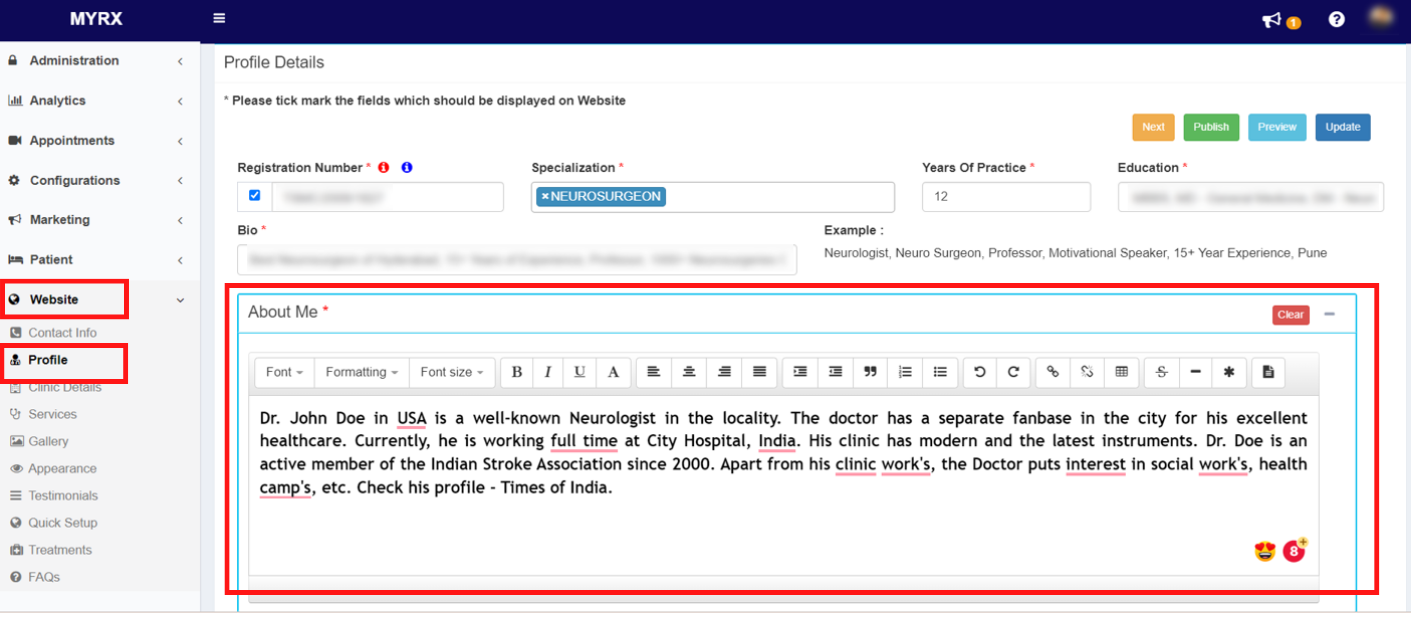
How to add / update the description of the “About Me” section on the website in MyRx?
Step 1: Go to MyRx Login Page
Step 2: Go to Website -> Profile
Step 3: Add description in the editor under About me section.
Step 4: Click on Update Button.
Step 5: Profile details will be saved successfully.
Step 6: Go to Website -> Profile
Step 7: Click on the Publish button to update the changes on your website.
Step 8: Publish Website confirmation message will pop up. Click on Publish button
Step 9: Click on the Ok button on the publish confirmation pop up.
About me description will be published successfully to the About section on your MyRx website.
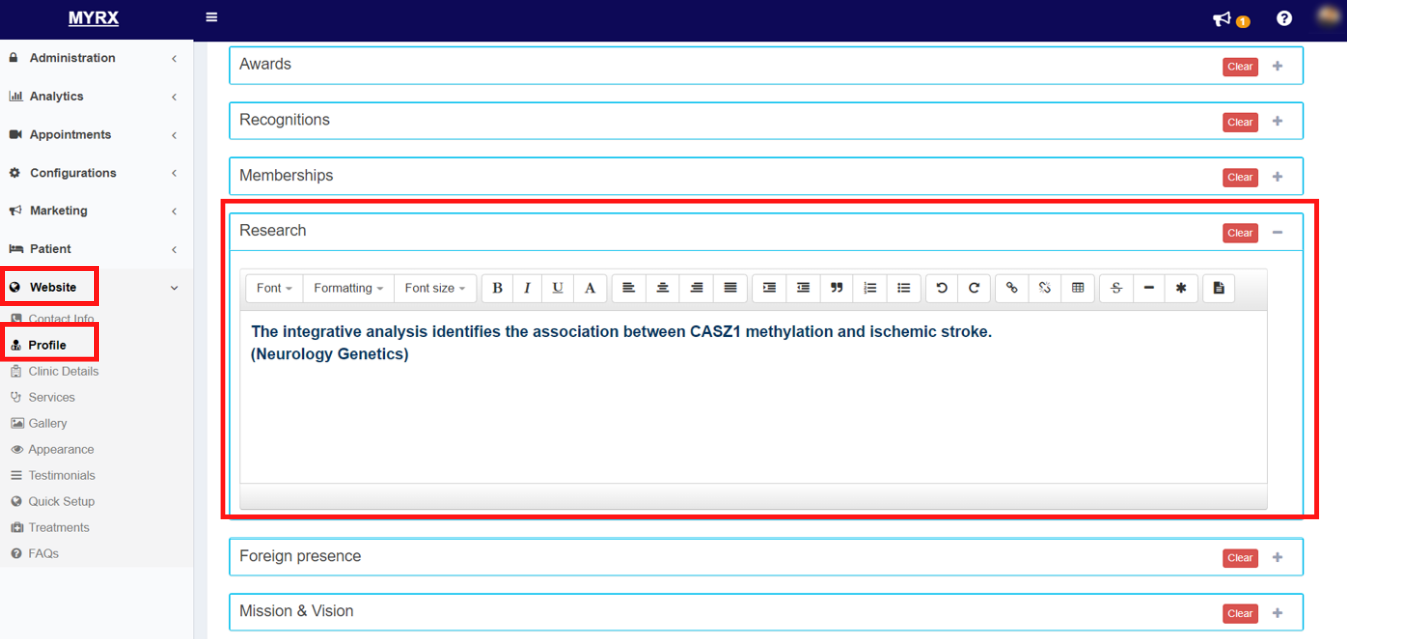
How to Add/ Update research details on my website in MyRx?
Step 1: Go to MyRx Login Page
Step 2: Go to Website -> Profile
Step 3: Add description in the editor under the Research section.
Step 4: Click on Update Button.
Step 5: Profile details will be saved successfully.
Step 6: Go to Website -> Profile
Step 7: Click on the Publish button to update the changes on your website.
Step 8: Publish Website confirmation message will pop up. Click on Publish button
Step 9: Click on the Ok button on the publish confirmation pop up.
Research description will be published successfully to the Research section on your MyRx website.
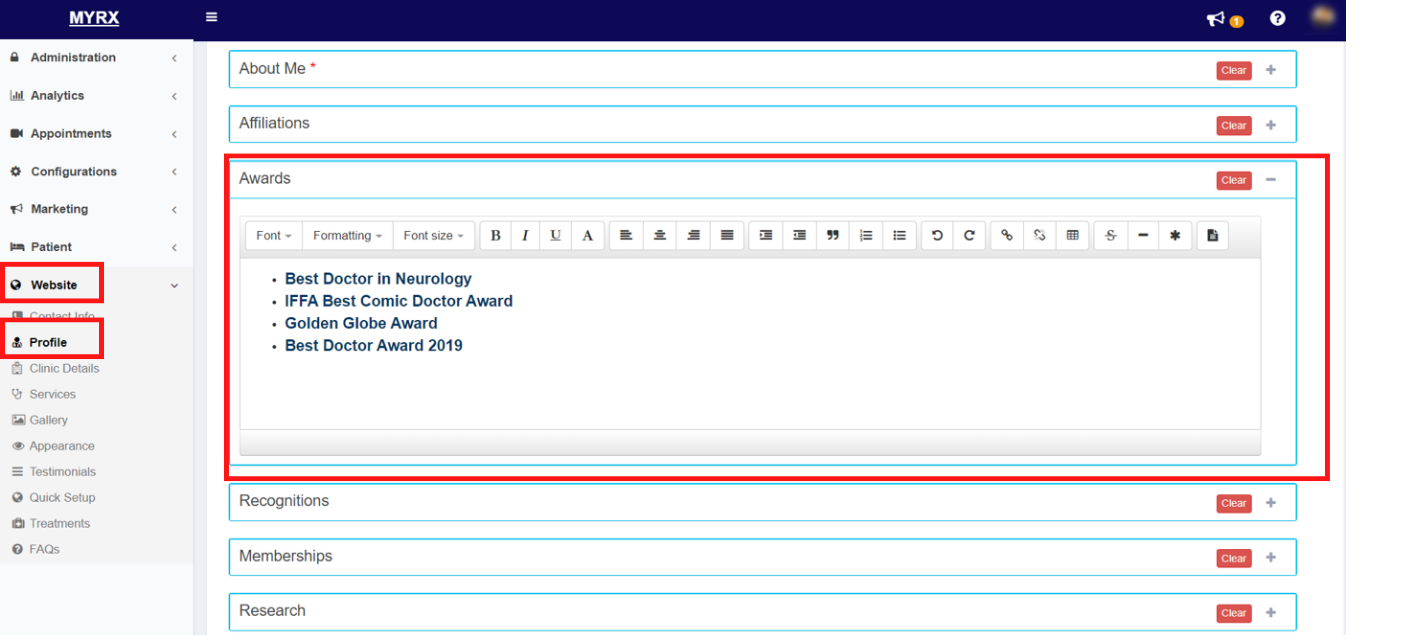
How to Add/ Update awards received on my website in MyRx?
Step 1: Go to MyRx Login Page
Step 2: Go to Website -> Profile
Step 3: Add description in the editor under the Awards section.
Step 4: Click on Update Button.
Step 5: Profile details will be saved successfully.
Step 6: Go to Website -> Profile
Step 7: Click on the Publish button to update the changes on your website.
Step 8: Publish Website confirmation message will pop up. Click on Publish button
Step 9: Click on the Ok button on the publish confirmation pop up.
Awards description will be published successfully to the Awards section on your MyRx website.
How to Add/ Update Recognitions received on my website in MyRx?
Step 1: Go to MyRx Login Page
Step 2: Go to Website -> Profile
Step 3: Add description in the editor under the Recognitions section.

Step 4: Click on Update Button.
Step 5: Profile details will be saved successfully.
Step 6: Go to Website -> Profile
Step 7: Click on the Publish button to update the changes on your website.
Step 8: Publish Website confirmation message will pop up. Click on Publish button
Step 9: Click on the Ok button on the publish confirmation pop up.
Recognition description will be published successfully to the Recognitions section on your MyRx website.
How to list my Affiliations details in MyRx?
Step 1: Go to MyRx Login Page
Step 2: Go to Website -> Profile
Step 3: Add description in the editor under the Affiliations section.
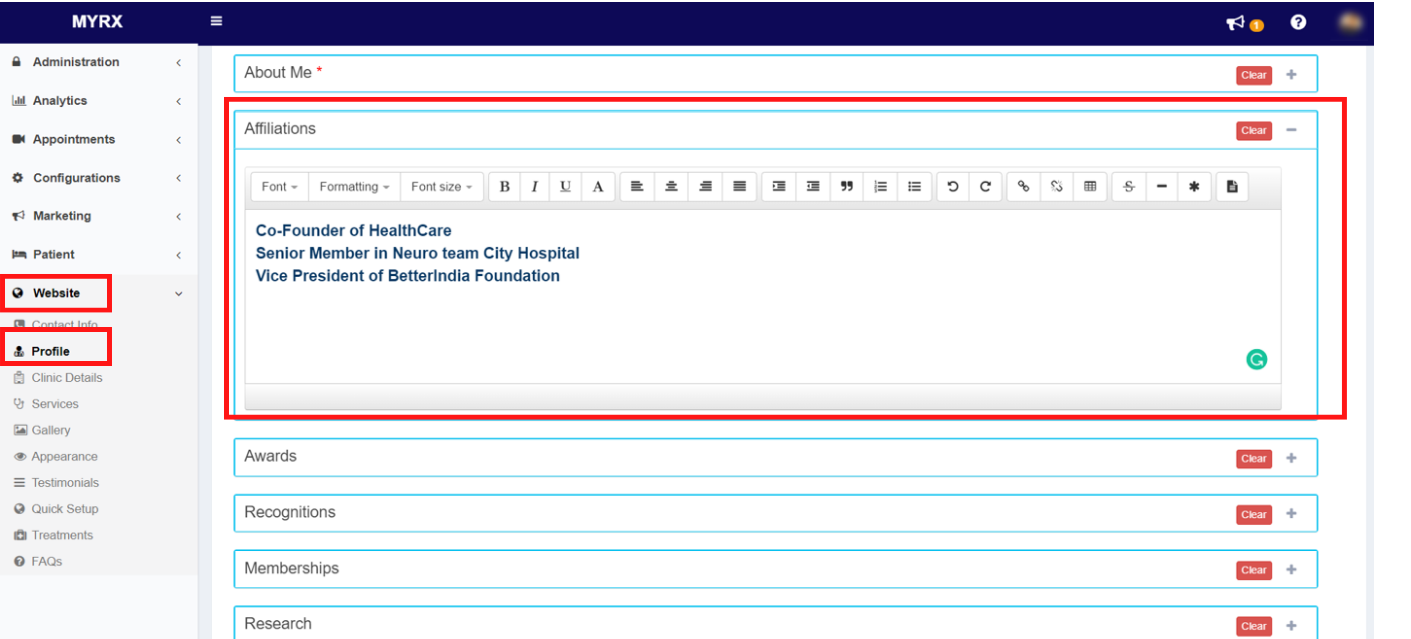
Step 4: Click on Update Button.
Step 5: Profile details will be saved successfully.
Step 6: Go to Website -> Profile
Step 7: Click on the Publish button to update the changes on your website.
Step 8: Publish Website confirmation message will pop up. Click on Publish button
Step 9: Click on the Ok button on the publish confirmation pop up.
Affiliation description will be published successfully to the Affiliations section on your MyRx website.
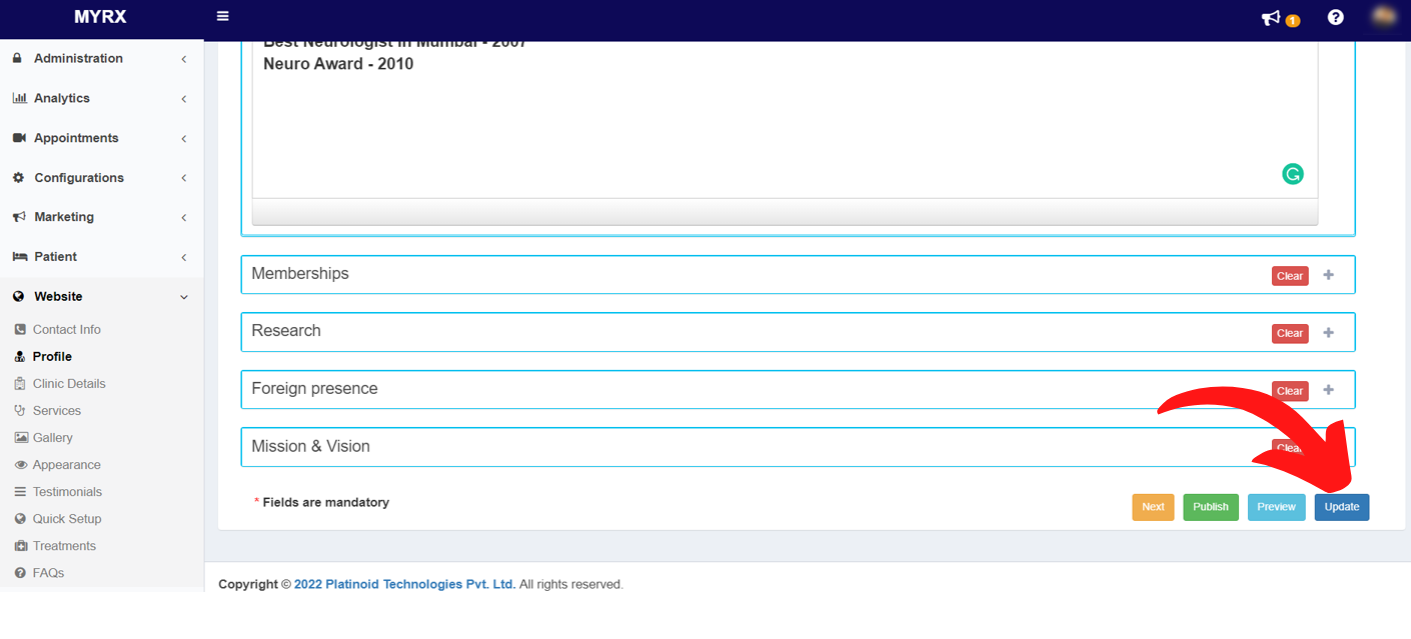
How to list my Memberships details in MyRx?
Step 1: Go to MyRx Login Page
Step 2: Go to Website -> Profile
Step 3: Add description in the editor under the Memberships section.
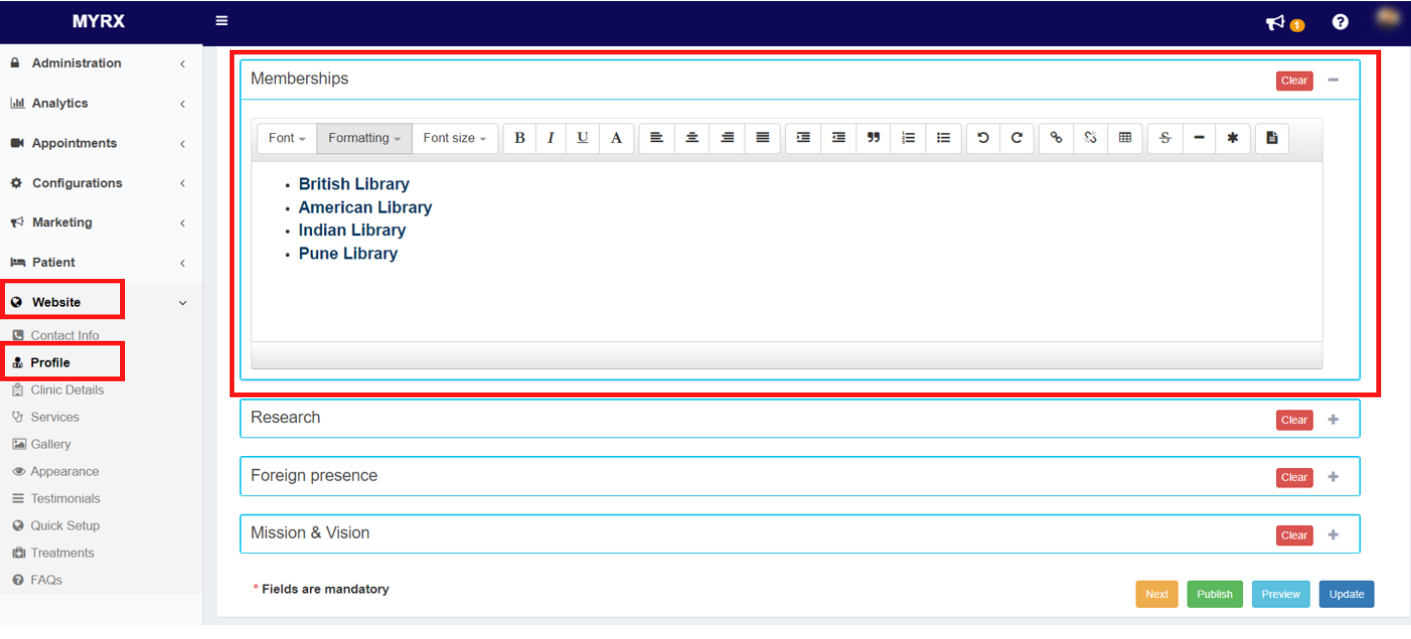
Step 4: Click on Update Button.
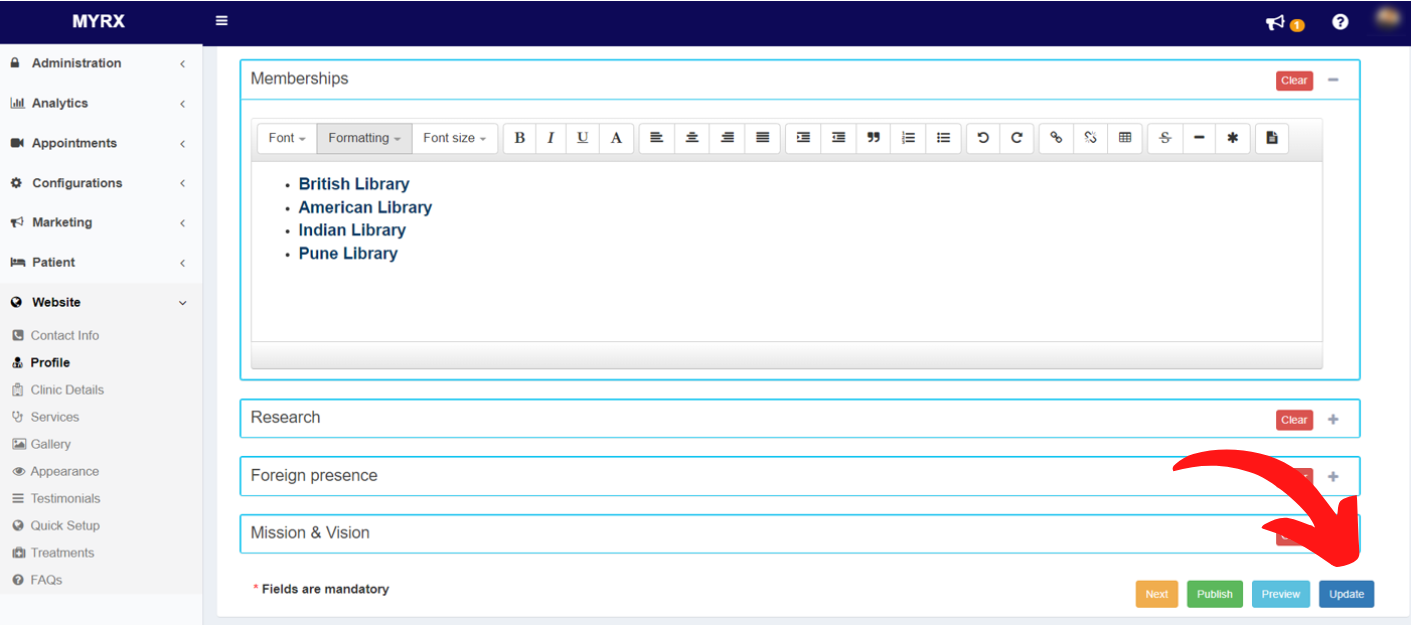
Step 5: Profile details will be saved successfully.
Step 6: Go to Website -> Profile
Step 7: Click on the Publish button to update the changes on your website.
Step 8: Publish Website confirmation message will pop up. Click on Publish button
Step 9: Click on the Ok button on the publish confirmation pop up.
Membership description will be published successfully to the Memberships section on your MyRx website.
15. Clinic
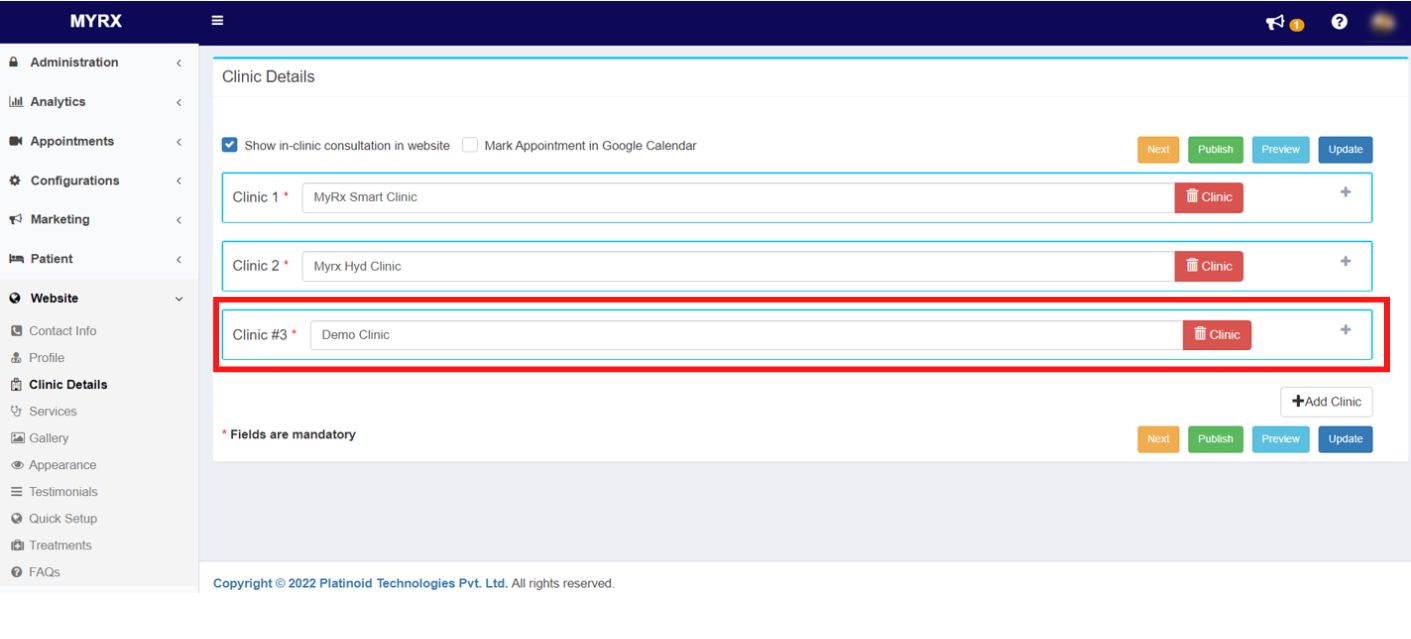
How to add a new Clinic profile on my website in MyRx?
Step 1: Go to MyRx Login Page
Step 2: Go to Website -> Clinic Details
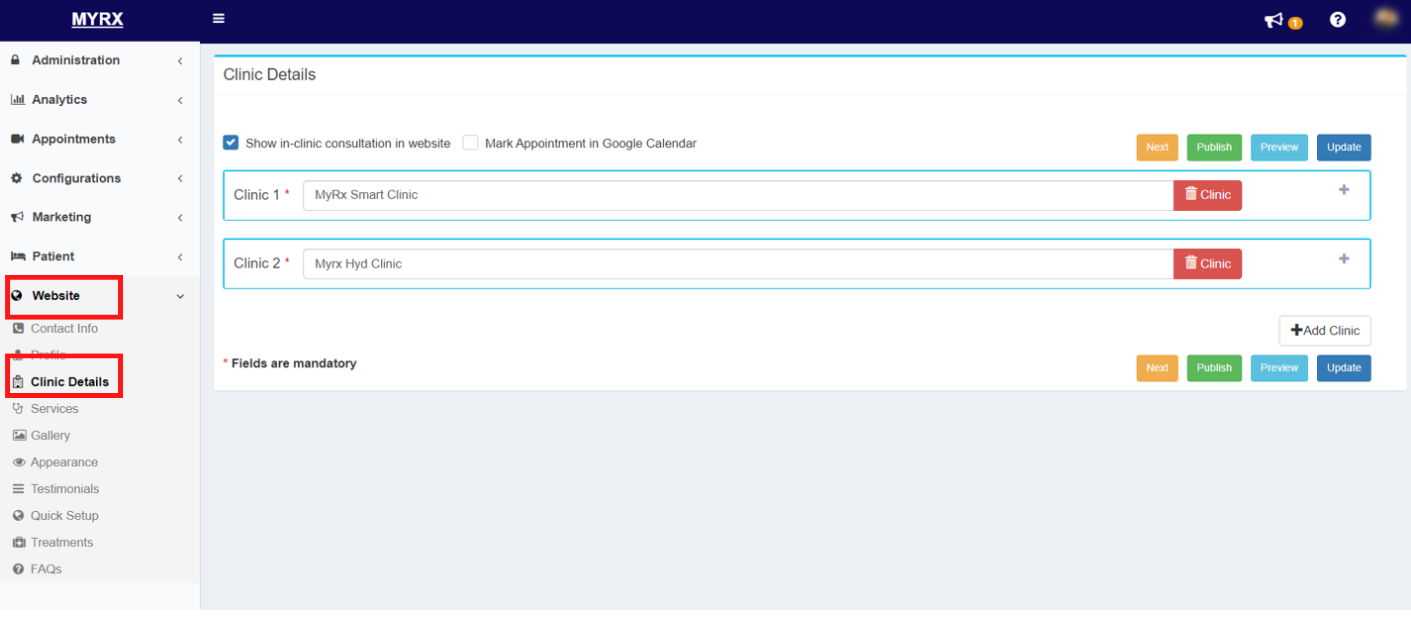
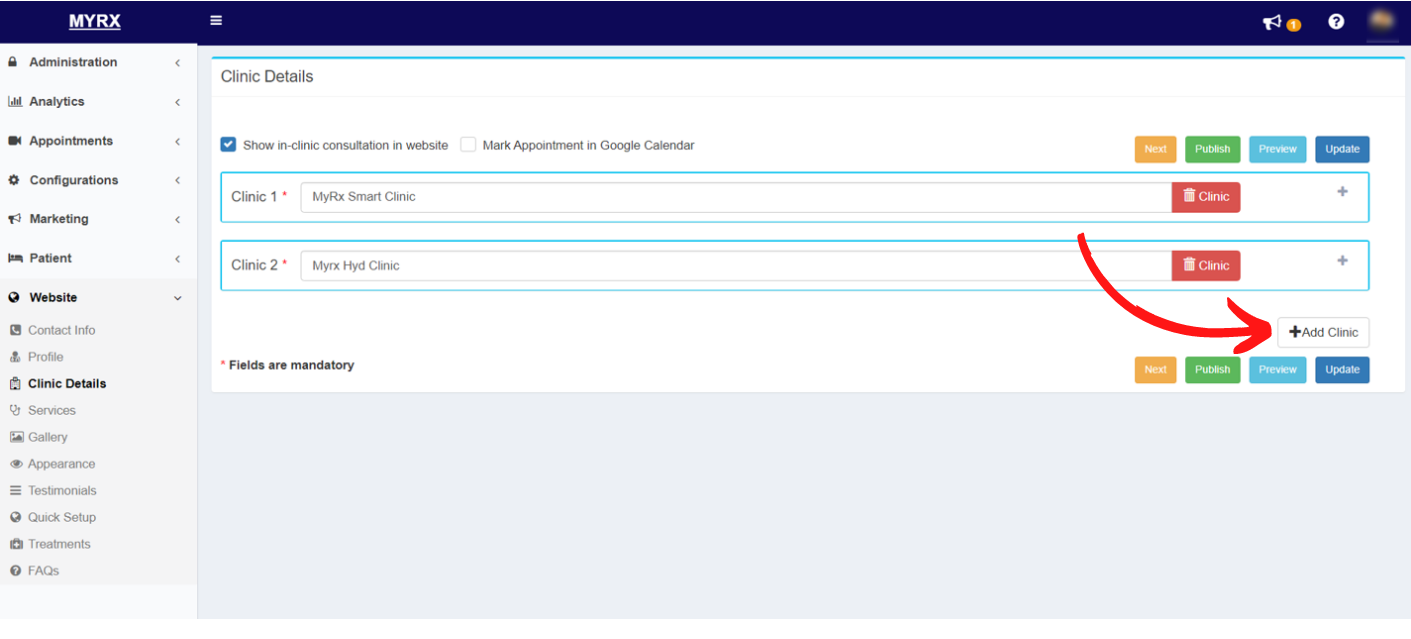
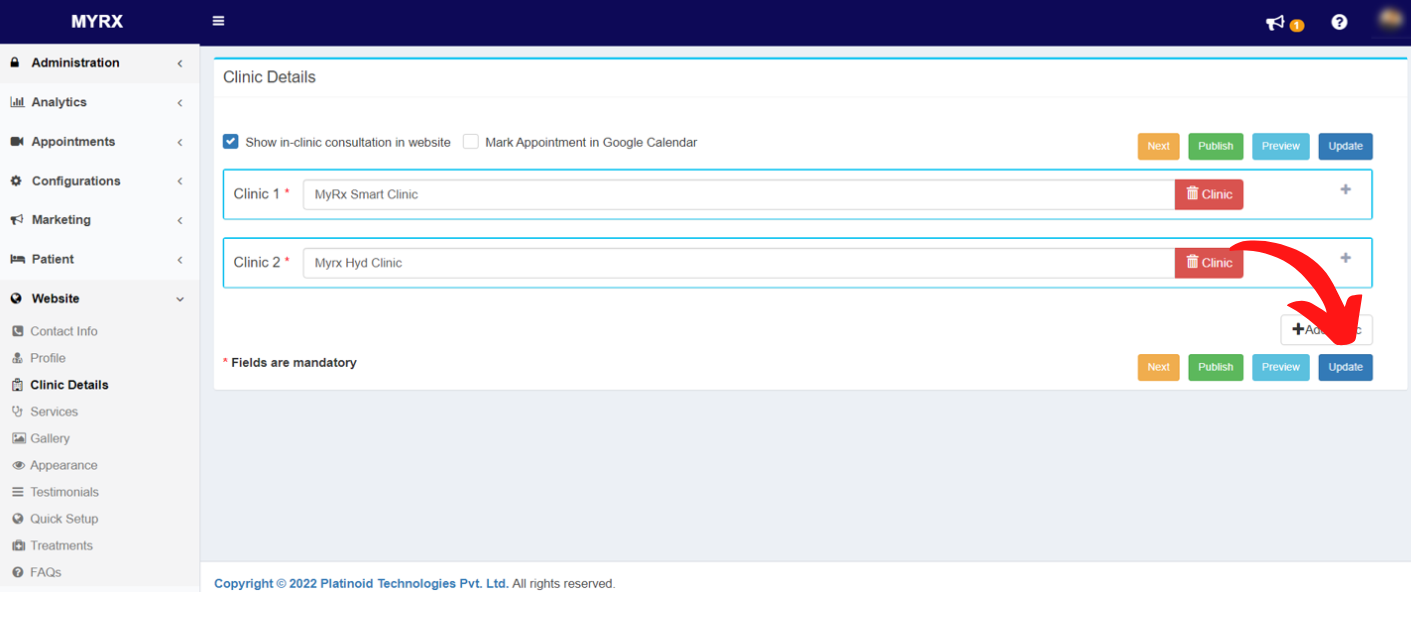
Step 3: Click on the “Add Clinic” button at the bottom of the clinic details page.
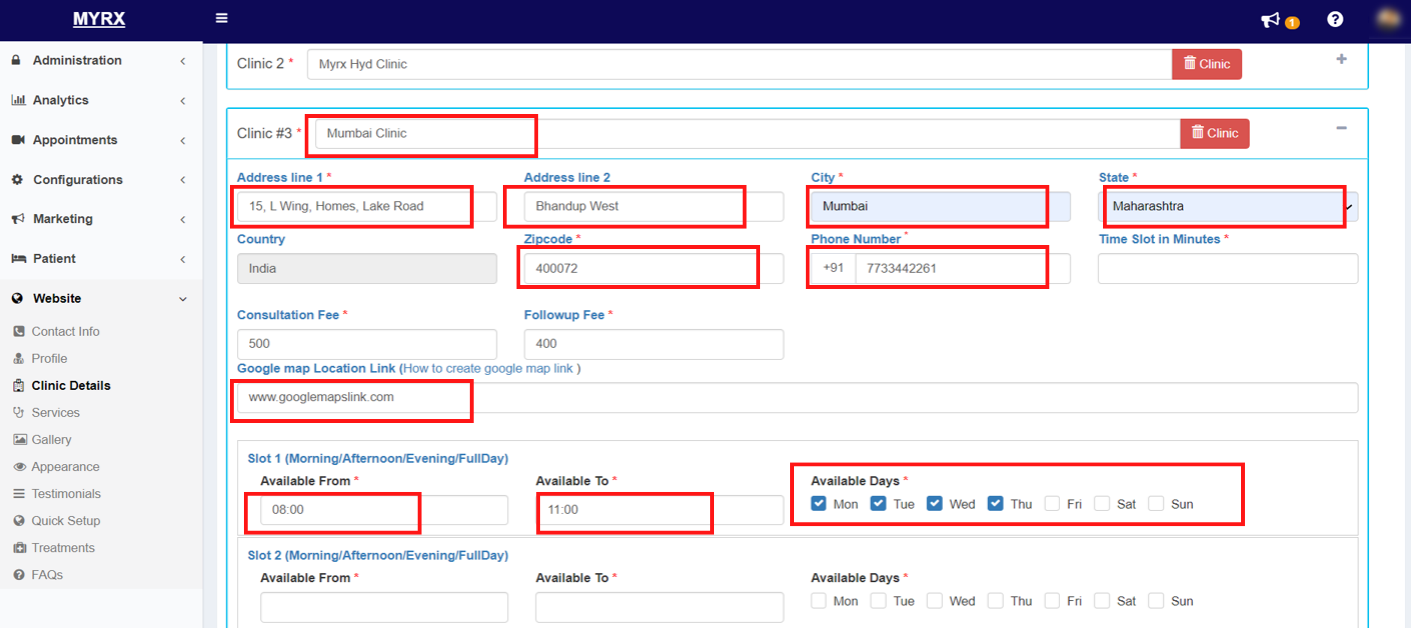
Step 4: Enter your Clinic Name in the clinic name field
Step 5: Enter your clinic Address, City, Zipcode and Phone number in the respective fields.
Step 6: Select your State from the drop down list.
Step 7: Enter your average consultation time in the “Time slot in minutes” text box.
Step 8: Paste the google map link for your clinic location in the “Google Maps location link” text box.
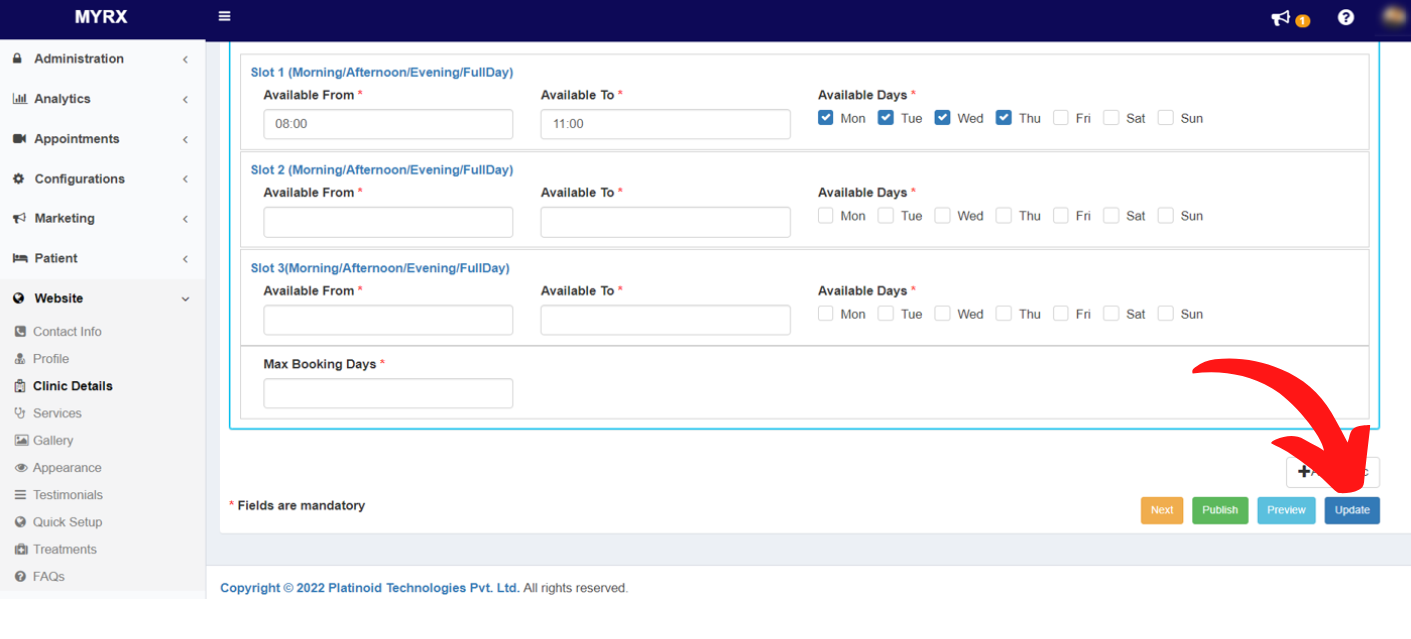
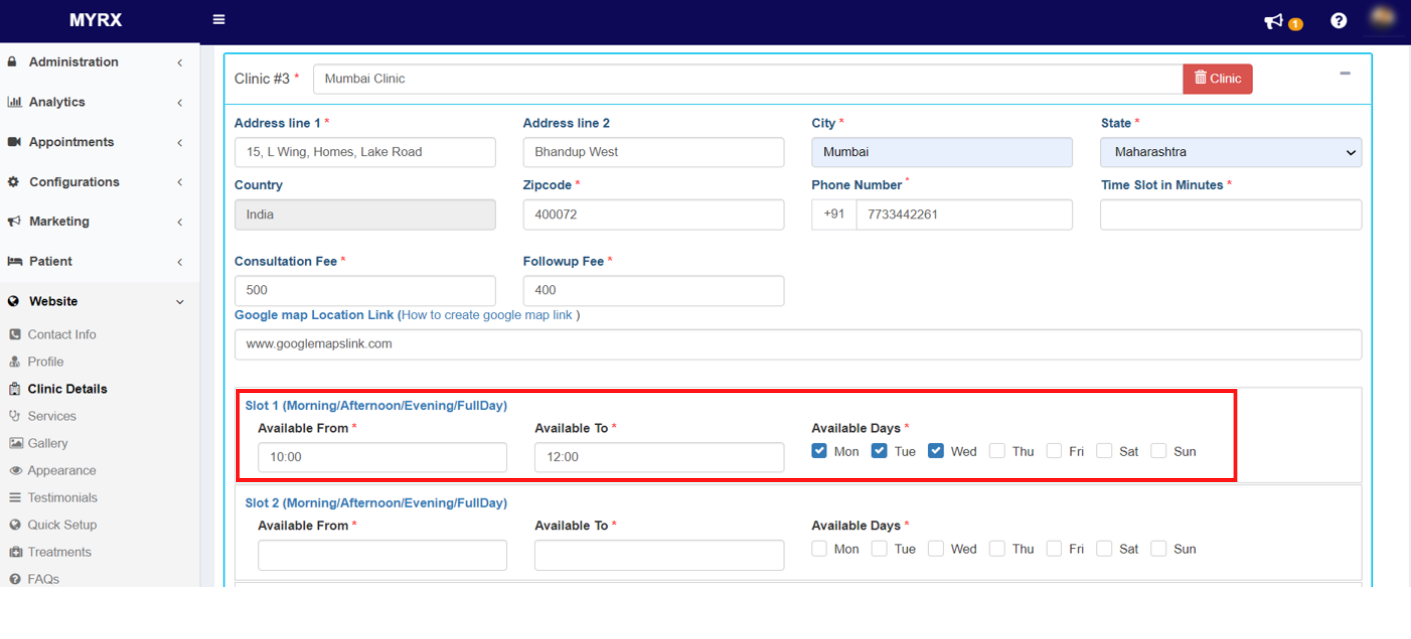
Step 9: Enter “Available from” and “Available to” times for the respective clinic.
Step 10: Select the available days for the respective time slot.

Step 11: Click on Update Button.
Step 12: Go to Website -> Clinic Details
Step 13: Click on the Publish button to update the changes on your website.
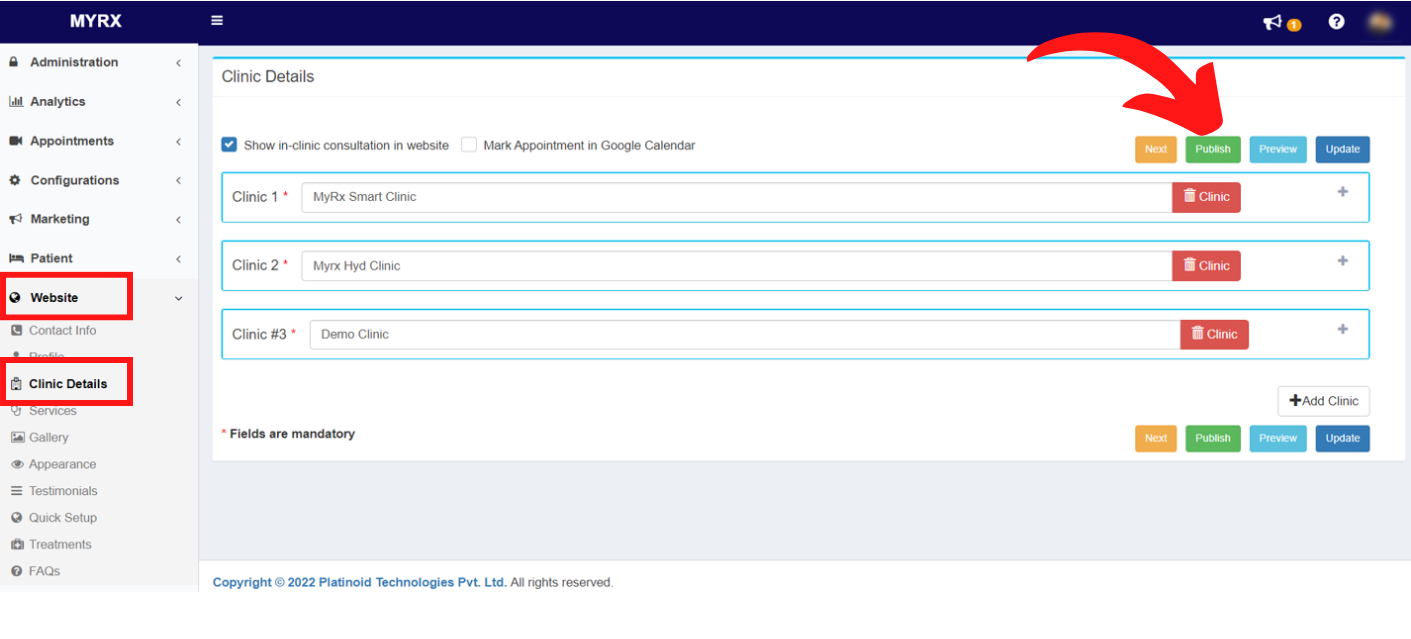
Step 14: Publish Website confirmation message will pop up. Click on Publish button
Step 15: Click on the Ok button on the publish confirmation pop up.
The clinic will be added successfully and it will be live on your website for receiving appointments.
To disable online appointment for a clinic kindly leave the time slots blank
How to delete a clinic profile from my website in MyRx?
Step 1: Go to MyRx Login Page
Step 2: Go to Website -> Clinic Details
Step 3: Find the Clinic to be deleted from the list of clinics.
Step 4: Clinic on the Delete icon against the clinic to be deleted.

Step 5: Click on Update Button.
Step 6: Go to Website -> Clinic Details
Step 7: Click on the Publish button to update the changes on your website.
Step 8: Publish Website confirmation message will pop up. Click on Publish button
Step 9: Click on the Ok button on the publish confirmation pop up.
Once published, the clinic will be deleted from your MyRx profile and website.
The action cannot be reversed.
How to update details of a clinic listed on my website in MyRx?
Step 1: Go to MyRx Login Page
Step 2: Go to Website -> Clinic Details
Step 3: Search the clinic to be updated and make only necessary changes in the next steps.
Step 4: Edit your Clinic Name in the clinic name field.
Step 5: Edit your clinic Address, City, Zipcode and Phone number in the respective fields.
Step 6: Edit your State from the drop down list.
Step 7: Edit your average consultation time in the “Time slot in minutes” text box.
Step 8: Paste the google map link for your clinic location in the “Google map location link” text box.
Step 9: Edit “Available from” and “Available to” time for the respective clinic.
Step 10: Select the available days for the respective time slot.
Step 11: Click on Update Button.
Step 12: Go to Website -> Clinic Details
Step 13: Click on the Publish button to update the changes on your website.
Step 14: Publish Website confirmation message will pop up. Click on Publish button
Step 15: Click on the Ok button on the publish confirmation pop up.
The clinic details will be updated successfully and it will be live on your website for receiving appointments.
How to modify my consultation timings for a clinic in MyRx?
Step 1: Go to MyRx Login Page
Step 2: Go to Website -> Clinic Details
Step 3: Search the clinic to be updated and make only necessary changes in the next steps.
Step 4: Edit “Available from” and “Available to” time for the respective clinic.
Step 5: Select the available days for the respective time slot.
Step 6: Click on Update Button.
Step 7: Go to Website -> Clinic Details
Step 8: Click on the Publish button to update the changes on your website.
Step 9: Publish Website confirmation message will pop up. Click on Publish button
Step 10: Click on the Ok button on the publish confirmation pop up.
Consultation timings for the clinic will be updated successfully. To disable online appointment for a clinic kindly leave the time slots blank.
How to embed a map link to navigate my clinic address from my website in MyRx?
Step 1: Go to MyRx Login Page
Step 2: Go to Website -> Clinic Details
Step 3: Open any Clinic and go to “Google Map Location Link” option.
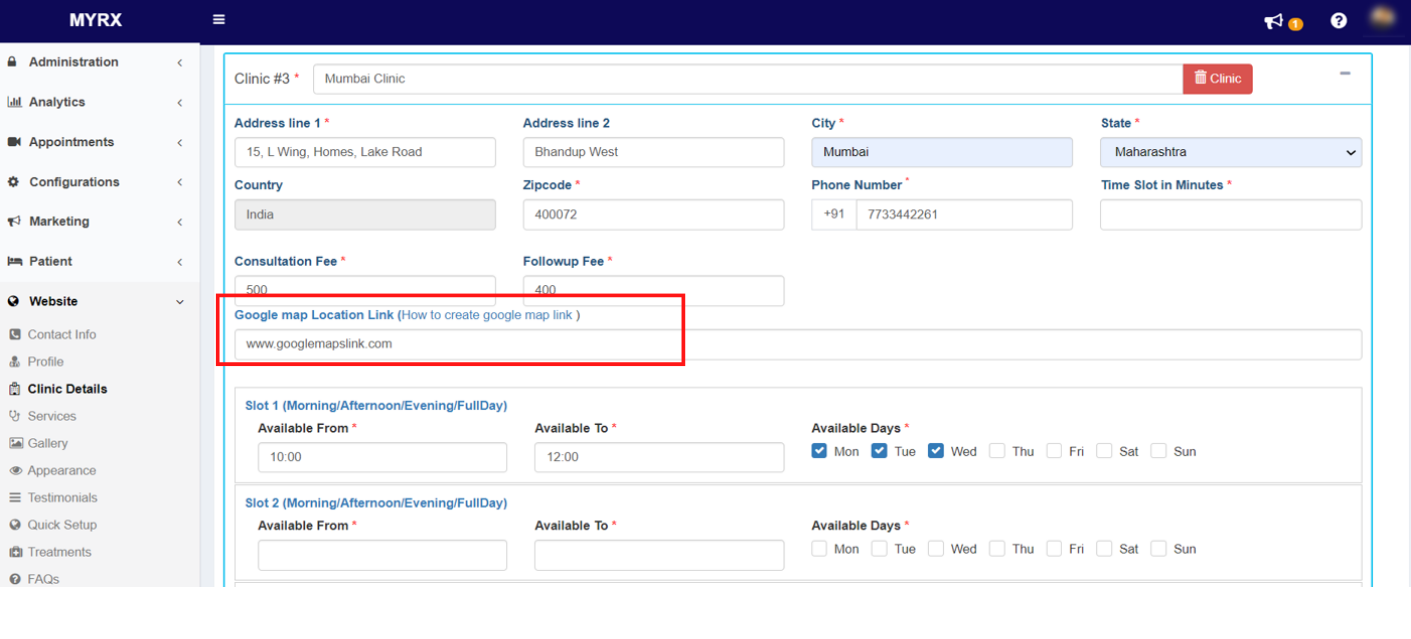
Step 4: Click on the “How to create google map link” link.
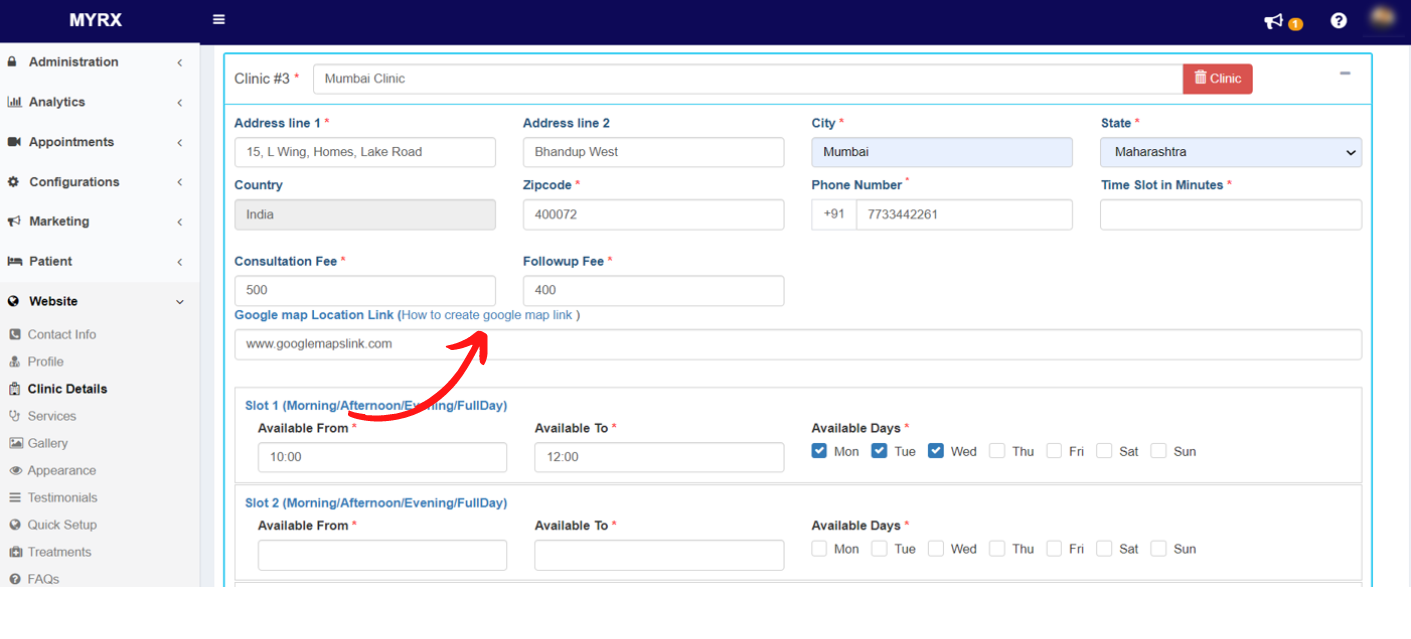
You will be redirected to “Google Maps Help” page, go through the document to embed a map link.
16. Analytics
How to generate monthly reports in MyRx?
Step 1: Go to MyRx Login Page
Step 2: Go to Analytics -> Reports & Analytics
Step 3: Go to Monthy Reports section.
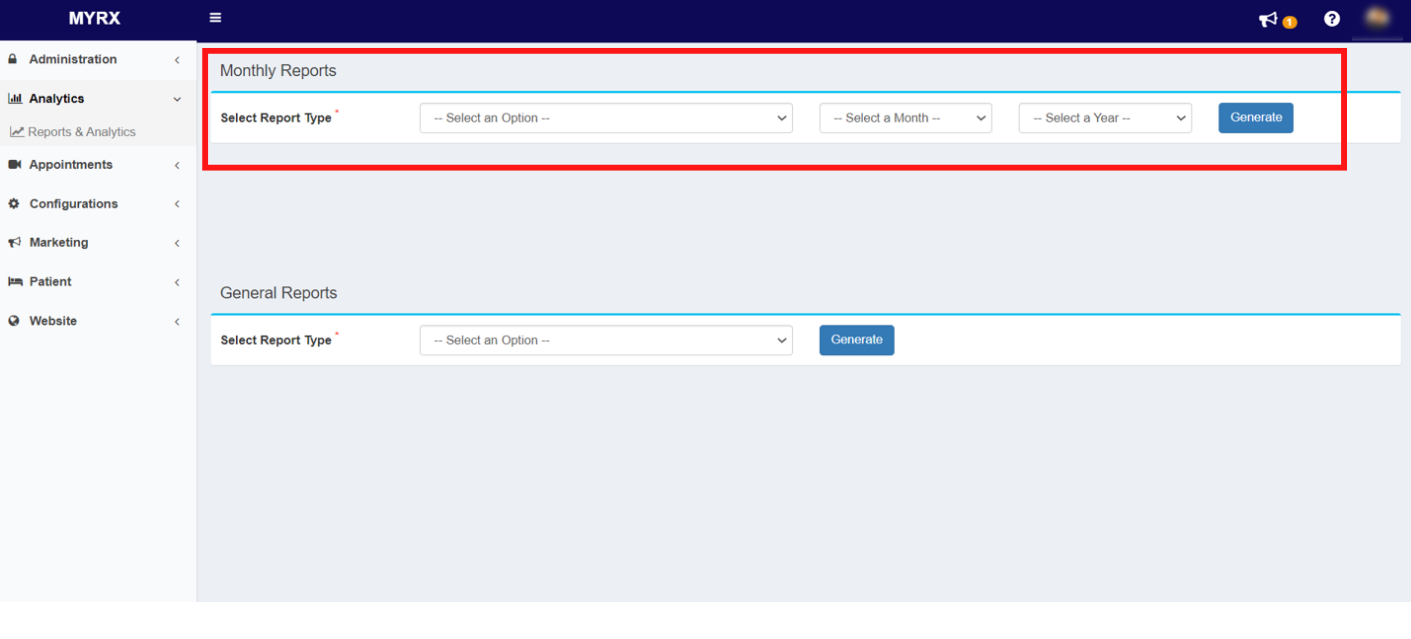
Step 4: Select any “Report Type” from the dropdown given.
Step 5: Select any Month from the dropdown given.
Step 6: Select any Year from the dropdown.
Step 7: Click on “Generate” button.
Monthly report file will be downloaded to your system.
How to generate all patients reports in MyRx?
Step 1: Go to MyRx Login Page
Step 2: Go to Analytics -> Reports & Analytics
Step 3: Go to General Reports section.
Step 4: Select “Search Patient Report” option from the dropdown given.
Step 5: Click on “Generate” button.
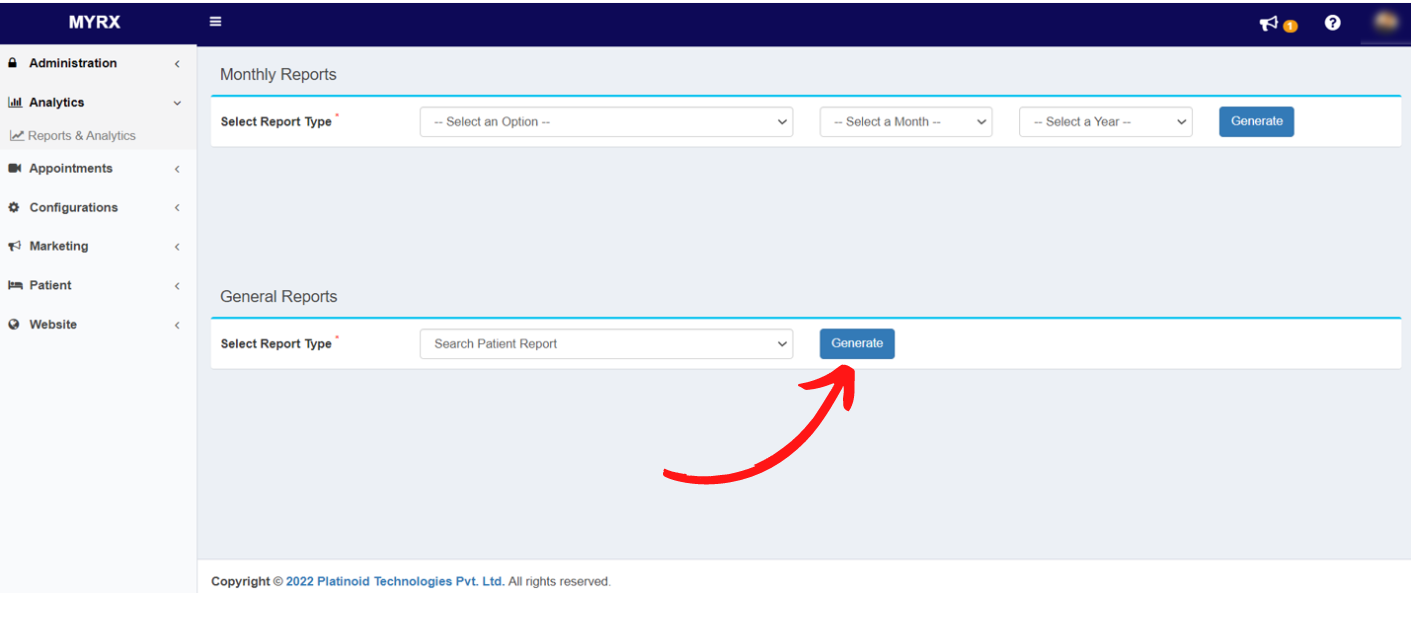
All patient report file will be downloaded to your system.
17. Treatments
How to add a new treatment in MyRx?
Step 1: Go to MyRx Login Page
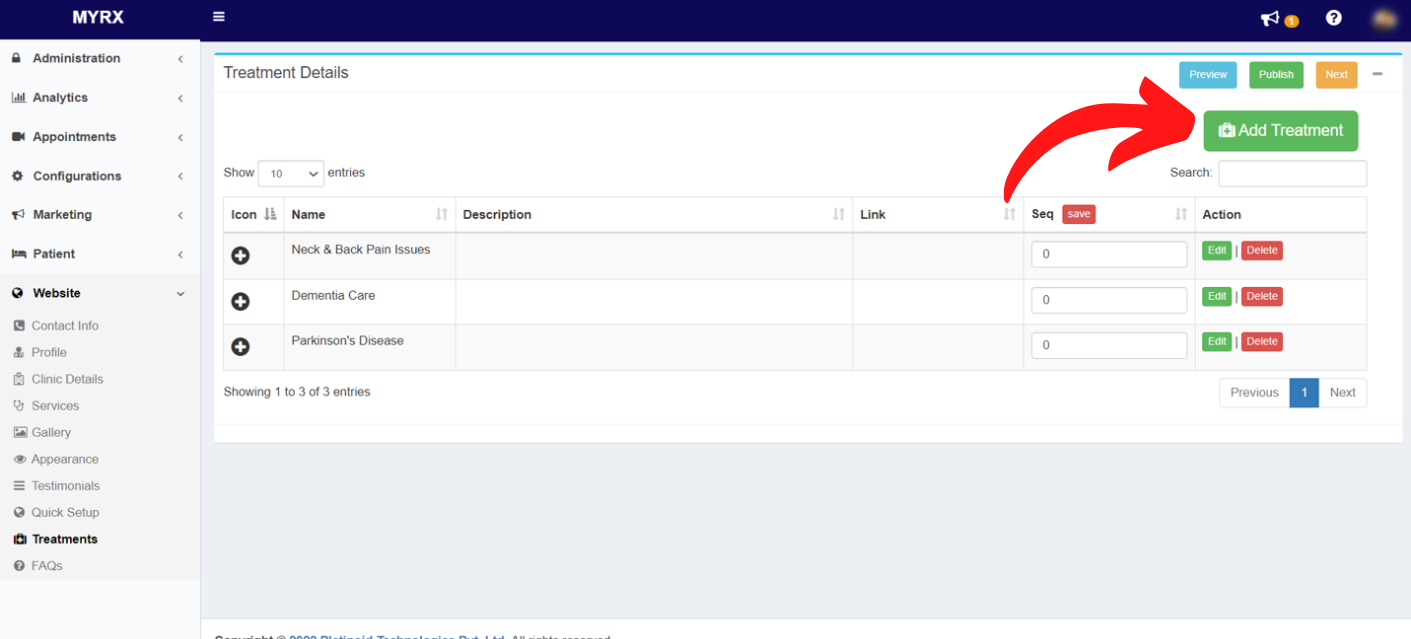
Step 2: Go to Website -> Treatments
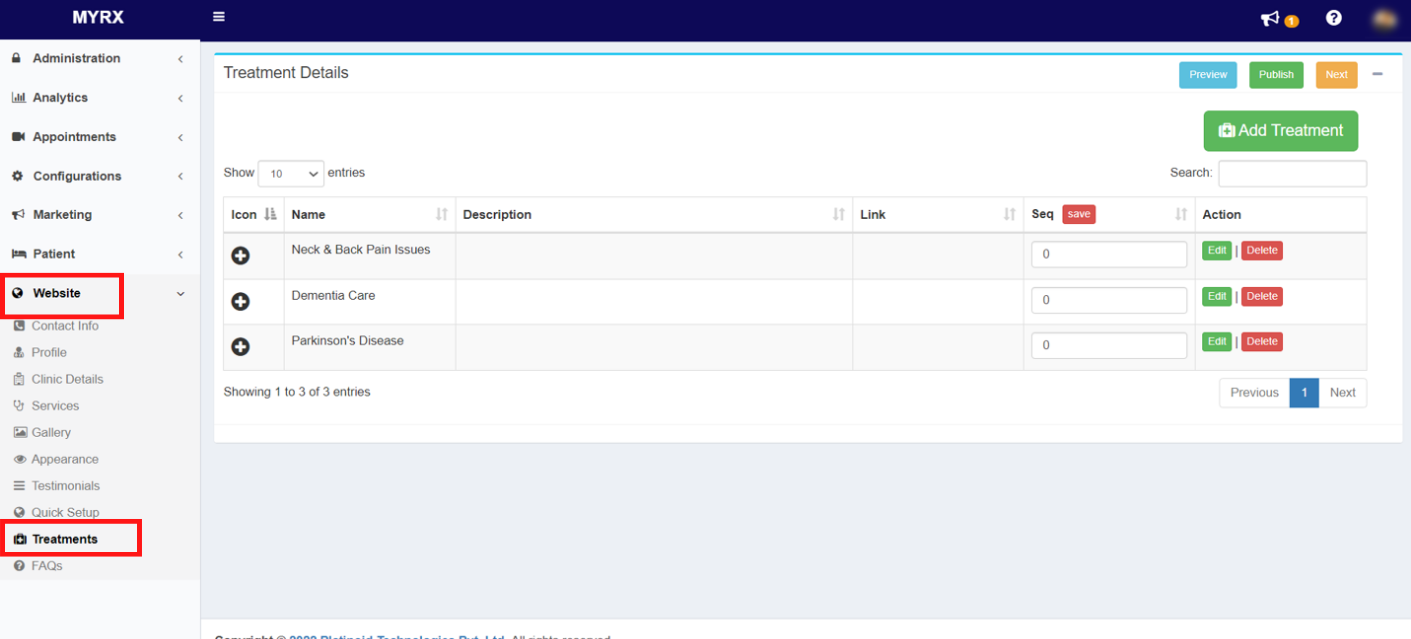
Step 3: Click on the “Add Testimonials” button.
Step 4: Enter the Treatment Name, Description(if needed), Link(if needed), and Icon(if required).
Step 5: Click on the Save button
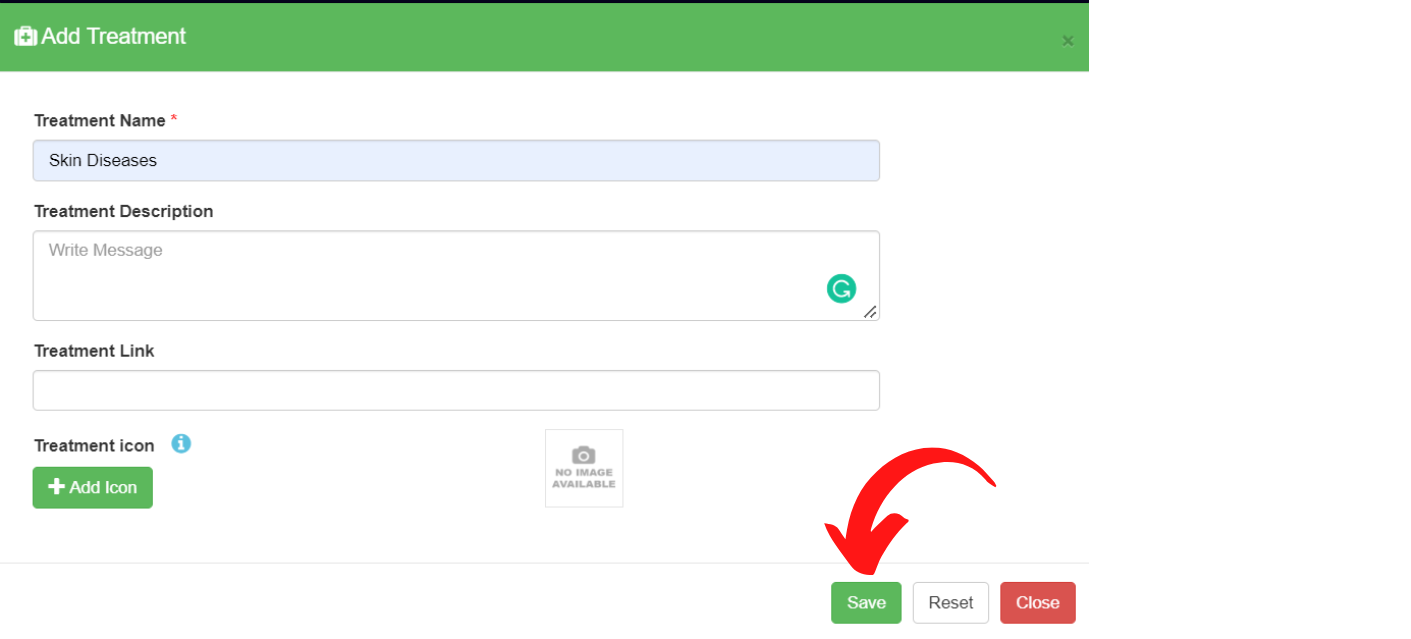
Treatment saved successfully message will popup click on Ok. 
How to edit a treatment in MyRx?
Step 1: Go to MyRx Login Page
Step 2: Go to Website -> Treatments
Step 3: Search for the treatment you want to edit in the Search box.
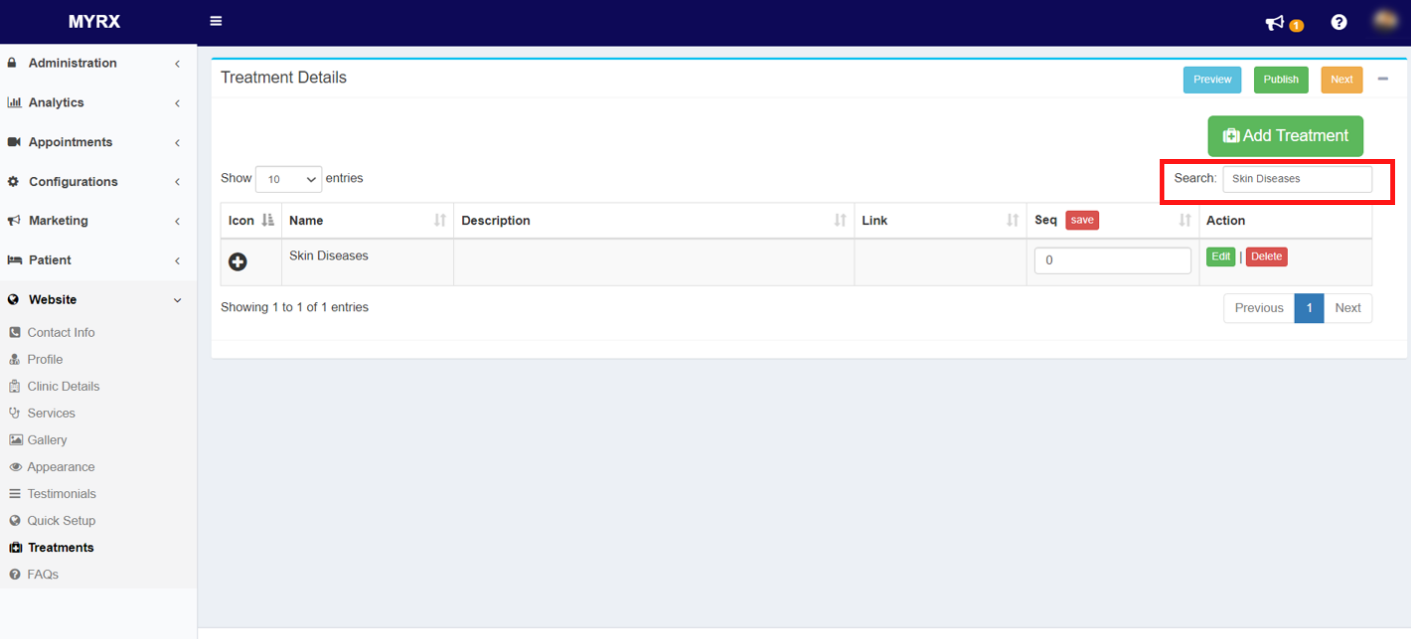
Step 4: Click on the Edit button on the right side of the treatment.
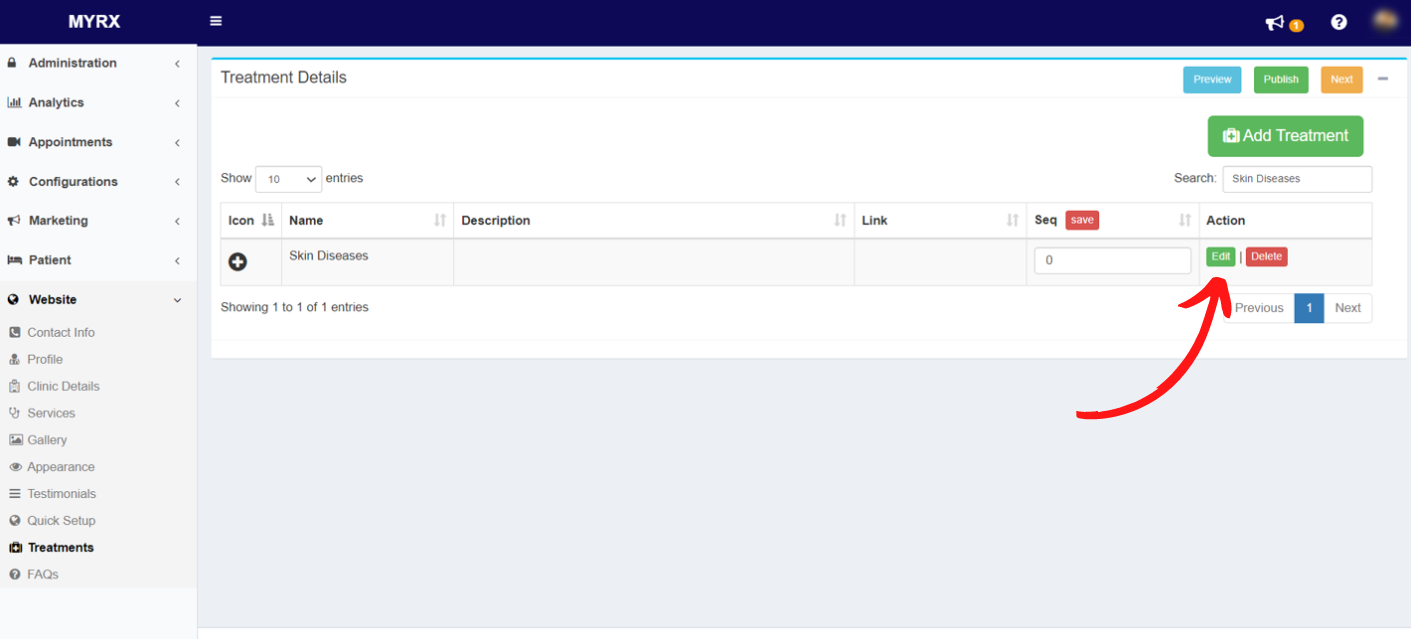
Step 5: Make the changes as per the requirement, Click on Update.
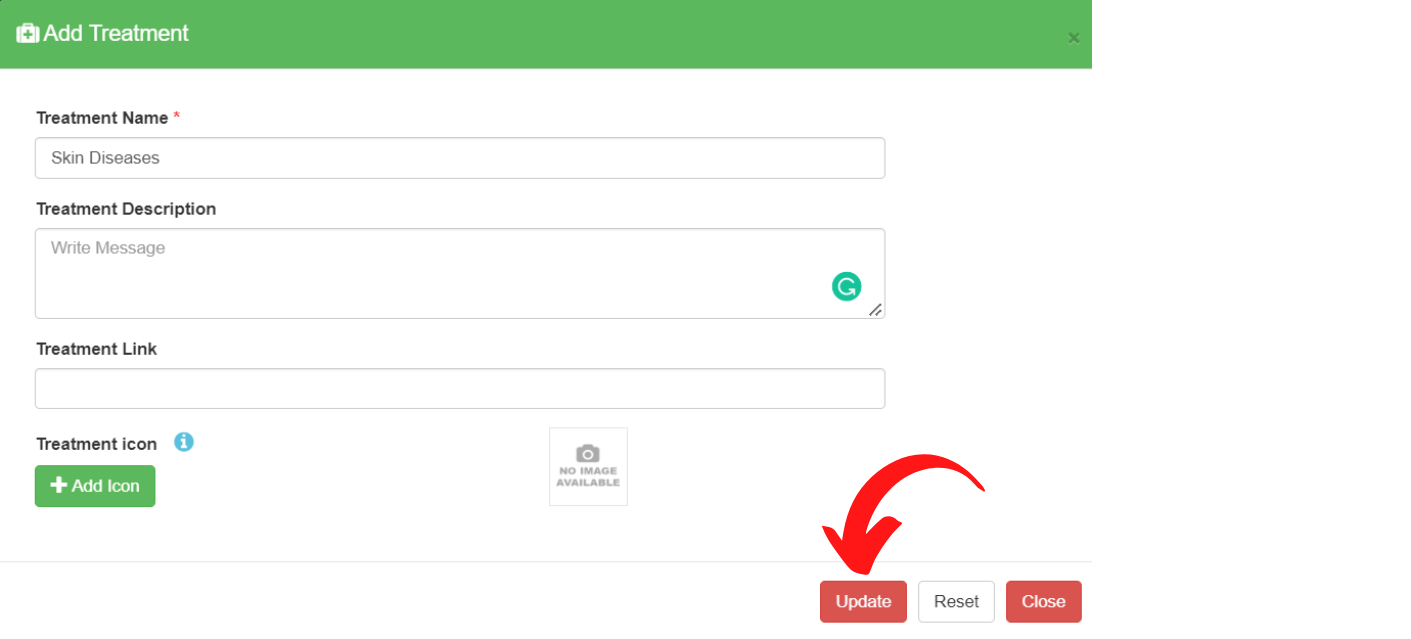
Treatment saved successfully message will popup click on Ok.
How to publish treatments on your MyRx website?
Step 1: Go to MyRx Login Page
Step 2: Go to Website -> Treatments
Step 3: Make sure all the treatments are updated and ready to be published. Click on the Publish button on the right.
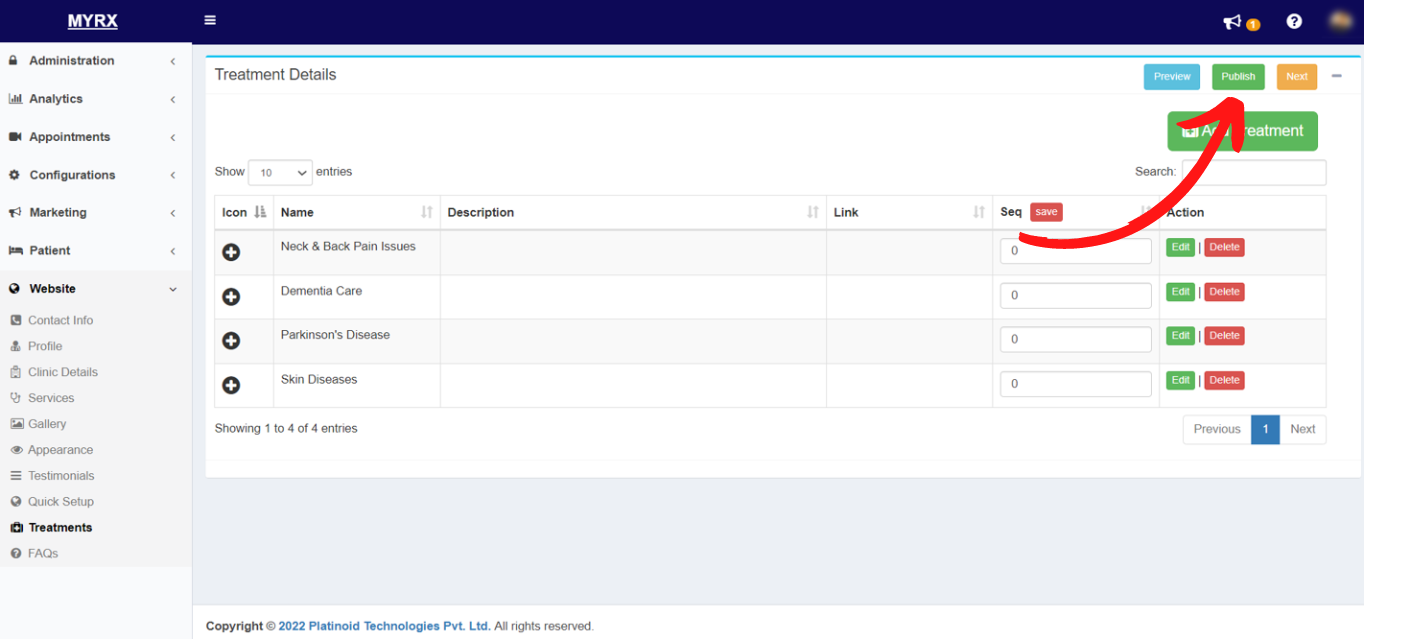
Step 4: Publish confirmation message will pop up. Click on Publish.
The treatments will be published on your website successfully. Click Ok. 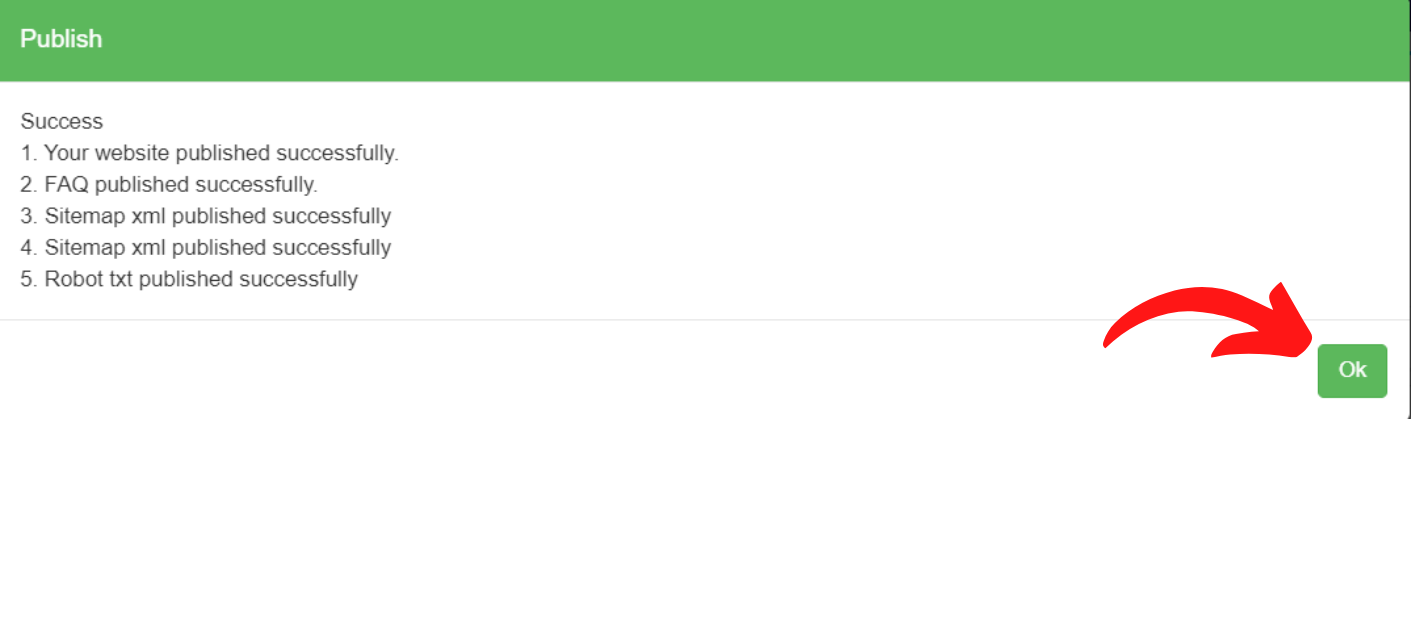
How to delete a treatment in MyRx?
Step 1: Go to MyRx Login Page
Step 2: Go to Website -> Treatments
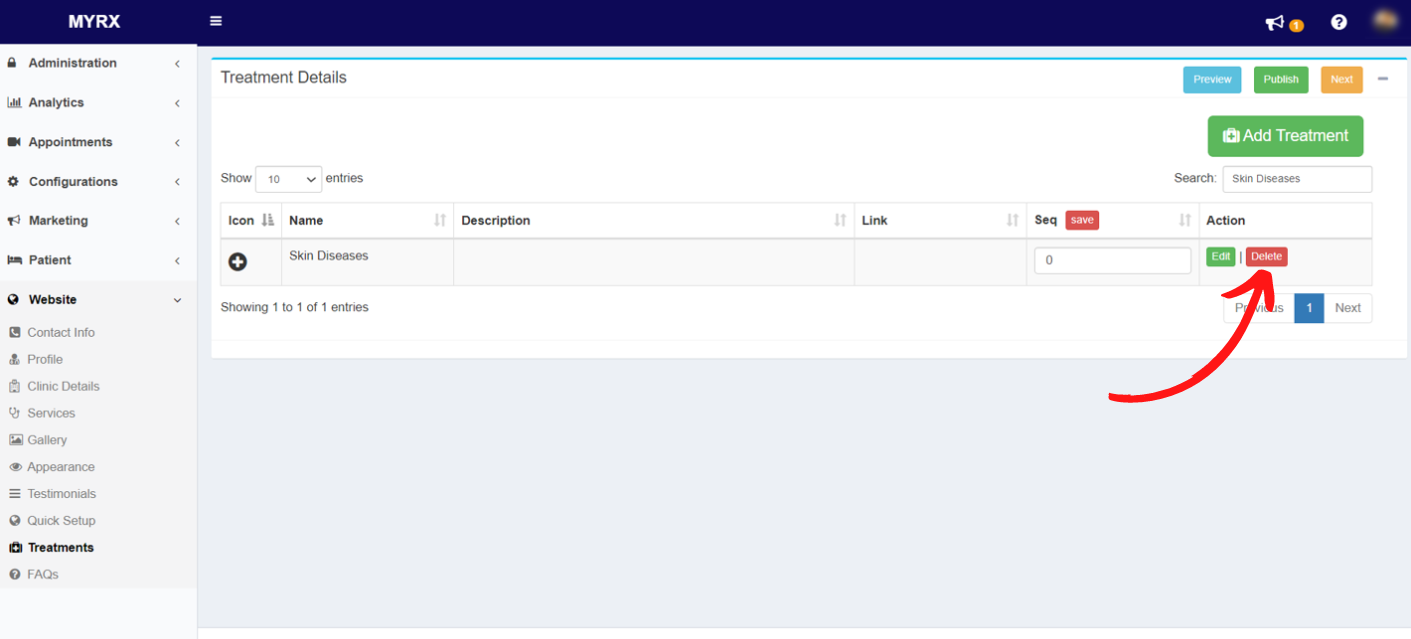
Step 3: Search for the treatment you want to delete in the Search box.
Step 4: Click on the Delete icon on the right.
Step 5: A delete confirmation message will pop up, Click on Delete. 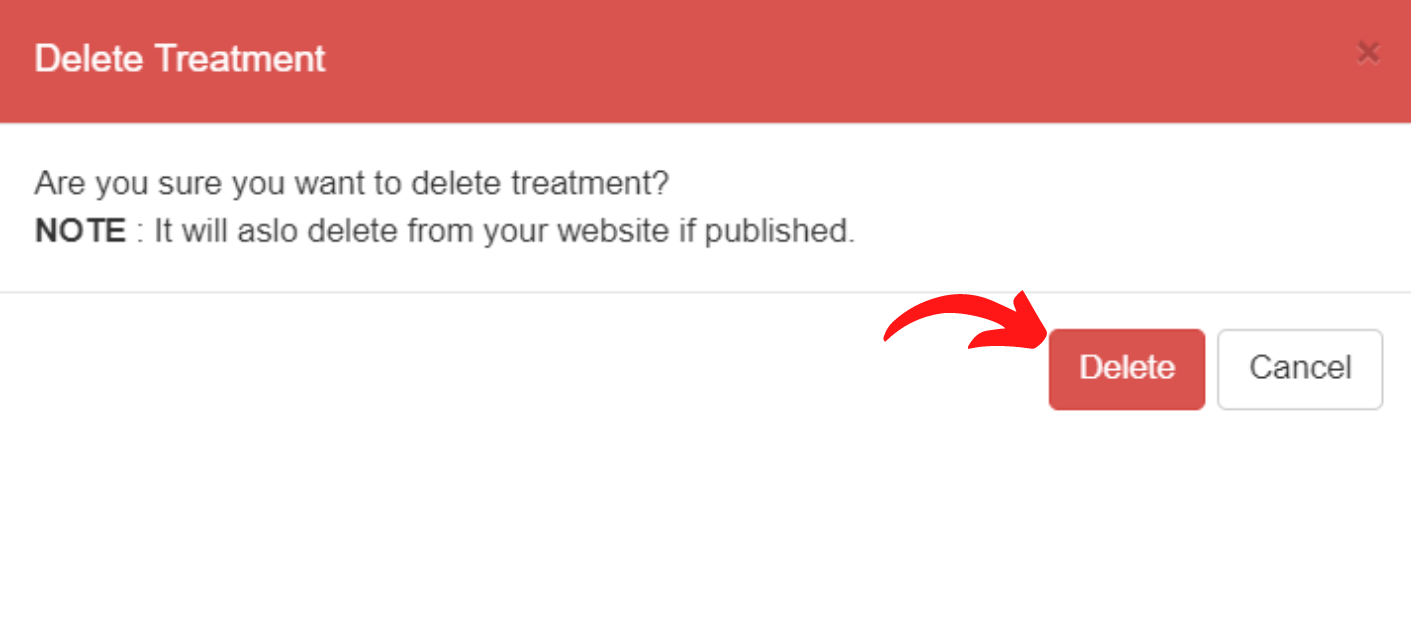
The selected treatment will be successfully deleted, click on Ok. 
18. FAQ's
How to add a FAQ in MyRx?
Step 1: Go to MyRx Login Page
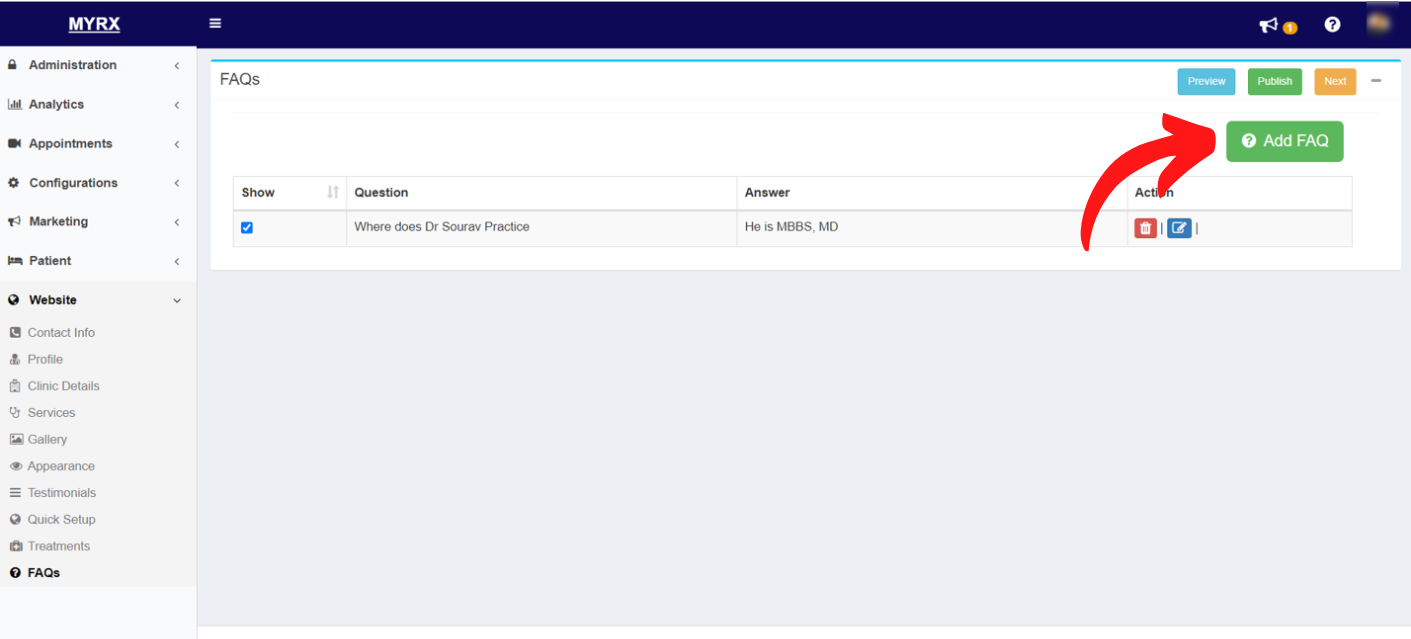
Step 2: Go to Website -> FAQs
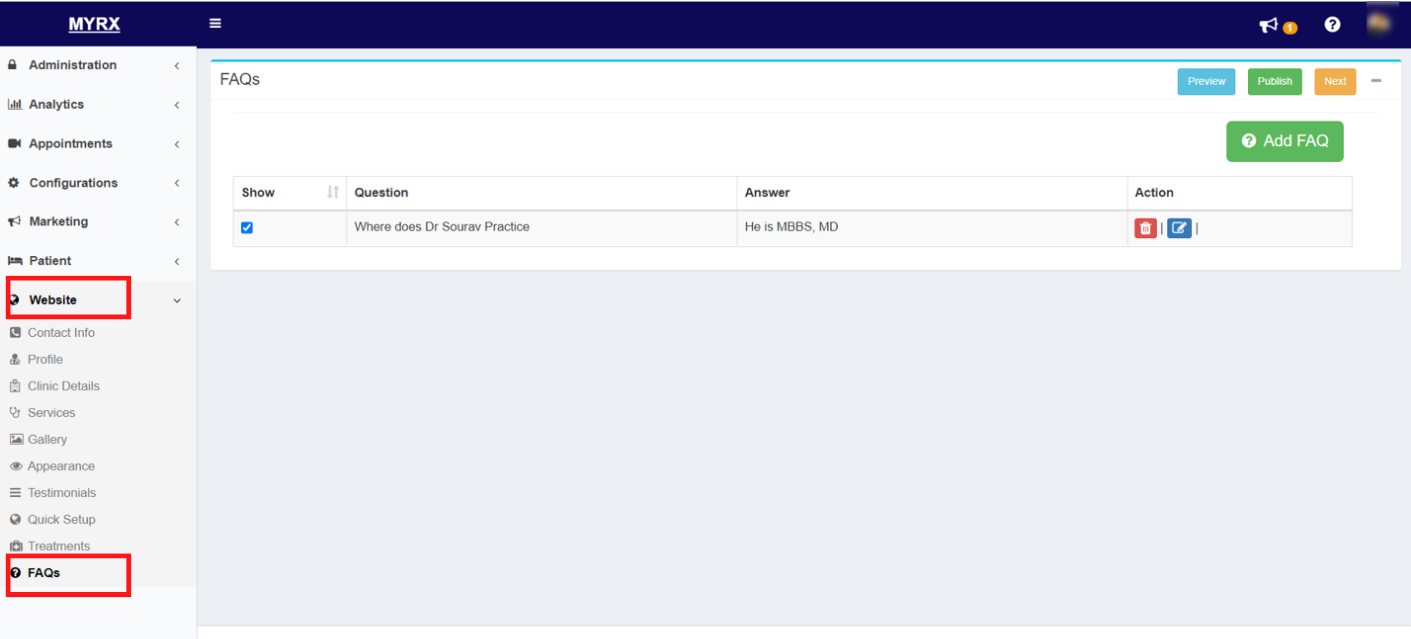
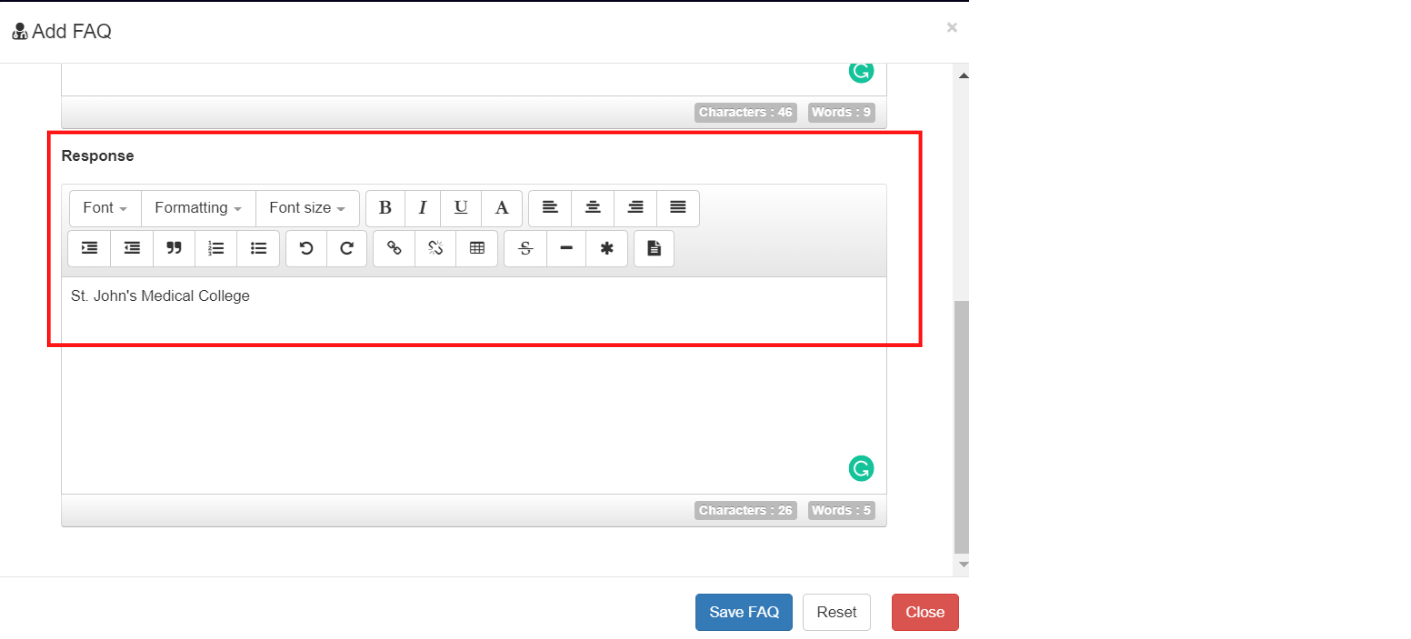
Step 3: Click on the “Add FAQ” button.
Step 4: Enter the Question & Response as per required. You can also edit the Font, Format, Font size, etc for the text.
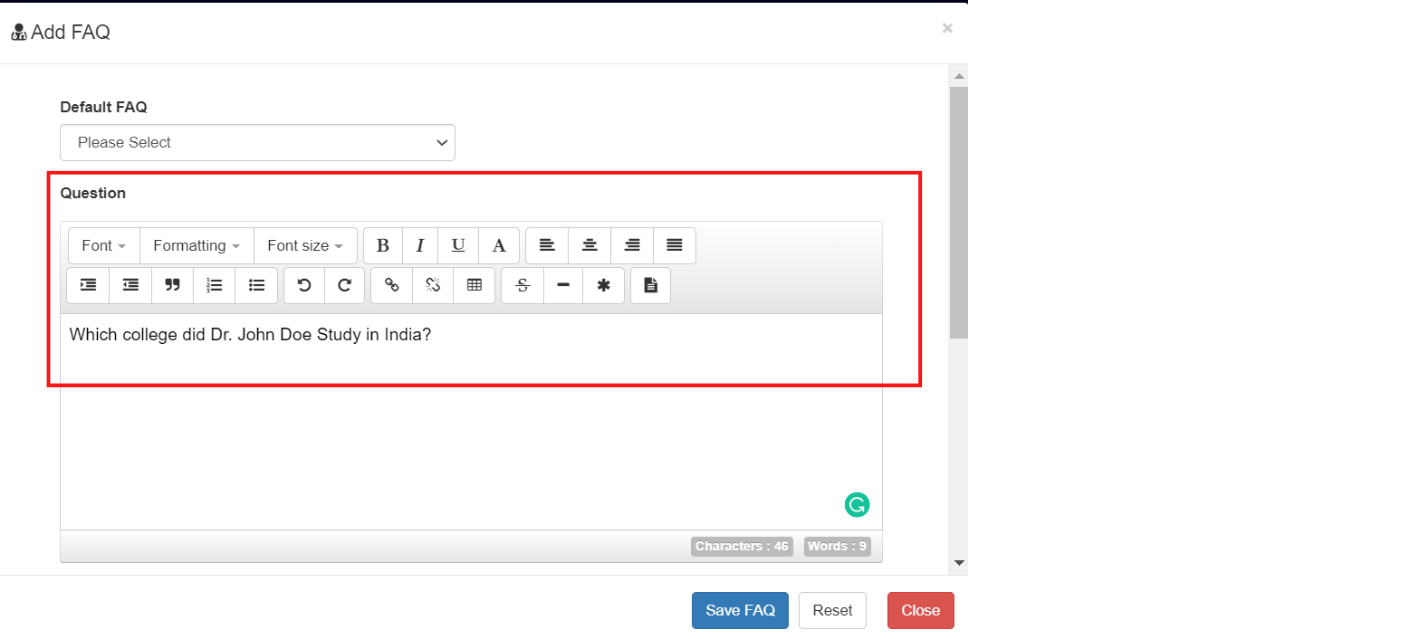
Step 5: Click on the Save FAQ button.
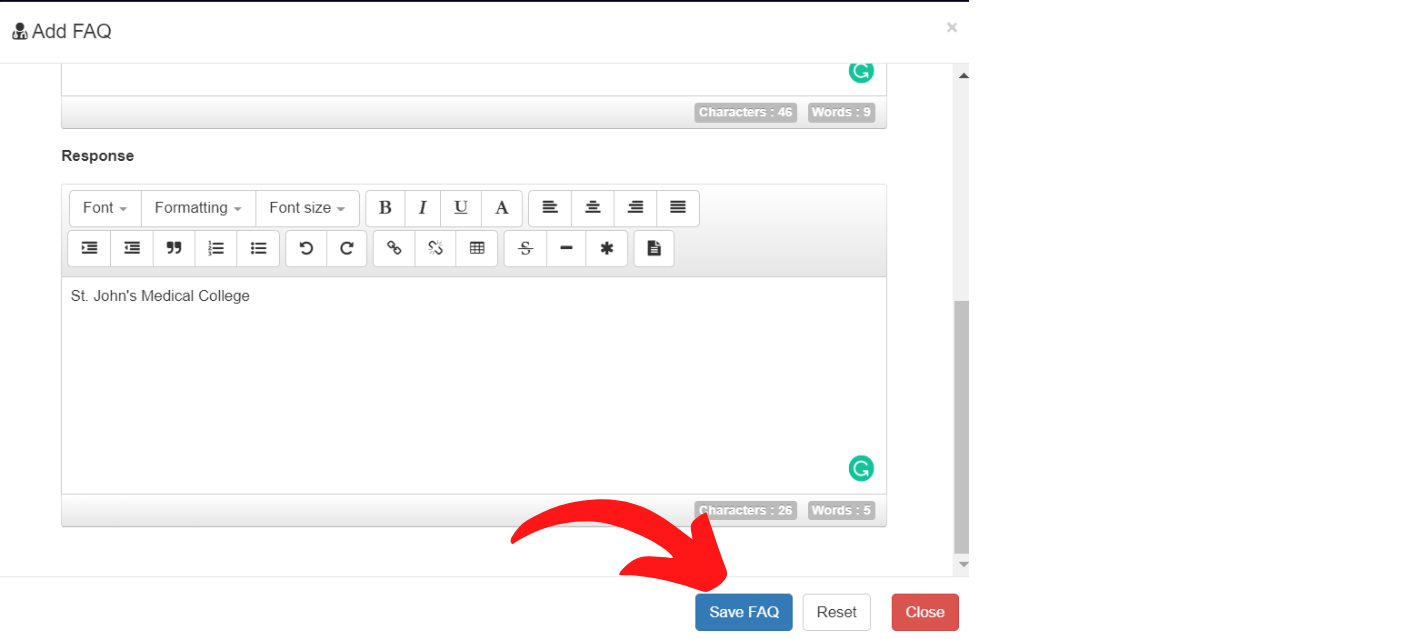
A new FAQ will be successfully added. 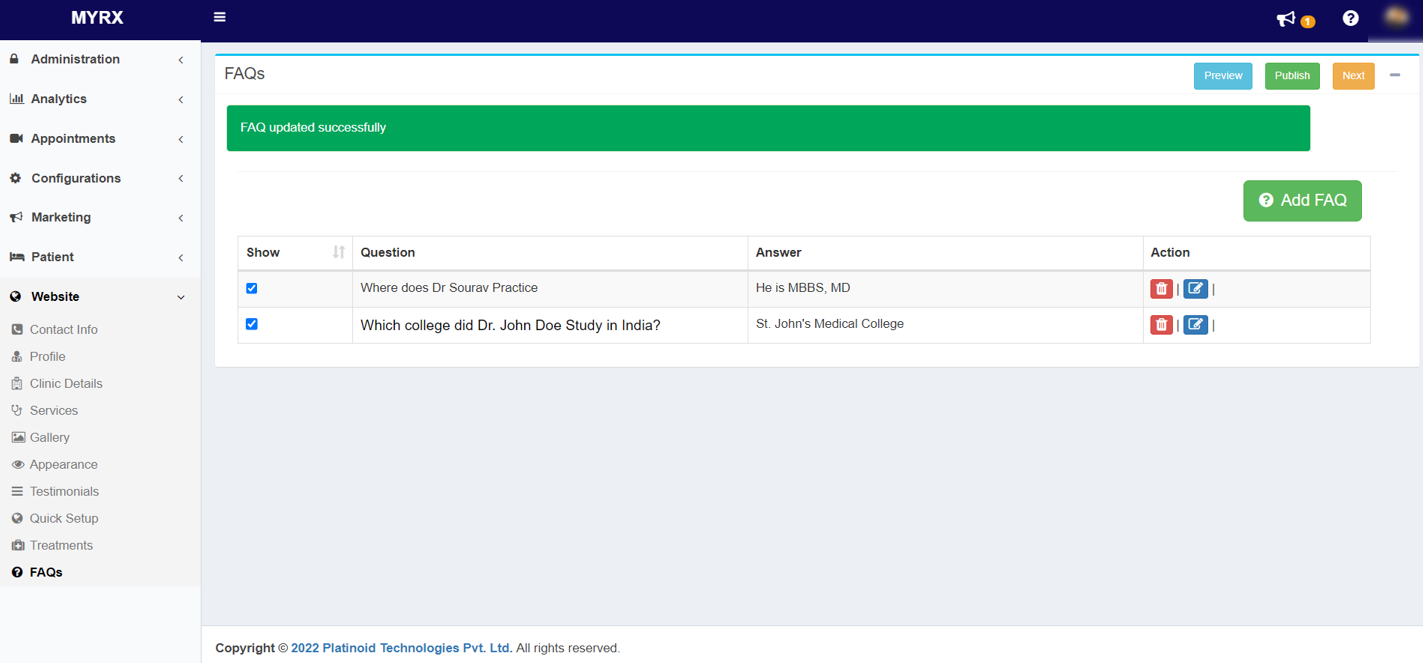
How to edit a FAQ in MyRx?
Step 1: Go to MyRx Login Page
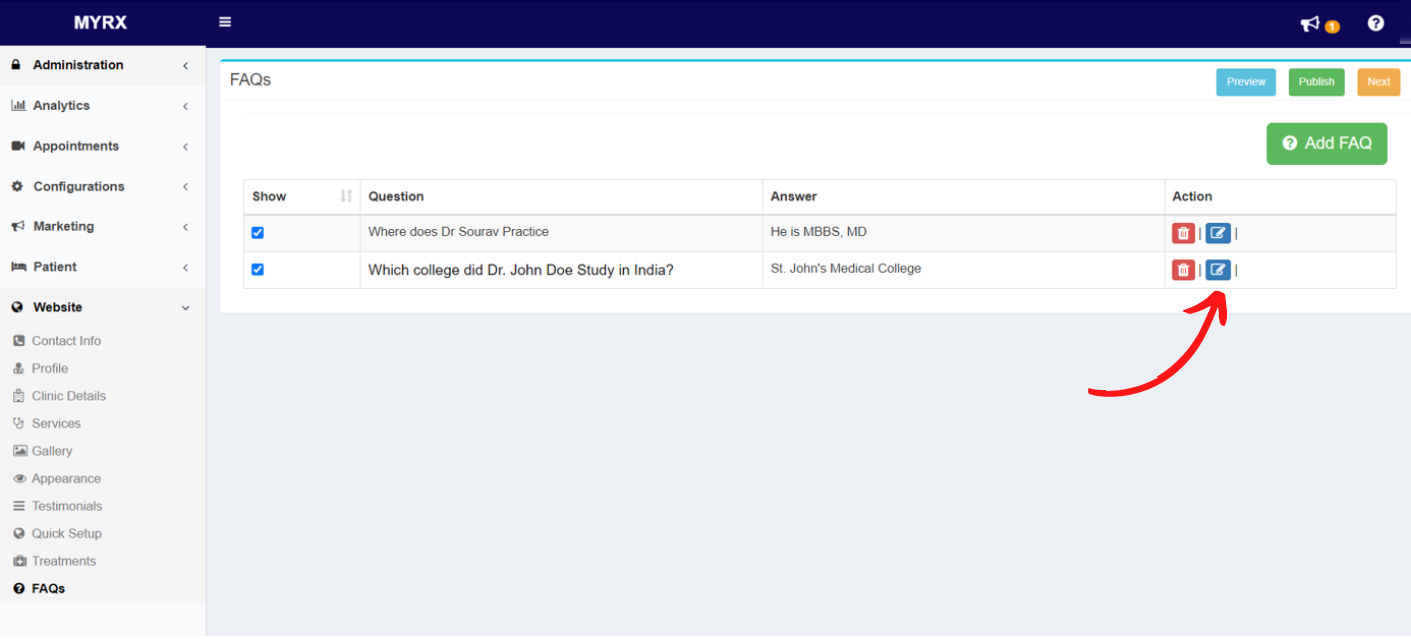
Step 2: Go to Website -> FAQs
Step 3: Click on the Edit button on the right side of the FAQ you wish to edit.
Step 4: Make the changes as per the requirement, Click on Update FAQ.
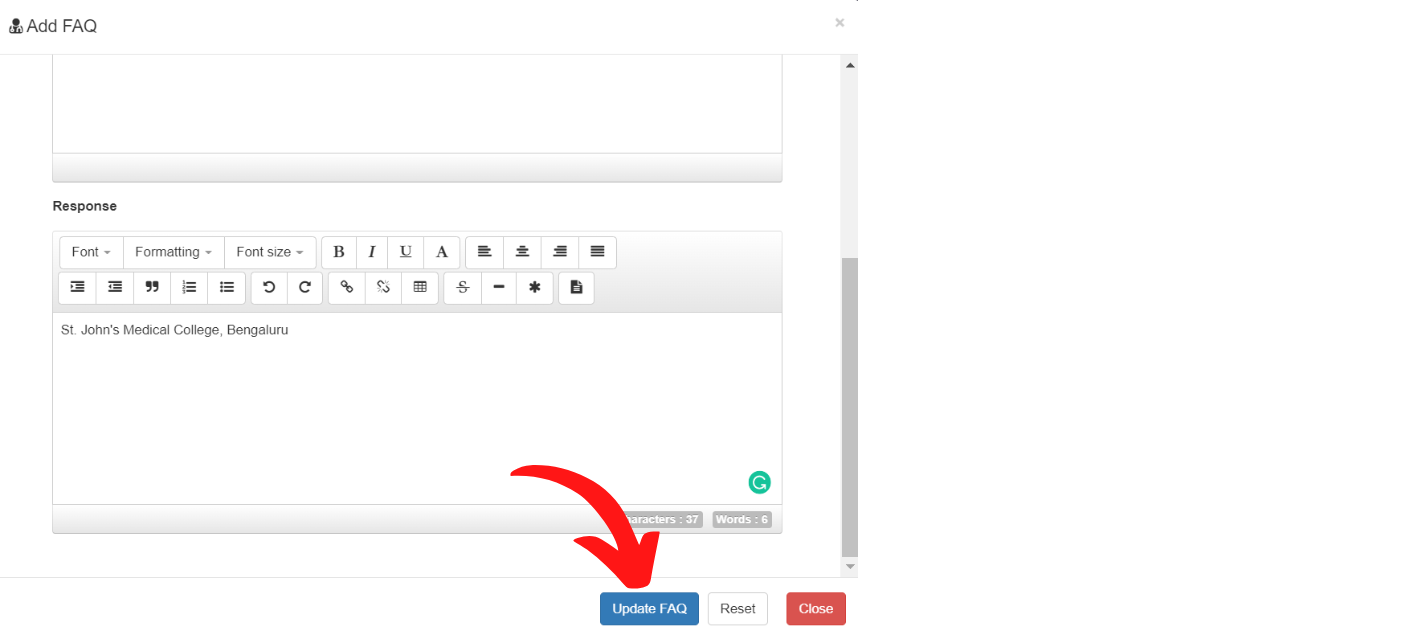
The FAQ will be successfully updated.
How to delete a FAQ in MyRx?
Step 1: Go to MyRx Login Page
Step 2: Go to Website -> FAQs
Step 3: Click on the Delete icon on the right of the FAQ you wish to delete.
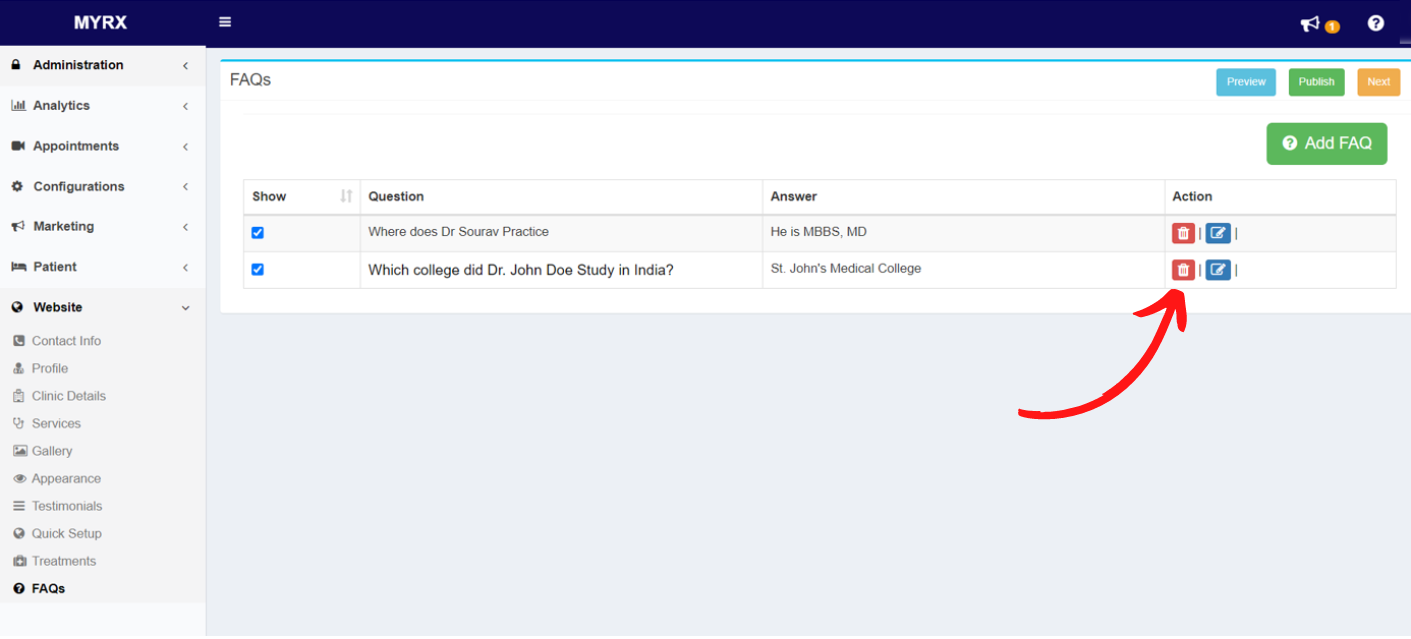
Step 4: A delete confirmation message will pop up, Click on Delete.
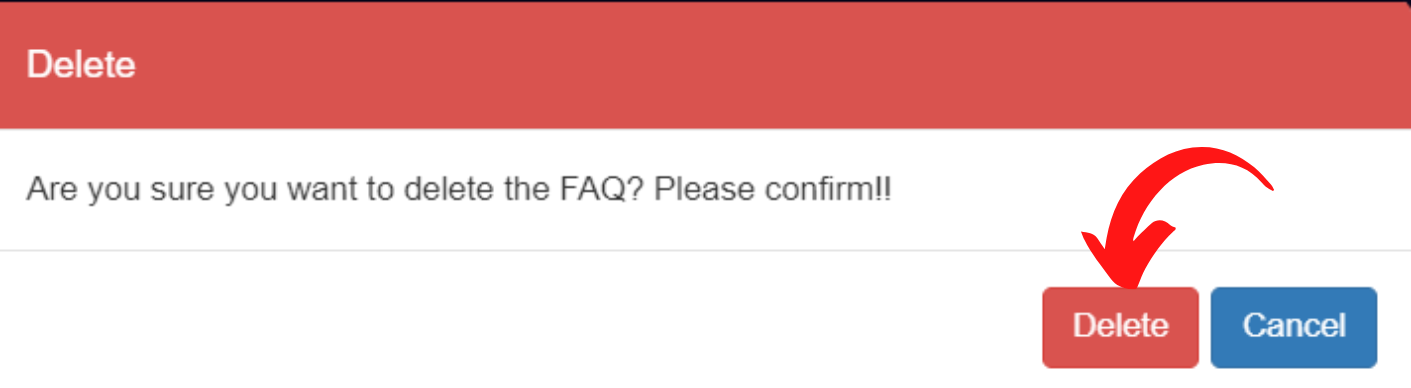
The selected FAQ will be successfully deleted.
Last update on 08 June 2022